Topplista
10 poäng
- Tigris & Euphrates
- The Great Zimbabwe
- Reef Encounter
- Automobile
- Dominant Species
- Civilization
- Imperial
- Keyflower
- Hansa Teutonica
- Arkwright
- Brass: Lancashire
- Brass: Birmingham
- Schack
- Backgammon
9 poäng
- Go
- Kanban EV
- Wildcatters
- Container
- Indonesia
- Food Chain Magnate
- Power Grid
- Samurai
- Taj Mahal
- The Palaces of Carrara
- Tikal
- China
- Ra
- Through the Desert
- Carolus Magnus
- The King is Dead
- Taluva
- Clans
- Alchemist
- Inca Empire
- Age of Steam
- Stephenson's Rocket
- Lisboa
- On Mars
- Alchemists: The King's Golem
- Diplomacy
- El Grande
- Bug
- Dominant Species: Marine
- Pax Pamir 2nd ed
- John Company 2nd ed
- Horseless Carriage
- Concordia
8 poäng
- Bus
- The Estates
- Yellow & Yangtze
- Amun-Re
- 1830: Railways & Robber Barons
- Acquire
- Babylonia
- Cavum
- Endeavor
- Lancaster
- Tinners' Trail
- Key Market
- Sol: Last Days of a Star
- Smartphone Inc.
- Barrage
- Modern Art
- UR
- Gheos
- Torres
- Alexandros
- Louis XIV
- The Bridges of Shangri-La
- Alchemists
- Keyper
- Myrmes
- Expedition: Northwest Passage
- Confucius
- Battle Line/Schotten Totten
- Mini Rails
- Chicago Express
- Power Struggle
- Masters of Venice
- Shogun
- Tao Long
- Ponte del Diavolo
- Neuland
- Railways of the World
- Trickerion
- Sherlock Holmes Consulting Detective
- Ships
- Tempus
- Goa
- Stockpile
- Ponzi Scheme
- Gentes
- Pipeline
- Innovation
- Nova Luna
- Hegemony: Lead your Class to Victory
- Amyitis
- Maharaja
- Sheepland
- Renature
- Namibia
- The Cost
- Crescent Moon
- Rallyman: GT
- Age of Industry
- Pueblo
- YINSH
7 poäng
- Imperial Steam
- The Resistance: Avalon
- Mykerinos
- Santiago
- Hansa
- Paris Connection
- Vanuatu
- Patrician
- Tsuro of the Seas
- Blokus
- Britannia
- Aztlán
- Bombay
- In the Year of the Dragon
- Deus
- Spyrium
- Kraftwagen
- Istanbul
- Puerto Rico
- Pergamon
- Calimala
- Rialto
- Yspahan
- Shakespeare
- Attika
- Rheinländer
- The Gallerist
- Akrotiri
- Genoa
- Mare Nostrum: Empires
- 7 Ages
- Olympos
- Bonfire
- CO2
- Key Harvest
- Agra
- Antike
- Settlers
- Manhattan
- Pandemic
- Darwin's Journey
- Irish Gauge
- Cottage Garden
- Blue Lagoon
- Five Tribes
- Lord of the Rings
- Africana
- Five Points: Gangs of New York
- Peloponnes
- Napoleon at Leipzig
- Wallenstein
- Macao
- Vasco da Gama
- Hacienda
- Ingenious
- Azul
- Antiquity
- Franchise
- 20th Century
- Cartagena
- High Society
- Condottiere
- Hanabi
- Hibernia
- 18Scan
- Keltis
- Lost Cities
- Ivanhoe
- Medina
- The Red Cathedral
- Realm of Sand
- Ys
- Ricochet Robots
- Copycat
- Firenze
- Fire in the Lake
- Hellas
- Yokohama
- Carnegie
- Viscounts of the West Kingdom
- Fjords
- Photosynthesis
- Struggle of Empires
- Union Stockyards
- Kutná Hora
- The Wolves
- Mini Express
- The Rich and the Good
- Das Letzte Paradies
- Pax Renaissance
- Colonialism
- SETI: Search for Extraterrestrial Intelligence
- Tower Up
- Aelderman
- DVONN
- Kaivai
6 poäng
- City of the Big Shoulders
- Anachrony
- Minos: Dawn of the Bronze Age
- Oltre Mare
- Kairo
- Tobago
- Cuba
- Coal Baron
- Murano
- Ginkgopolis
- Java
- Poseidon
- Elysium
- Glory to Rome
- Chinatown
- Historia
- Nippon
- Troyes
- Amerigo
- The Oracle of Delphi
- Steam Works
- Gaia Project
- Terra Mystica
- Terra Mystica: Age of Innovation
- Great Western Trail
- Great Western Trail: Argentina
- Lewis & Clark
- Lords of Waterdeep
- Bruges
- Assyria
- Agricola
- Euphoria
- Tower of Babel
- Merchants of Amsterdam
- La Città
- The King's Will
- Haspelknecht
- Ticket to Ride: Europe
- Glass Road
- One Night Ultimate Werewolf
- Tiananmen
- Kanagawa
- Can't stop
- Kahuna
- VivaJava
- Samara
- Industry
- John Company
- Tammany Hall
- Carpe Diem
- Airlines Europe
- Navegador
- The Quest for El Dorado
- Merv
- Daimyo: Rebirth of the Empire
- For Sale
- Biblios
- Spirit Island
- Bios:Genesis
- Roam
- The Crew
- Second Chance
- Pandemic: Fall of Rome
- Hadara
- Castles of Burgundy
- Imhotep
- Keltis Mitbringspiel
- 6 Nimmt
- No Thanks
- Drakborgen
- Svea Rike
- RoboRally
- Res Publica
- Coffee Traders
- Cryo
- Coloretto
- Onirim
- Dwellings of Eldervale
- Luna
- Rococo
- Madeira
- Cooper Island
- Beyond the Sun
- Pulsar 2849
- Wayfarers of the South Tigris
- Scholars of the South Tigris
- Lost Ruins of Arnak
- Trans Europa
- Tiletum
- Maps of Misterra
- Mercado de Lisboa
- Terra Nova
- Scout
- Age of Rail: South Africa
- Shackleton Base: A Journey to the Moon
- Hecht im Karpfenteich
- Pirates of Maracaibo
- Nucleum
- Men-Nefer
- Root
- Exit: Dead Man on the Orient Express
- Lorenzo if Magnifico
5 poäng
- Grand Austria Hotel
- Ark Nova
- The Bloody Inn
- Ticket to Ride
- Fresh Fish
- Auztralia
- Thebes
- Camel Up
- Messina 1347
- Eclipse
- Dead of Winter
- Relic Runners
- Twilight Struggle
- Nations
- Bruxelles 1893
- La Granja
- The Name of the Rose
- Stratego
- Abalone
- Qwirkle
- BLUE
- Othello
- Kalaha
- Brädspel
- Red 7
- Alhambra
- Palmyra
- Siege of Jerusalem
- Carcassonne
- Elfenland
- Impulse
- Deep Sea Adventure
- Riverboat
- Tzolk'in
- Kingdom Builder
- River of Gold
- Orientexpressen
- The Republic of Rome
- War and Peace
- Castles of Mad King Ludwig
- Escape from the Aliens in Outer Space
- Orléans
- Railroad Revolution
- The Pursuit of Happiness
- The Round House
- Mundus Novus
- Bunny Kingdoms
- Magnum Sal
- La Isla
- Origin
- Pax Porfiriana
- Hoity Toity
- Tichu
- Teotihuacan: City of Gods
- Santa Maria
- Rajas of the Ganges
- Catan: Cities & Knights
- Wingspan
- Ganz schön clever
- Welcome To...
- K2
- Flamme Rouge
- The Voyages of Marco Polo
- Rise to Nobility
- Broom Service
- Sailing Toward Osiris
- Candamir
- Praetor
- Raiders of the North Sea
- Oceans
- Nusfjord
- Imperialism: Road to Domination
- Caverna: The Cave Farmers
- Blue Skies
- Trick of the Rails
- Principato
- Nemesis
- Lost Explorers
- Homesteaders
- Ostindiska kompaniet
- Ohanami
- Tapestry
- Whirling Witchcraft
- Planet Unknown
- Thief's Market
- Golem
- Moonrakers
- Foundations of Rome
- Backyard Chickens
- Obsession
- Calico
- Bitoku
- Expeditions: Around the World
- Mahjong
- Turing Machine
- Sagrada
- Looot
- Hunt for the Ring
- Metro
- Age of Galaxy
- Codenames
- 1846: The Race for the Midwest
- Exit: The Missing Hollywood Star
- Spirits of the Forest
- Oware
- Prêt-à-Porter
- Skull
- Ad Acta
- Aeroplanes: Aviation Ascendant
- Age of Rail: South Africa
- Molly House
- Village
- Pax Emancipation
4 poäng
- Viticulture: Essential Edition
- RISK
- Talisman
- Combat Cars
- Urban Sprawl
- Signorie
- After the Flood
- Carson City
- AssassinCon
- Sheriff of Nottingham
- The aMAZEing Labyrinth
- Heimlich & Co
- Mastermind
- Tokaido
- Love Letter
- Dominion
- 7 Wonders
- Coup
- Citadels
- Jenga
- Dam
- Kinaschack
- Caylus Magna Carta
- Galaxy Trucker
- Forbidden Desert
- Ribbit
- Gisborne
- Saboteur
- Fabled Fruit
- Seasons
- Argent: The Consortium
- Dixit
- Mysterium
- The Grizzled
- Villages of Valeria
- Ethnos
- Century: Spice Road
- Hotel Samoa
- Enchanters
- Through the Ages
- The Flow of History
- Comrade Koba
- Tournay
- Discworld: Ankh-Morpork
- Takenoko
- Gods
- Tash-Kalar
- Stone Age
- Hawaii
- Caylus
- Alfapet
- Domino
- Veggie Garden
- The Builders
- Shipyard
- Roll for the Galaxy
- Clank! A Deck-Building Adventure
- Station Master
- Crusader Kings
- Khronos
- Glen More
- Russian Railroads
- Terraforming Mars
- At the Gates of Loyang
- Underwater Cities
- Red Rising
- Trekking the World
- Thunder Alley
- Eminent Domain
- Architects of the West Kingdom
- Khôra
- Ancient Knowledge
- Daybreak
- Barcelona
- Bites
- Stupor Mundi
- Praga Caput Regni
- Race for the Galaxy
- Paris
- Zoo Vadis
- Civolution
- The White Castle
- The Lord of the Rings: Fate of the Fellowship
- Mountain Goats
- Galactic Cruise
- Encyclopedia
- Map Masters
- Movers & Shakers
- Imperium: Classics
- Lodge
- Bohemians
3 poäng
- Excalibur
- Daitoshi
- Saint Petersburg
- A Feast for Odin
- Kill Doctor Lucky
- Shadows over Camelot
- Battlestar Galactica
- Yggdrasil
- Ghost Stories
- Castle Panic
- Muminspelet
- Jakten på den försvunna diamanten
- Kingmaker
- Finans
- Datafinans
- Monopol
- Bondespelet
- Cluedo
- Tjuv och polis
- Android: Infiltration
- Small World
- Kemet
- Inis
- King of Tokyo
- Råttfällan
- Colt Express
- Libertalia
- Incan Gold
- Takara Island
- Helios
- First Class
- The Scarlet Pimpernel
- Mid-East Peace
- Res Arcana
- Nidavellir
- 7 Wonders: Architects
- Arctic Scavengers
- It's a Wonderful World
- Age of Civilization
- My First Castle Panic
- Monty Python Fluxx
- Earth
- Villagers
- Age of Champagne
- GOLDblivion
- Hadrian's Wall
- MLEM: Space Agency
- Forest Shuffle
- Karate Tomate
- När då då?
- Stationfall
- 51st State
- Bottle Imp
- Flip 7
- War of the Ring: The Card Game
- OASIS New Hope
- Limit
- 7 Wonders Dice
- Arkham Horror: Lovecraft Letter
2 poäng
- T.I.M.E Stories
- Onward to Venus
- Bloodborne: The Card Game
- Eldritch Horror
- Plato 3000
- Ascension: Apprentice Edition
- Epic Spell Wars
- Yatzi
- Kasta gris
- Fia med knuff
- Resan
- Sänka skepp
- Memory
- Plockepinn
- Fluxx
- A Game of Thrones
- Space Hulk
- Axis & Allies
- Supremacy
- Bang!
- Martians!!!
- NätTrollz!
- Mindbug: First Contact
1 poäng
- Masterquiz
- Sybarit
- Trivial Pursuit
- Ormar och stegar
- Ubåtsjakten
- Rackare/Cards Against Humanity
- Jyhad
- Tic-Tac-Toe
- Exploding Kittens
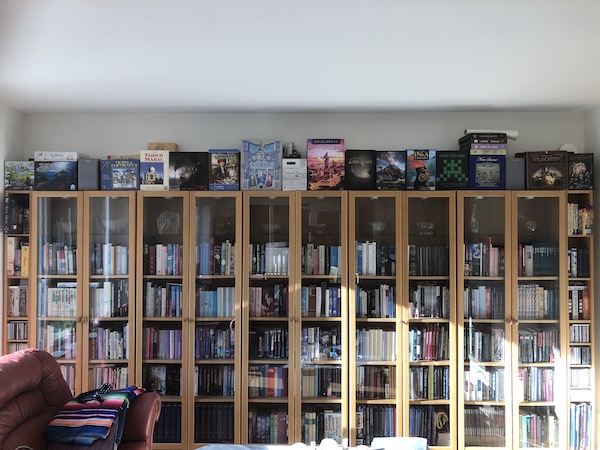
Partiexempel
Brädspel
Uppdaterad 2026-03-08
Brädspel kombinerar de bästa elementen från schack och rollspel. Dels finner vi de strategiska och taktiska elementen - spänningen i att besegra en motståndare med tankens kraft - och dels finner vi de diplomatiska elementen - upplevelsen av att sätta sig in i en fältherres eller stats roll och med den som utgångspunkt förhandla med, förekomma och förinta andra fältherrar eller stater.
Mitt intresse för brädspel vaknade följaktligen också i högstadiet, efter det att jag tagit schack och rollspel till mitt hjärta. Klassikern RISK blev det första brädspelet jag prövade mina krafter på men med tiden upptäckte jag fler och fler slagfält som erbjöd större och mer spännande utmaningar.
Internets utveckling gav brädspelen en ny dimension såtillvida att spelplanens gränser eliminerades och man kunde skaffa sig vänner (eller fiender, beroende på hur man ser det) över hela världen. Jag deltog i flera Diplomacypartier över nätet, inklusive 1999 års världsmästerskap. Det gav mig många roliga minnen men tyvärr kunde jag också konstatera att det krävde alltför mycket tid. För den intresserade rekommenderar jag ändå ett besök på Diplomatic Pouch!
Efter det blev det svårt att hitta tid och motståndare till att spela brädspel. Ibland dök snabbare spel som Settlers och Puerto Rico upp på bordet när jag träffade kompisar men annars förde de länge en tynande tillvaro i mitt välfyllda spelskåp. Sedan vi flyttade till villa och fick mer plats "annekterade" jag visserligen ett rum för solitärspel där jag ofta har partier uppställda (vilket kan behövas då ett spel som Napoleon at Leipzig tog över ett år att färdigspela).
På senare tid har dock mitt intresse för speldesign välkomnat fler spel i studiesyfte och de har till och med fått byta det diskreta spelskåpet mot en mer framträdande spelhylla. Jag har också utökat mitt nätverk till att omfatta fler brädspelsentusiaster och min lista på spelade spel har växt dramatiskt. Jag vill därför på den här sidan dela med mig av mina tankar och erfarenheter om alla dessa spel till andra brädspelsfantaster.
Topplista - vad jag gillar och inte gillar i ett spel
Om det är tack vare erfarenheten av att spela spel eller designa spel ska jag låta vara osagt men jag har också lärt mig mer om vilka typer av spel jag uppskattar:
- Skicklighet framför tur: Ända sedan jag började spela schack har jag uppskattat skicklighetsspel framför rena turspel. Jag förlorar hellre ett parti efter en hård strategisk och/eller taktisk kamp än vinner tack vare tärningen. Vissa tärningsspel som Backgammon lyckas visserligen skapa en kamp om att få sannolikheterna snarare än slumpen på sin sida men det är ett sällsynt undantag.
- Mekanismer framför tema: Jag uppskattar episka spel där varje parti är en historia i sig men inte ens de vackraste illustrationerna eller komponenterna kan skyla över klumpiga eller oengagerande mekanismer. Med extremt avskalade mekanismer lyckas till exempel Diplomacy berätta om politiska intriger och Tigris & Euphrates om kungarikens uppgång och fall. Det mer tematiska Game of Thrones är bara en utdragen och plågsam orgie i dåliga mekanismer som inte hänger ihop.
- Bräde framför kort: Jag vill se spelet utspela sig på brädet där alla förutsättningar är kända för alla spelare, inte i korthögar och korthänder där kunskapen om vilka kort som finns och hur de kan kombineras är avgörande. Ingen skulle vilja spela ett brädspel med hundra unika pjäser men ett kortspel med hundra unika kort går bra trots att principen är densamma. Jag kan förstå glädjen i att plötsligt hitta en stark och oväntad kortkombination men den går helt enkelt inte upp över glädjen över att långsamt bygga upp en stark position på ett bräde och slå till i exakt rätt tid och på rätt plats.
- Kort speltid framför lång speltid: Spel med mycket djup i relation till sin komplexitet anses bra men jag skulle också vilja lägga till relationen till speltiden. Visserligen tackar jag inte nej till speldagar dedikerade till spel som Civilization men i längden föredrar jag att spela flera partier eller andra spel under samma tid. Tid är helt enkelt en bristfaktor och kvalitet är viktigare än kvantitet.
- Interagerande framför solitär: Spel är för mig en social verksamhet där spelare agerar mot varandra snarare än oberoende av varandra. Jag uppskattar visserligen Eurospel men det får inte gå till överdrift där varje spelare sitter och lägger sitt eget pussel oberoende av varandra. Jag är därför tveksam till många "poängsallader" där spelet går ut på att bygga en mer effektiv "ekonomisk motor" än motståndarna.
- Kontroll framför take that: Min preferens för interaktion innebär inte att jag vill ha kaotiska spel där alla påverkar varandra hela tiden. I många fall kan sådana spel drabbas av det välkända "kingmaker-problemet", där spelet avgörs inte på spelbrädet utan av spelarna själva (så varför över huvud taget spela). Det gäller inte bara traditionella krigsspel som RISK utan också i övrigt väldesignade spel som Puerto Rico, där större delen av dina handlingar väljs av dina motståndare och ger dig lite kontroll över ditt eget öde. Jämför detta med Tigris & Euphrates, där spelarnas handlingar indirekt styrs av vilka behov de har (d v s vilka färger de behöver). Det ger ett spel där varje spelare strategiskt kan planera för balans men taktiskt måste svara på spelets "naturliga" konflikter om resurser snarare än att välja konflikt mot specifika spelare.
- Konkurrens framför samarbete: Spel förblir för mig en kamp mellan spelare snarare än mot spelet. Jag har prövat diverse samarbetsspel men alltid fått samma upplevelse. Spelarna spelar alla spelare tillsammans (så varför ha olika spelarkaraktärer?) och den enda tillfredsställelsen kommer sig av att besegra ett spels mekanismer, ofta genom att optimera sannolikheterna. Det gör man visserligen i Backgammon också men då mot en annan spelare. Vill jag spela mot ett spel spelar jag hellre datorspel och vill jag samarbeta spelar jag hellre rollspel.
- Mål framför "poängsallad": Reiner Knizia sa en gång att "det är målet som är viktigt, inte segern". För mig betyder det att du ska spela mot ett mål som betyder något snarare än att plocka så mycket poäng som möjligt. Jag kan förstå charmen med spel där du känner att du åstadkommer något varje tur men i slutändan handlar det bara om att optimera en spelmotor. Det är lite som om schack hade gått ut på att ta flest pjäser i X drag snarare än att fånga motståndarkungen.
Slutligen några ord om mina rankningar. I början överväldigades jag av de många bättre spelen jämfört med min barndoms spel och rankade följaktligen alla mellan 8 och 10 som "vill alltid spela" eller bättre. Men ju fler spel jag spelade, desto mer insåg jag att jag kan vara kräsen. Följaktligen justerade jag mina rankningar till en mer normalfördelad kurva, inte för att spel är dåliga (de flesta är det inte) utan för att det finns ännu bättre spel.
- Ett spel som jag kan spela en hel speldag och sedan ägna nästa dag åt att utforska strategier
- Ett spel som skulle ha fått en 10:a om det inte hade varit för spelen som redan fått en 10:a
- Ett spel jag gärna spelar men kanske inte hela speldagen
- Ett spel jag gärna spelar men kanske inte mer än en gång under en speldag
- Ett spel jag inte föreslår men inte heller tackar nej till
- Ett spel jag kan spela om det inte finns något bättre
- Ett spel jag kanske spelar som en ursäkt för att umgås
- Ett spel jag försöker hitta en ursäkt för att slippa spela
- Ett spel jag aktivt undviker
- Ett spel... nej, det är det inte
För den som vill läsa mer om brädspel kan jag rekommendera följande sajter:
- Boardgamegeek: En speldatabas med outsinlig mängd information.
- The Game Crafter: En print-on-demand-tjänst där man kan trycka egna spel.
- Cardboard Edison: En spelblogg med bra tips för speldesigners.
- Games Precipice: En spelblogg med insiktsfulla diskussioner om spelmekanismer.
För den som vill provspela online innan de köper ett fysiskt spel kan jag rekommendera följande sajter:
- Boardgame Arena: En stor och välutvecklad sajt för många olika spel såsom Keyflower och Palaces of Carrara. Dock saknar jag möjligheten att ångra drag.
- Triqqy: En lite buggig sajt men en av få där man kan spela Knizias spel, däribland Tigris & Eufrat och Samurai. Även här saknar jag möjligheten att ångra drag.
- Spiel By Web: En sajt med bättre funktioner än utseende med spel som Reef Encounter och Tikal.
- Yucata: En sajt som påminner om Spiel By Web med kortare spel som Alchemist och Torres.
- Boardgamecore: En stilren sajt med flera spel från Splotter games, däribland The Great Zimbabwe och Food Chain Magnate.
- Slothninja: För den som saknar Splotterspelet Indonesia så är det ett av få spel på den här sajten.
- Boiteajeux: En snygg sajt med spel som Alchemists, Myrmes och Concordia.
- Michael Schacht: En enkel men fullt funktionell sajt för många av Michael Schachts spel, däribland China och Patrician.
- Mabiweb: En liten sajt med okända pärlor som UR och Mykerinos.
- Civilization: En inte helt intuitiv sajt dedikerad för Civilization och Advanced Civilization.
Topplista - från fulländade 10-poängare till "trasiga" 1-poängare
10 - Ett spel som jag kan spela en hel speldag och sedan ägna nästa dag åt att utforska strategier
Tigris & Euphrates (äger)
| Bakgrund: | Civilisationers uppgång och fall i Mesopotamien | 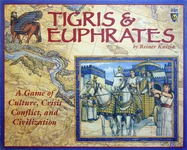 |
| Spelare: | 2-4 | |
| Speltid: | 1-2 timmar | |
| Svårighetsgrad: | 30% |
Allmänt
Tigris & Euphrates måste vara det perfekta spelet. Här finns ett element från go, där du lägger ut brickor för att skapa kungadömen och få poäng från dem. Här finns ett element från schack, där du manövrerar dina pjäser för anfall och/eller försvar. Här finns ett element från klassiskt civilisationsbyggande, där du förbättrar ditt kungarike genom monument och byggnader.
Men det här är inte ett fredligt spel utan interaktion mellan spelarna. Konflikter förekommer i två intressanta skepnader. I interna konflikter placerar du medlemmar i din dynasti i dina motståndares kungadömen med målet att störta dem och själv dra fördel av deras riken. I externa konflikter kan expanderande gränser skapa ett starkare kungadöme för vinnaren eller lämna de två kungadömena försvagade efter de interna stridigheterna.
Men det slutar inte där. Det finns ingenting sådant som "ditt" kungadöme, de är bara där för att tjäna din dynastis intressen (d v s generera poäng) och kan (ska!) överges när de inte längre är till någon nytta för dig.
Slutligen måste du, i detta kaos av uppgående och fallande civilisationer, balansera din tillväxt. Det är nämligen inte ditt starkaste område som ger dig segern, det är ditt svagaste område. Spelet är till synes enkelt men under ytan döljer sig ett fantastiskt speldjup.
Tigris & Euphrates - the perfect game? (engelskspråkig recension för publicering på Boardgamegeek)
Is it possible to fall in love with a game before even playing it? It all started when I casually browsed around the Boardgamegeek top list one day. I had no intentions to find a new game - I already had more games than time. Besides, reading the negative critics (which is a best way to judge a game, second only to actually play it), they all seemed to be too much of something. Agricola was too solitaire, Through the Ages was too long, Terra Mystica was too much of a counting exercise, Puerto Rico had too little interaction, Eclipse was too random and so on.
But then I found a game that seemed to balance everything. Here was an element of go, where you woud place tile to create kingdoms and score points from them. Here was an element from chess, where you would maneuver your pieces for attack and/or defense. Here was an element of the classical civilization building, where you would improve your kingdom through monuments and buildings.
However, this was not a peaceful game without player interaction. Conflicts came in two interesting shapes. In internal conflicts you would plant your dynasty members in your opponents' kingdoms with the objective of overthrowing them and reap the benefits for yourself. In external conflicts the clashes of expanding borders might form one stronger kingdom for a winner or leave the two kingdoms weaker after the fierce strife.
But it did not end there. There was no such thing as "your" kingdom, they were only there to serve your dynasty's interests (i.e. generate victory points) and might (should!) be abandoned when they no longer served any purpose.
Finally, in this chaos of rising and falling civilizations you would need to find a balanced growth because it was not your strongest area that awarded you the victory, it was your weakest area. The game seemed to be so simple and yet the depth of the gameplay so immense.
I am of course talking about Tigris & Euphrates.
But let us start with an overview of the rules. You are a leader of a dynasty in the Ancient Fertile Crescent. At your disposal, you have a king (black), a priest (red), a trader (green) and a farmer (blue). The land is represented by a checkered map and the kingdoms by adjacent tiles in the same colors as your leaders. The objective of the game is to score victory points, again in the same colors as your leaders. You start with six tiles (which are replenished at the end of each turn) and may carry out two of the following actions:
- Place, move or remove a leader. Leaders are necessary to earn victory points
- Place a tile. Placed tiles earn victory points to the leader in the same kingdom
- Place a catastrophe tile. Catastrophe tiles permanently destroys a square.
- Swap up to six tiles.
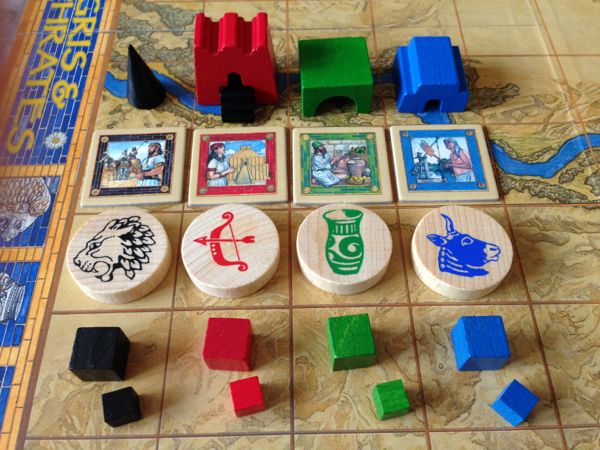
This is the peaceful part of the game where you build kingdoms. The aggressive part is when leaders of the same color end up in the same kingdom. Leaders of different colors can co-exist in a kingdom, even if belonging to different players, but leaders of the same color results in a conflict. Internal conflicts take place when leaders are placed and are fought with red tiles. The leaders gain strength from adjacent red tiles and may add tiles from their hand. External conflicts take place when tiles are placed so that kingdoms merge. The leaders gain strength from tiles of their color in their "half" of the kingdom and may add tiles from their hand. The loser is removed (and, in the external conflict, all supporting tiles), and the winner gets victory points for each removed leader and tile.
Each of the four colors have special abilities:
- The black leader earns victory points for placing tiles of all colors if the leader of the tile's color is not present
- Leaders must be placed adjacent to red tiles and red tiles are also used in internal conflicts
- The green leader can earn treasury ("wild card" victory points) if a kingdom connects two or more tiles with treasury
- The blue tile is the only tile that may be placed on rivers (and nowhere else)
Victory points may also be earned from monuments (and, in the advanced rules, from buildings and the ziggurat). Those can be built when tiles of the same colors are grouped in certain ways (in a square of four to build monuments etc.) and earn points to the leader or leaders of that color. At the end of the game, the player with the most victory points in his or her worst color (i.e. the player with the most balanced score) wins!
Let us now continue to see how those rules make Tigris & Euphrates so special. (The list is based on the criteria for a fun game listed by Wolfgang Kramer, designer of El Grande among others.)
- Originality: To my knowledge, there is no game that combine tile-laying and civilization building with internal and external conflicts the way Tigris & Euphrates does
- Replayability: The possible combinations of kingdoms and conflicts are unlimited, making each game unique
- Surprise: The available actions may be few but their effects may overturn the entire board
- Equal opportunity: The players start with equal and symmetric conditions and although the first-mover may have an early benefit, her kingdom will also attract early enemies
- Winning chances: The unique balanced scoring prevents players from racing to victory as victory points of all four colors are required
- No "kingmaker" effect: The limit of one leader of each color in a kingdom makes it difficult to cooperate with the winner and weak attacks may even benefit the runner-up
- No early elimination: Leaders never die, they may re-enter the game board next turn
- Reasonable waiting times: With two actions per turn, the downtime is short and often a player's action affect other players as well (positively or negatively)
- Creative control: Everything that happens in the game is because of the players' actions
- Uniformity: The theme may be pasted on but the story of rising and falling kingdoms fits very well in the Ancient Fertile Crescent and, as other reviewers have said, the game looks almost like it was dug out from an old ziggurat
- Quality of components: My edition (Mayfair revised 2-sided board edition) come with linen-textured board and tiles and the sturdy wooden monuments give a nice 3D-feeling to the rising and falling kingdoms
- Consistency of elements: Tigris & Euphrates is tactical and although tiles are randomly drawn, tactics is required to use them well
- Tension: The fact that leaders may move freely and kingdoms expand rapidly makes conflicts a constant threat
- Learning and mastering: Tigris & Euphrates is quickly learnt and mastering the game is about assessing the open board, not memorizing hidden cards with special abilities
- Complexity and influence: Tigris & Euphrates is not complex and the players have full influence on the course of the game
Some reviewers warn that Tigris & Euphrates require some sessions to reveal its secrets but either my first session proves the opposite or there is much more to discover. The session started quietly with the Lion settling in the Northeast corner and the Archer in the Northwest while the Potter and the Bull got into an early fight for the South. The Lion took advantage of the fight and built a serpent-like kingdom in the East, claiming two treasures and building the first temple. So far, it was a standard civilization game with a first- mover advantage. But then came a series of conflicts, culminating in devastating external conflicts that stretched from the Northeast to the Southwest, swept away three leaders and left the Lion kingdom scattered and the monument abandoned in a desolated land. Never before in my gaming experience have I seen such a turn of events. Survivors fled to the prospering Arrow kingdom in the Northwest and dynasties replaced each other but in the end, the Arrow dynasty emerged as the winner.
- Archer: 10-10-11-13
- Potter: 8-9-9-9
- Bull: 8-8-9-14
- Lion: 7-8-8-9
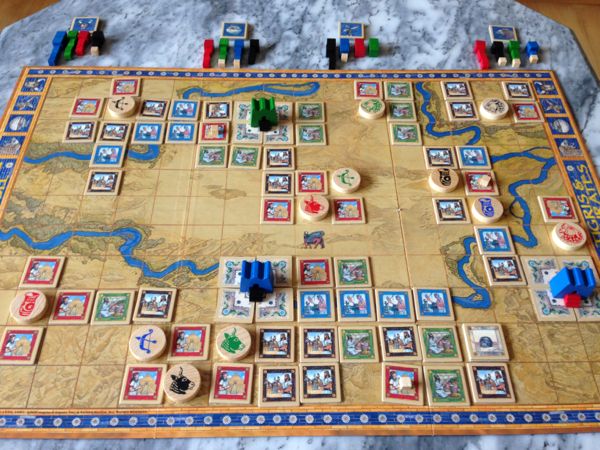
Note that the end position contains a newbie error - can you spot it?
To sum up, Tigris & Euphrates satisfies all criteria for a fun game. Each session is unique as tiles are placed and removed on the game board. Leaders will come and go and kingdoms will carefully expand until the time is ripe for a confrontation. Players will be veering between hope and despair as the kingdoms rise and fall in the Ancient Fertile Crescent. There are few games that give such a complete gaming experience like Tigris & Euphrates and in my opinion it is truly the perfect game.
Strategi
Målet i Tigris & Euphrates är inte att bygga ett kungarike eller erövra motståndarriken utan helt enkelt att samla poäng. Du måste därför frikoppla dig från tanken på ett kungarike som "ditt" eller "någon annans" - de finns där för att ge dig poäng, inget annat. Därmed måste du se till att varje handling maximerar dina poäng, antingen på kort sikt eller lång sikt, samtidigt som du nekar motståndarna poäng. Det är också viktigt att du balanserar poängen så att du inte får för lite poäng i någon färg.
Hur du bäst maximerar poängen beror helt på hur det ser ut på spelbrädet men följande generella tips hjälper dig att bedöma läget:
- Börja med en svart ledare, så att du kan få poäng i alla färger, och en grön ledare, så att du kan få skatter
- Försök få in övriga ledare med "tempo", d v s en intern konflikt som ger dig både ledare och poäng
- I början av spelet, försök få ut alla dina ledare då dessa behövs för att få poäng i olika färger
- Senare i spelet, fokusera på de ledare i de färger som du behöver poäng i
- Börja inte i hörnen, dels eftersom du kan bli instängd och dels eftersom skatterna i hörnen tas bort först och lämnar din ledare med ett oskyddat tempel
- För dina första ledare anses E14 vara bra, då det är centralt och gränsar till ett möjligt blått monument (4 flodrutor i kvadrat), och därefter C6 och J6
- Lägg din första bricka nära två skatter med sikte på att få dem bägge i ditt kungarike
- Lämna fler än två brickor mellan ditt kungarike och en skatt så länge du inte har en grön ledare, annars riskerar du att en motståndares gröne ledare tar den
- Skydda dina ledare mot interna konflikter genom att ha dem intill åtminstone två röda brickor
- Skydda dina ledare mot externa konflikter genom att ha dem nära brickor av samma färg (så att inte ledaren isoleras om mellanliggande brickor tas bort av konflikten)
- Lämna inte två eller fler tomma rutor intill röda brickor då dessa kan användas av fientliga ledare
- Var försiktig med långa smala kungariken då dessa kan förstöras av externa konflikter eller katastrofer
- Var försiktig med kungariken med avstånd mellan ledare och brickor av samma färg då katastrofbrickor eller externa konflikter kan bryta kontakten och göra ledaren svagare
- Förstärk smala kungariken eller kungariken med avstånd med "redundanta" brickor som skapar extra förbindelser
- Var försiktig när det är bara är två brickor till ett fientligt kungarike ("semistabilt") då fienden kan anfalla med två handlingar
- Var mycket försiktig när det är bara är en bricka till ett fientligt kungarike ("instabilt") då fienden först kan försvaga dig med en katastrof och sedan anfalla
- Använd dina handlingar inte bara till att maximera dina poäng utan också till att störa motståndarna
- Använd katastrofbrickorna defensivt för att bryta motståndares tillgång till viktiga brickor eller förstöra anfallsvägar mot dig
- Använd katastrofbrickorna offensivt för att splittra fientliga kungariken och antingen anfalla halvor med ledare eller lägga beslag på halvor utan ledare
- Använd interna konflikter för att få tillgång till monument
- Använd externa konflikter där du deltar för att få brickor och/eller tillgång till monument
- Använd externa konflikter där du inte deltar till att förstöra motståndarriken men bara om du är säker på att vinnaren inte har någon nytta av färgerna han eller hon vinner
- Starta inte en extern konflikt enbart för att få brickor om du redan har många brickor i den färgen
- En tumregel är att tre brickors övervikt (brickor på brädet + brickor på handen) ofta räcker för seger
- En annan tumregel är att två brickors övervikt kan räcka för seger i gröna och svarta konflikter, är mer osäkert i blå konflikter och riskabelt i röda konflikter
- Bygg inte små kungariken som lätt kan sväljas av närliggande stora kungariken
- Bygg inte monument om du hotas av en extern konflikt eftersom de vända brickorna försvagar din ledare och därmed ditt försvar
- Bygg däremot ett monument i ett moståndarrike om du kan försvaga dess ledare och själv erövra det genom en extern konflikt
- Försök gissa dig till dina motståndares brickor utifrån hur de positionerar sina ledare eller gör sig av med brickor
- Var aktsam på motståndarens sent byggda monument då dessa i regel byggs för att komplettera färger med få poäng
- Känn inte att du måste ta tillbaka "förlorade" kungariken - det kan mycket väl finnas bättre kungariken att hämta poäng i
Men kom som sagt ihåg att detta är generella tips, varje handling måste bedömas utifrån det rådande läget.
Minnen
Under en lång tid var mina minnen av Tigris & Euphrates tyvärr färre än vad jag hade önskat. Reiner Knizias mästerverk är helt enkelt det närmaste ett flerspelarspel har kommit schack med alla dess fördelar men också två viktiga nackdelar: det är svårt att hitta spelare för socialt spel och det kräver jämna spelare för att komma till sin rätt. Ofta när jag introducerar det för nya spelare så vinner jag enkelt och får höra att tur med brickor (särskilt röda tempelbrickor) är avgörande.
Det blev i stället på online-sajter som Triqqy.com som jag hittade jämbördiga spelare. Tyvärr så blev många partier lidande av att spelare lämnade det och även om det fanns turneringar med bättre fullföljande så spelades finalen alltid på två spelare - en spelform som tyvärr saknar det ebb och flod som inträder när fyra spelare ständigt rubbar maktbalansen. Längre trodde jag att Tigris & Euphrates öde var att förbli det spel som jag spelar minst i förhållande till hur ofta jag skulle vilja spela det.
Men så kom Tigris & Euphrates till Boardgamearena och med det öppnades många fler möjligheter till spel. I skrivande stund har jag spelat ett par hundra partier, varav hälften på Boardgamearena, och lyckats inneha den högsta ELO-rankingen på sajten vid ett tillfälle. Nedanstående kommenterade parti spelades mot högt rankade motståndare och belyser mycket av den strategi och taktik som präglar mitt spel.
The Mesopotamian Bull Run (engelskspråkig sessionsrapport för publicering på Boardgamegeek)
In the ancient times, a young man laid the foundation stone to a boardgame collection. After extensive research, Tigris & Euphrates was the chosen one with the expectation that no other boardgames would ever be necessary. Although that expectation turned out to be futile, Tigris & Euphrates maintained its status as the major boardgame in the collection, to which the now old man would always return.
At the time of writing, I have recorded almost 250 games and I am one of the lucky few to reach the World ELO Leader position at Boardgamearena. Yet, I have never returned to an old game to analyze it and learn from it, something that I always do after a chess game. Well, it's never too late to start so here is an informative game I played as the Bull in the Golden Trophy Tigris Euphrates tournament against the highly rated players Miroku20X6, RomainJ and Zzzyyxas. It provides an insight in some of the strategic and tactical considerations of Knizia's masterpiece and yet it only scratches the surface of this deep game. I hope this will be of interest to newbies and seasoned players alike.
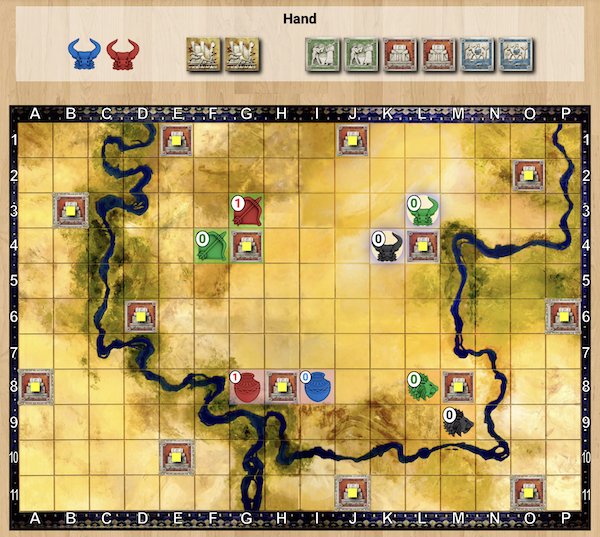
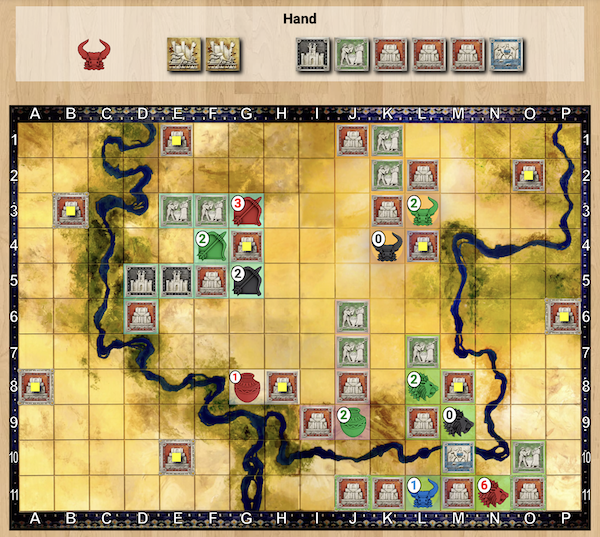
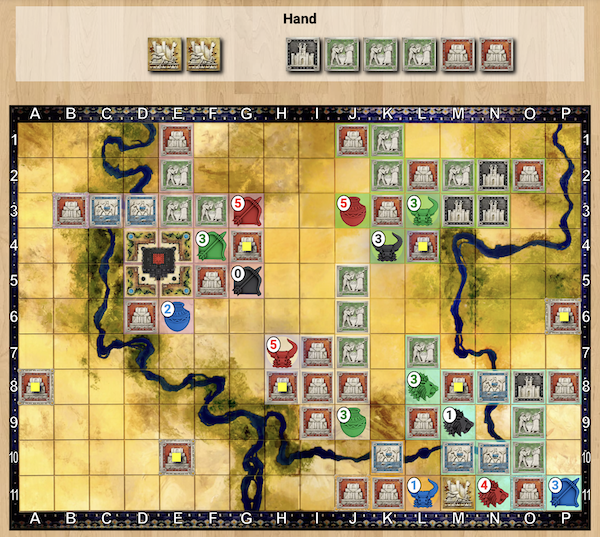
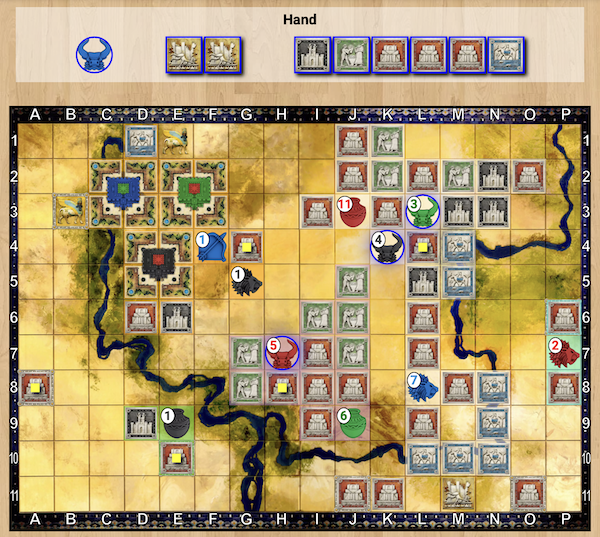
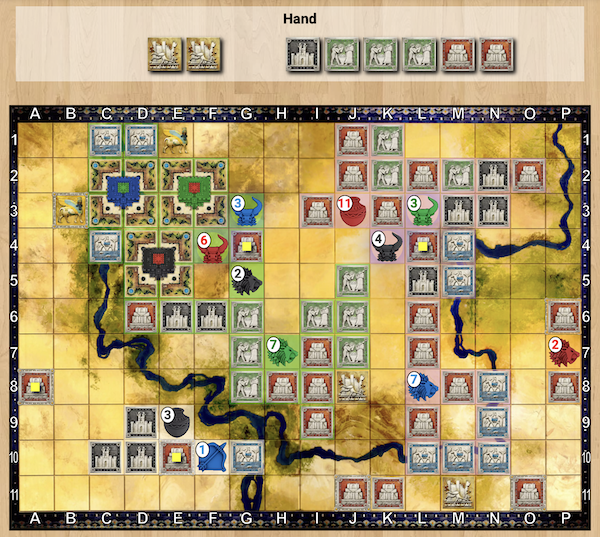
Round 1
The game opened in a traditional way with each player starting a kingdom of their own. Three of the players started with a King (to be able to gain victory points for all colors) and a Merchant (to be able to gain treasures). The Potter chose a different strategy with a Priest and a Farmer, perhaps with the intention to build an early Blue monument at G9:H10.
Notice how all players position themselves between the center and a corner to start carving out pieces of territories for their own, similar to how Go players place their initial stones. From those positions, they may expand towards the corners (and claim the treasures there) while still being close to the center to engage in wars if opportunities would arise. Also notice how the Potter and Lion kingdoms are separated by only two squares. This is an example of semi-stable kingdoms, which can be connected and attacked in one turn. Since the kingdoms have no leaders of common colors, this is not an issue yet, but it may be in the future.
- Potter: Priest to G8, Farmer to I8
- Bull: King to K4, Merchant to L3
- Archer: Trader to F4, Priest to G3
- Lion: Merchant to L8, King to M9
Score: Red 0, Black 0, Green 0, Blue 0
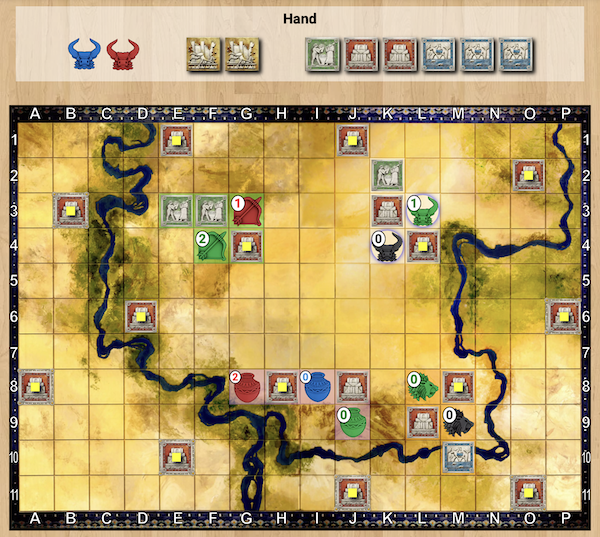
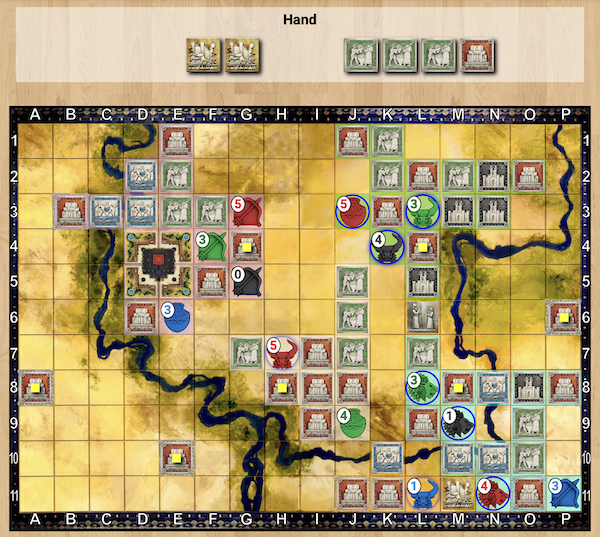
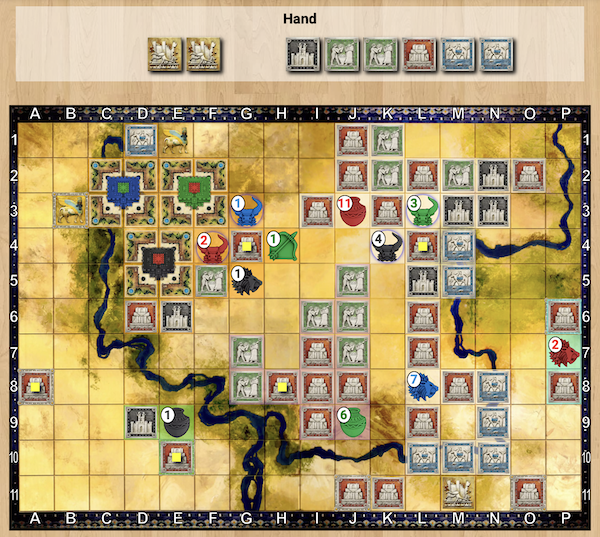
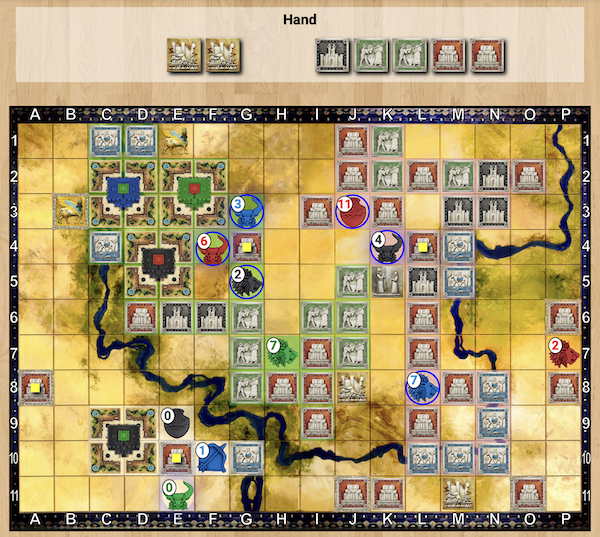
Round 2
I proceeded with the basic Tigris & Euphrates opening: play a second Red tile to protect the two initial leaders followed by a tile to connect to a treasure. The other player also went for treasures but possibly with other goals in mind. The Archer placed two green tiles, perhaps aiming for an early green monument, while the Potter expanded further towards the Lion. The purpose was probably to beat the Lion to the treasure but the kingdoms are now separated by only one square, something that makes them unstable. Any player could now start a war with their first action and take advantage of the war result with their second action. Keep an eye on this part of the board (I certainly did) because things will happen there.
- Potter: Red to J8, Merchant to J9
- Bull: Red to K3, Green to K2
- Archer: Green to F3, Green to E3
- Lion: Red to L9, Blue to M10
Score: Red 1, Black 0, Green 1, Blue 0
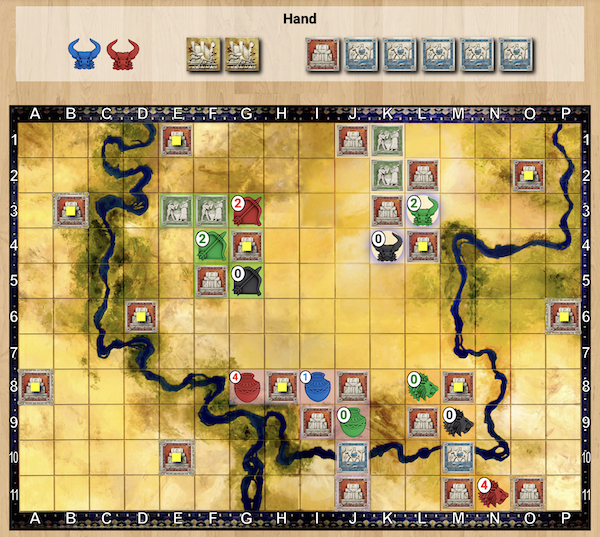
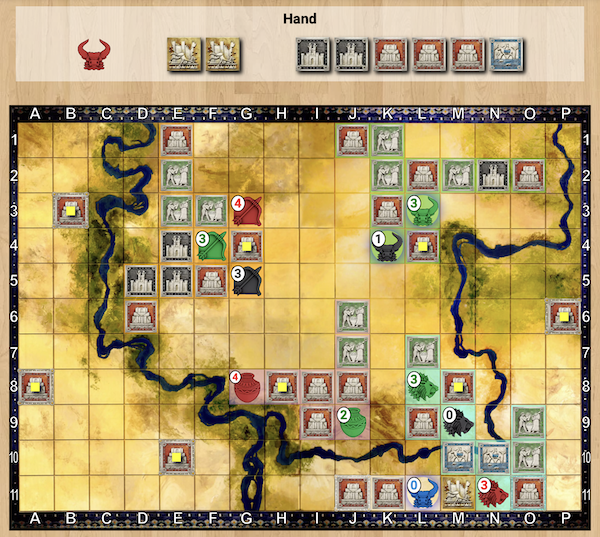
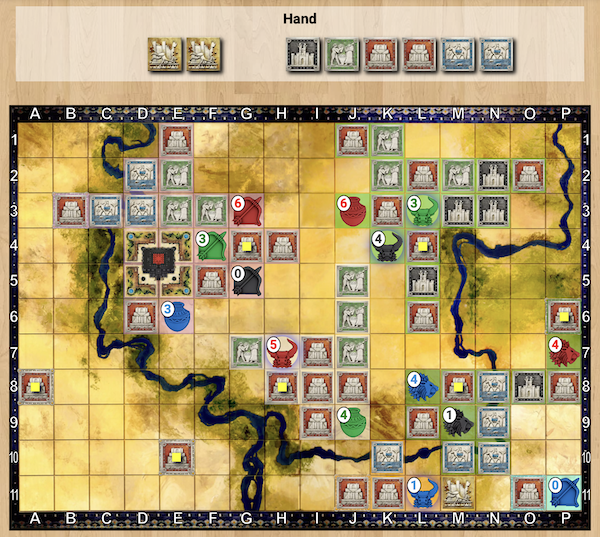
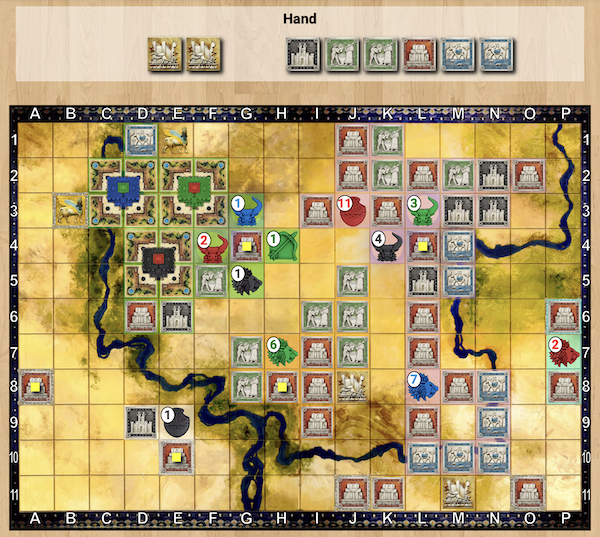
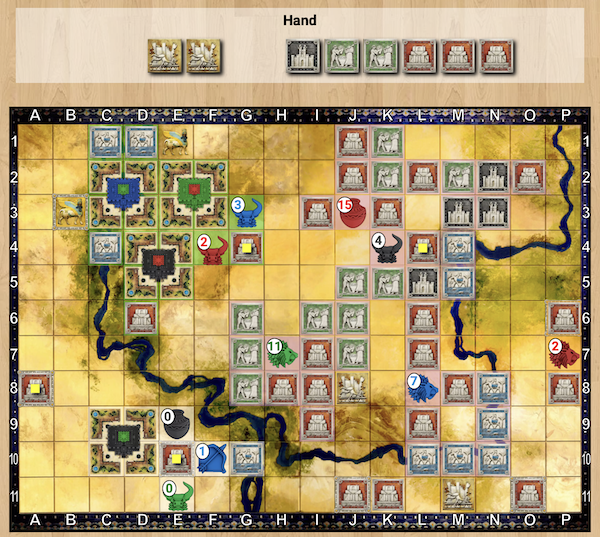
Round 3
In the third round, all players connect to treasures. Notice how all players except me have added a third leader. In a typical Tigris & Euphrates game you only have about 13-15 rounds (26-30 actions) and really want every action to count. Thus, I tend to delay my (non-scoring) leader moves until a scoring opportunity appears, such as a revolt against a weak leader. However, I do run the risk of getting an opponent leader in "my" kingdom and lose control of how it grows in that leader's color. We'll see both this opportunity and this risk in the game.
- Potter: Red to I9, Blue to J10
- Bull: Green to K1, Red to L2
- Archer: King to G5, Red to F5
- Lion: Red to M11, Priest to N11
Score: Red 2, Black 0, Green 2, Blue 0, Treasures 1
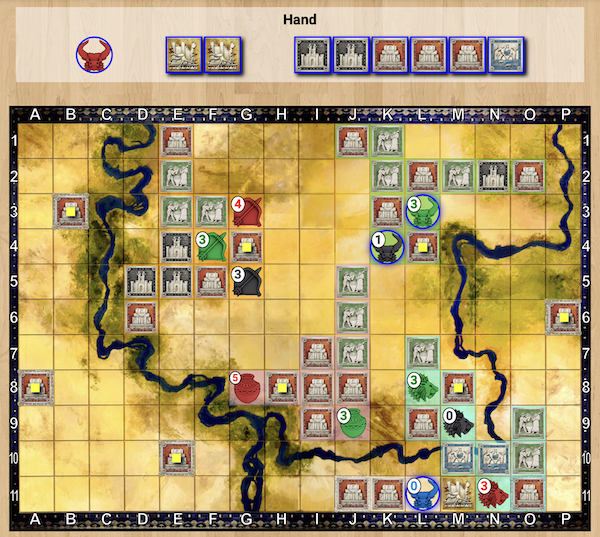
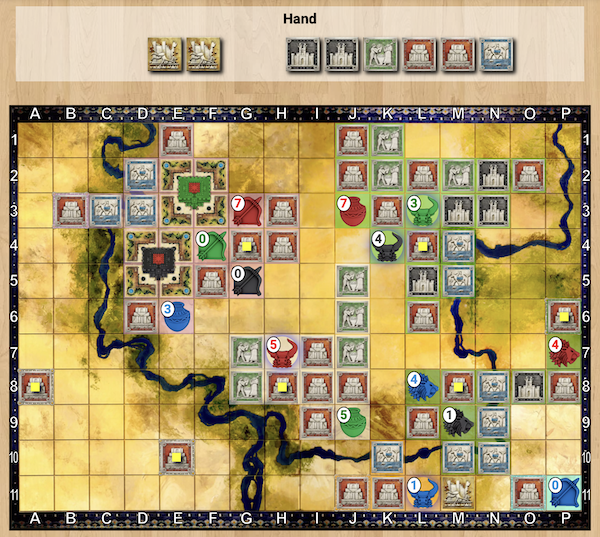
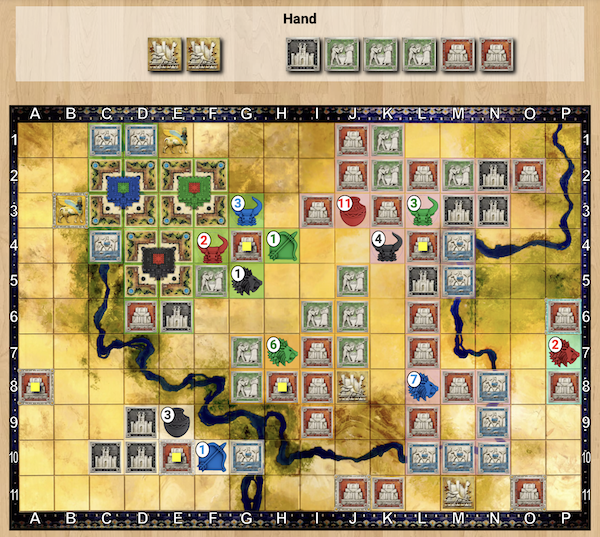
Round 4
I was now expecting a war between the Potter and the Lion but was surprised to see the Potter kingdom expanding in my direction. Did the Potter have more green tiles up their sleeve and did they plan a green war against me? Meanwhile, my hand consisted of 1 red tile and 5 blue tiles so how could I possibly defend?
One option would be to discard my tiles, hoping to get more green ones. Another option would be to play a catastrophe tile on J8, taking advantage of the weak "snake kingdom" of the Potter and split it in two. However, both those options would cost me an action without giving me any benefit in return. But there was also a third and much better option.
Many newbies complain about how the luck of the draw can result in a bad hand of tiles in Tigris & Euphrates. However, there is no such thing as bad hands of tiles, only different hands of opportunities. If you have a hand heavily weighted in one color, you should look for opportunities where that color can be useful.
With this in mind, I played Farmer to L11 and Red to K11 to start a blue war. Why a blue war? Because I wanted to make use of my blue tiles and hopefully refresh my hand with more green tiles. Why not a green war between two opponents to force them to spend their green tiles against each other instead of me? Because I didn't want to give my opponents points if I could avoid it.
The war was successful and my two defensive actions earned me two blue points. Unfortunately, I didn't draw any green tiles after all but the Potter couldn't know this so for the time being, the threat was averted. However, I did get three red tiles instead, which later would turn out to be useful.
- Potter: Green to J7, Green to J6
- Bull: Farmer to L11, Red to K11 WAR
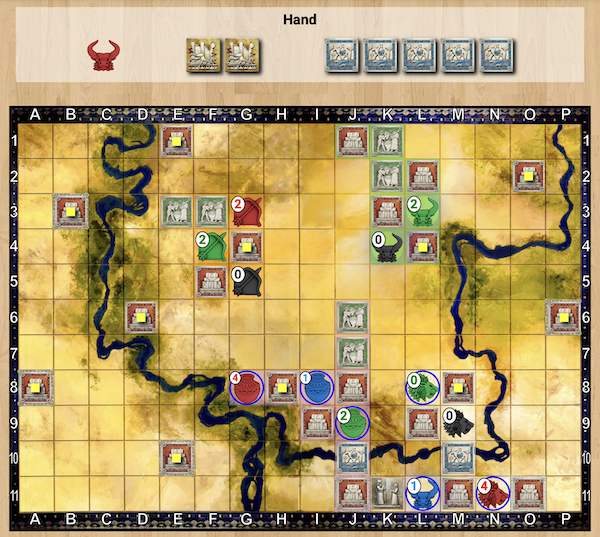
- Bull selects Blue war (1 vs 1)
- Bull places 5 support
- Potter places 0 support
- Bull wins with 6 vs 1 and removes Farmer I8 and Blue J10
- Archer: Black to E5, Black to D5
- Lion: Green to L7, Green to O10
Score: Red 2, Black 0, Green 2, Blue 2, Treasures 1
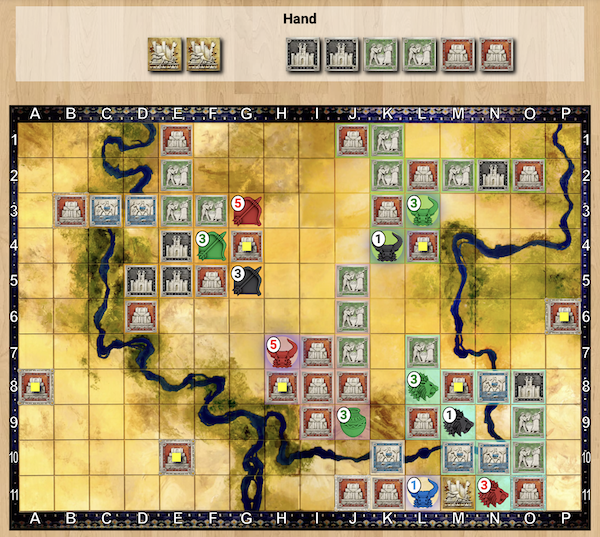
Round 5
The fifth round was more of a consolidation round. The Potter surprised me with a catastrophe tile, splitting the Lion/Bull kingdom in three parts. Perhaps he wanted to weaken his neighbour? Both me and the Archer claimed our second treasures while the Lion had to spend time mending his kingdom with a blue (non-scoring) tile to N10. I felt a little bit guilty but only a little.
- Potter: Catastrophe to M11, Red to I8
- Bull: Green to M2, Black to N2
- Archer: Green to E2, Black to E4
- Lion: Blue to N10, Green to O9
Score: Red 2, Black 1, Green 3, Blue 2, Treasures 2
Round 6
The Potter wasn't daunted after all and moved his border even closer to mine with a green tile to J5. Strangely enough, this was followed by a red tile to I7. I believe this was a mistake, since empty squares adjacent to red tiles make it easier for opponents to jump in there and start a revolution. Do you remember how I used blue tiles to defend against the Merchant through a blue war? I got red tiles in return so this time I used red tiles to defend against the Merchant through a red revolution.
Let me pause here for a moment to discuss the odds of winning a war or a revolution. I don't know the exact probabilities but a useful rule of thumb is to attack if you have three or more tiles except for red where four or more tiles are usually needed. (There are more red tiles in the game and players tend to keep them on their hands longer for defensive purposes.) In this case, I could revolt with 5 vs 1 and be fairly optimistic about my chances.
The gamble paid off and I had now got both my Farmer and my Priest to the board for "free". However, my leaders were spread out in three different and relatively weak kingdoms. My score was probably good but I had a bad feeling about my position and I would have to steer very carefully in the future.
- Potter: Green to J5, Red to I7
- Bull: Priest to H7 REVOLT (2 vs 1)
- Bull places 3 support
- Potter places 0 support
- Bull wins with 5 vs 1 and removes Priest G8
- Bull: Blue to K10
- Archer: Blue to D3, Blue to C3
- Lion: Black to O8, Blue to N8
Score: Red 3, Black 1, Green 3, Blue 3, Treasures 2
Round 7
There is no such thing as "your" kingdom in Tigris & Euphrates. A kingdom is merely a mean for your leaders to score points and should be abandoned if there are better kingdoms elsewhere. This is exactly what the Potter did this round by placing the Farmer in the Western Archer kingdom and the Priest in (my) Eastern kingdom. In addition, the Priest was placed so that only two squares separated the Western and the Eastern kingdoms. This meant that my Black and Green leaders were close to all opponent kingdoms. A threat or an opportunity?
I did consider an attack against the Southern Lion kingdom with 3 vs 1 black tiles and 5 vs 3 green tiles. With some luck, I would win the black war and split the kingdom so that I then could attack with 5 vs 1 green tiles. (One important advantage of being the attacker is that you can choose the order of the wars and use the first war to weaken the remaining leaders. Without the King at M9, the green King at L8 would no longer be connected to the green O9 and O10 tiles.) However, I feared that my position would get too weak in case of a black loss, even if it would be followed by a green victory. Instead, I played two black tiles to improve my black score and hopefully deter my opponents from attacking.
I don't know if my deterrence worked but the Archer decided to build the game's first monument instead, a Black/Red one. A monument is a valuable source of points but weakens a color, in this case Black. On the other hand, the Archer's Red and Green leaders were still strong enough to maintain a terror balance between the Western and the Eastern kingdoms. If left unchecked, the Archer would run away with the game, but for the moment there was nothing I could do about it.
Meanwhile in the South, the Lion prepared a revolt against an intruding Farmer by first placing a red tile so that he could follow up with a Farmer adjacent to two red tiles while the opponent Farmer was adjacent to only one. Unfortunately, he had only two red tiles on the hand while the Archer had three so the revolt failed. (Do you remember the rule of thumb? You should have at least four more tiles if revolting or attacking with Red.)
This was unfortunate for me too, because now all the Archer's leader were well positioned. With about half the game played, I couldn't remain passive if I wanted to play for a victory. But what could I do?
- Potter: Farmer to E6, Priest to J3
- Bull: Black to M3, Black to N3
- Archer: Black to D4, Black/Red monument D4:E5, Farmer to P11
- Lion: Red to P8, Farmer to P7 REVOLT (2 vs 1)

- Lion places 2 support
- Archer places 3 support
- Bull wins with 4 vs 4 and removes Farmer P7
Score: Red 3, Black 3, Green 3, Blue 3, Treasures 2
Round 8
If an opponent has a monument, they will score two extra points each round. Thus, you have to score at least two extra points yourself and the best way to do so is to wage a war. With three green tiles, I could start a green war and choose between three opponent Merchants but whom should I choose? The Potter was the strongest (4) and probably out of the competition anyway. I could fight the Archer (3) but then a red war between the Archer and the Potter would eventually follow and a victory for the former would not only give the Archer red points but also add two tiles to their kingdom. (The connecting tiles I3 and H3 would no longer be part of my kingdom if the Priest at J3 were to be removed.) That left only the Lion Merchant (3).
But why not attack the Lion King first with 4 vs 1 and then the Lion Merchant? Didn't I state earlier that 3 vs 1 offers good chances? Well, actually I had three reasons for my decision. First, I worried that the Lion had set up a "honey trap" by holding on to black tiles and giving the impression that their King was weak to tempt opponents to start the war. As a defender, you don't have to spend an action (connecting tiles don't score points) and it's easier to win (the defender wins ties). Second, even if I would win the black war and two points, I would split the Lion kingdom and win two green points less so the net result would be the same. Third, if things would come to worse and the Lion would turn out to have three green tiles, I would lose the green war but our kingdoms would remain connected, enabling me to win the black war AND be able to return my Merchant to L3 and win the revolt thanks to the three adjacent red tiles. Surrounding your leaders with red tiles not only protect them against revolts but also give them a chance to come back after lost wars.
I don't know whether my worries were founded but I did win the Merchant war with 5 vs 4. With that, I had eliminated the green threat from the Southern kingdom and could always come back for black points later.
After the war, the Archer added tiles to their kingdom while the Lion returned their Farmer and repositioned their Priest to a stronger position (protected by two red tiles instead of one). Thanks to the war, I thought I was still keeping up with the Archer, but for how long?
- Potter: Green to G7, Blue to D2
- Bull: Black to L5, Red to L6 WAR
- Bull selects Green war (3 vs 3)
- Bull places 3 support
- Lion places 2 support
- Bull wins with 5 vs 4 and removes Lion L8 and Green L7, O9 and O10
- Archer: Blue to N9, Red to H4
- Lion: Priest to P7, Farmer to L8
Score: Red 3, Black 4, Green 7, Blue 3, Treasures 2
Round 9
The 9th round was not my finest hour. The Potter placed green and red tiles, making both their Merchant and their Priest two tiles stronger than mine. Meanwhile, I had drawn two blue tiles last round but my Farmer was too weak to use them for an attack and I couldn't place any of them without connecting to other kingdoms and not scoring any points. Besides, such a placement would probably only give away blue points to an attacker. I decided to place them in my Eastern kingdom instead to at least score two blue points but this wasn't enough to keep up with the Archer.
To make things worse, my arch enemy built a second monument and now earned four extra points each round! The final nail in the coffin was an expected Lion attack on my Farmer. What did I do to deserve that? Besides attacking their Merchant last round, that is. The age of patience was over, I would have to act fast to win this game.
- Potter: Green to G8, Red to J2
- Bull: Blue to M4, Blue to M5
- Archer: Red to H3, Green to F2, Green/Red monument E2:F3
- Lion: Blue to L10 Blue WAR (4 vs 1)
- Lion places 1 support
- Bull places 1 support
- Lion wins with 5 vs 2 and removes Bull L11 and Blue K10
- Lion: Merchant to L11
Score: Red 3, Black 4, Green 7, Blue 5, Treasures 2
Round 10
The 10th round would see a lot of events. The Archer's second monument had improved their score but also significantly weakened their King and Merchant. Perhaps they hoped to score enough points from the monuments before the war reached them? Perhaps they expected the strong Priest to fend off attacks? No matter what, I had to attack. After (too?) passive actions from the Potter, I used my first action to attack the Southern Kingdom.
Wait, what? Why the Southern Kingdom and not the Western kingdom you might ask? Well, for two reasons. First, an immediate attack on the Western kingdom would only earn me 1 green and 1 black point. Second, if the Potter Priest would lose the war, the Archer King and Merchant would just return in the Archer's turn and score again. A precursory attack on the Eastern kingdom would solve both issues by giving me more black and green tiles AND add red tiles to the Potter Priest. I guess I owed him that. Unlike last time, I had both green and black tiles on my hand so it should be safe to start wars in both colors (4 vs 0 green and 6 vs 1 black).
- Potter: Blue to D1, Green to I6
- Bull: Red to L7 WAR
- Bull selects Green war (3 vs 0)
- Bull places 1 support
- Lion places 1 support
- Bull wins with 4 vs 1 and removes Merchant L11
- Bull selects Black war (4 vs 1)
- Bull places 2 support
- Lion places 1 support
- Bull wins with 6 vs 2 and removes King M9
With the green and the black wars won and three red tiles added to the kingdom, it was finally time for the Eastern and the Western kingdoms to meet on the battlefield. It's true that the Archer could have prepared a honey trap in either black or green but I expected them to be more prepared for revolts and have mostly red tiles on the hand.
- Bull: Red to I3 WAR
- Bull selects Black war (4 vs 0)
- Bull places 0 support
- Archer places 0 support
- Bull wins with 4 vs 0 and removes King G5
- Bull selects Green war (3 vs 0)
- Bull places 0 support
- Archer places 0 support
- Bull wins with 3 vs 0 and removes Merchant F4
- Bull selects Red war (7 vs 10)
- Archer places 0 support
- Potter places 0 support
- Potter wins with 10 vs 7 and removes Priest G3 and Red B3, E1, F5, H3 and H4
When the fog of war cleared, all parts of my plan had succeeded. Two Kings and two Merchants had been defeated together with one Priest and the Archer kingdom was no more. Attempts to return any of the leaders would be met by another war so the Archer decided to bring his Farmer there instead through a revolt (the Archer did indeed have plenty of red tiles on the hand!) and build a third monument to add blue tiles to his score. The last thing that happened in the round was that the Lion King took advantage of the power vacuum to settle in the shadows of the many monuments. My score had increased from 3-4-7-5-2 to 3-7-9-5-3 and I could hope for victory again but would have to start focusing on Red and Blue next.
- Archer: Farmer to F4 REVOLT (1 vs 1)
- Archer places 4 support
- Potter places 0 support
- Archer wins with 5 vs 1 and removes Potter E6
Score: Red 3, Black 7, Green 9, Blue 5, Treasures 3
Round 11
My hand offered me red tiles (3) and the board offered me blue tiles (the blue/green monument) so the obvious move now was to force my way to the former Archer kingdom through a revolt. It's true that I only had three more red tiles instead of the four I usually prefer but I knew that the Archer had spent most (all?) of his red tiles in the revolt last turn and was willing to take the risk. The gamble paid off and my red and blue points improved. (The Priest could walk to the red monuments without a fight!) The Archer then returned his Merchant while the Lion used a catastrophe on a red tile to weaken the Potter Merchant before revolting. Personally, I want my catastrophe tiles to give a better pay-off before using them (such as splitting a kingdom before attacking) but I guess the Lion was desperate. Now, his two actions only earned him one red point.
- Potter: King to E9, Black to D9
- Bull: Farmer to G3 REVOLT (1 VS 1)
- Bull places 3 support
- Archer places 0 support
- Bull wins with 4 vs 1 and removes Archer F4
- Bull: Priest to F4
- Archer: Merchant to H4, Market to F5
- Lion: Catastrophe to J8, Merchant to H7 REVOLT (2 vs 1)
- Lion places 2 support
- Potter places 0 support
- Lion wins with 4 vs 1 and removes Potter J9
Score: Red 6, Black 7, Green 9, Blue 6, Treasures 3
Round 12
My next hand offered me two blue tiles and since there was no Farmer nearby to attack, I simply played them to earn more blue points. Since my two weakest colors were both connected to monuments, there was no reason to take risks. The opponents were surprisingly passive and played tiles for points as well. Only the Lion Merchant attacked from their strong central position but fortunately the Western monuments were more tempting than the Eastern tiles so I was spared the wrath of the Lion - for now.
- Potter: Black to D10, Black to C10
- Bull: Blue to C1, Blue to C4
- Archer: Farmer to F10, Blue to G10
- Lion: Black to F6, Green to G6 Green WAR (6 vs 1)
- Lion places 0 support
- Archer places 0 support
- Lion wins with 6 vs 1 and removes Archer F4
Score: Red 8, Black 7, Green 9, Blue 9, Treasures 3
Round 13
Once again, I found myself with a difficult hand and a difficult position. Most of my leaders had stronger opponent leaders ready to attack (the Potter Priest with 11 vs 6, the Lion merchant with 7 vs 3 and the Lion Farmer with 7 vs 3). Only my King was stronger than the opponents. Given that, my next move was obvious, particularly since the Potter went for a (failed) revolt against the Archer and a monument building instead of attacking. Perhaps they already had enough red tiles?
Anyway, an immediate attack would probably give me a black victory but definitely a green loss. Fortunately, the Potter had just given me a better place for my Merchant so I moved it to the newly built black/green monument first and then attacked the Lion King. Notice how I attacked through a "longer route" with K5 instead of the "shorter route" with H3. The reason was that I wanted the war to end after defeating the Lion King, otherwise my Farmer would have to fight the stronger Lion Farmer. My King did indeed win the war and removed the Lion King, after which the kingdoms were no longer connected and the war ended. Always visualize the positions after the different war results before starting a war!
With that, the round became very profitable (a black victory and all remaining leaders connected to monuments) and I hoped I could afford losing a war or two since the game should end sooner or later. To my surprise, it was ended sooner by the Archer, who discarded their hand twice so that the tiles ran out.
- Potter: Farmer to E11 REVOLT
- Potter places 2 support
- Archer places 2 support
- Archer wins with 3 vs 3 and removes Farmer E11
- Potter: Black to C9, Black/Green monument C9:D10
- Bull: Merchant to E11, Market to K5 WAR
- Bull selects Black war (4 vs 2)
- Bull places 1 support
- Lion places 0 support
- Bull wins with 5 vs 2 and removes Archer G5
- Archer: Discard 5 tiles, discard 6 tiles, unable to refill END OF GAME
Score: Red 10, Black 10, Green 10, Blue 10, Treasures 4
The final result was "a perfect 10" with 10 of each color and 3 treasures (10 points), followed by the Archer (10-7-10-6-3=8), the Lion (4-6-7-4-3=5) and the Potter (10-5-6-3-1=4). Sometimes I was lucky with the tiles (the right colors when I needed them) and sometimes I was lucky with the position (opponent actions that fit my needs). There is certainly an element of luck in Tigris & Euphrates but I do think that the ability to make the best use of the tiles and positions that Destiny gives you is the key to win more often than you lose.
What do you think? Did I find the best moves or were there better options? Should I have been more aggressive or did I take too many risks? One of the many great things about Tigris & Euphrates is that there are no straight paths between the two rivers.
Thank you for reading!
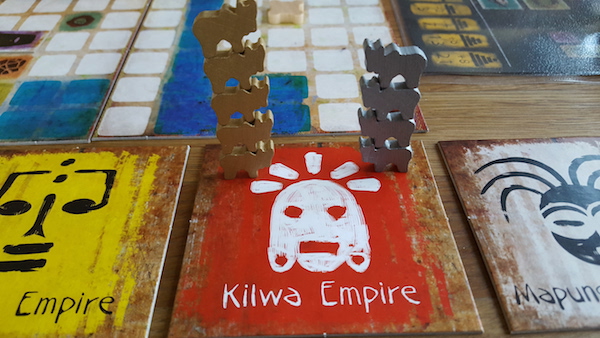
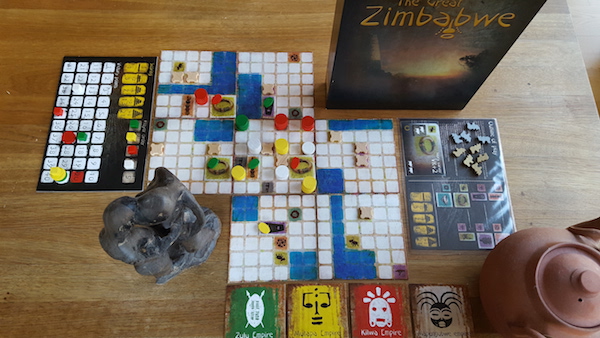
The Great Zimbabwe (äger)
| Bakgrund: | Bygg monument i gamla Zimbabwe |  |
| Spelare: | 2-5 (bäst för 3-4) | |
| Speltid: | 90 minuter | |
| Svårighetsgrad: | 40% |
Allmänt
Splotter var länge något som jag associerade till ett mycket fint men mycket sällsynt vin - något som alla konnässörer känner till men aldrig prövat. Men tack vare nytryck har deras spel blivit tillgängliga, om än till ett högt pris. Så får man valuta för pengarna?
Ja, deras rykte om sig att designa djupa och interaktiva spel bevisas mycket väl i det här spelet om handel och monumentbyggande i södra Afrika. Det finns många intressanta och tveeggade beslut här. Du bjuder på turordningen men ju mer du bjuder, desto mer får dem som inte har lika mycket att bjuda med och ger dem därmed en chans att hinna ikapp. Du kan välja gudar och specialister för att få tillgång till särskilda fördelar men det höjer också ribban för att vinna spelet. Du behöver resurser för att bygga ditt monument men dessa resurser kan bara nå dit via en lång och interaktiv kedja:
- Du behöver en teknologi för att bygga en hantverkare (något som också höjer ribban för seger).
- Hantverkarna behöver resurser inom sin räckvidd (något som är begränsat varje runda).
- Resurserna behöver transporteras till ditt monument (eventuellt i flera omgångar om hantverkarna i sin tur behöver resurser).
- Hantverkarna behöver betalas med ett pris som sätts av spelarna själva (och som kan betalas till motspelare om nödvändigt).
Resultatet blir ett komplext nät av beroenden där spelarna ömsom försöker locka motspelarna att köpa sina resurser för att finansiera sina egna monument och ömsom försöker blockera motspelarnas tillgång till resurser för att färdigställa sina egna monument först. Ett exempel på det senare är att bygga en masktillverkare som behöver trä som resurs och därmed sänka värdet på trä så att det inte längre kan användas i monumentbyggande. Lägg till spelvärdet de underbara illustrationerna som bygger på autentisk afrikansk konst och du har ett spel som är väl värt pengarna!
The Great Zimbabwe - What's so Great about Zimbabwe? (engelskspråkig recension för publicering på Boardgamegeek)
My introduction to Fine Gaming
There are games and there are games. Some games are seen everywhere and played by everyone while others are surrounded by mystique and ritual. It's like comparing a mass market soft drink to a vintage wine - some are easily available and give an instant but quickly forgotten satisfaction while others provide a rare and unique experience. To the latter category belong games by Splotter Spellen.
I was first introduced to Splotter Spellen when a collector solemnly produced a copy of Roads & Boats and carefully unwrapped it from its protective foil to present what superficially looked like a set of uninspiring components. With a playing time and a price tag triple to that I was used to, I remained lukewarm to his enthusiasm. The absence of Splotter Spellen games on all my game meetings seemed to further confirm my skepticism.
But the more I learned about games, the more did games from Splotter Spellen stand out in the discussions about great games. Could such a game fill a gap in my already tight collection? Perhaps, there was one game that was highly praised by several influential geek buddies (cymric 9, chally 9, clearclaw 8, pincao 8) with a reasonable playing time (90-150 min) and weight (3.7). When I was offered to buy a used copy from the above mentioned collector (sleeved of course!), it was time to discover the world of Splotter Spellen!
The Economy of The Great Zimbabwe
The Great Zimbabwe is a good representant for the type of mechanics that I've come to understand characterize many games from Splotter Spellen: build a shared infrastructure and use it to make more profit than your competitors. In The Great Zimbabwe, the shared infrastructure consists of craftsmen, who turn resources into goods, which then are used to erect monuments. The higher the monument, the greater your score. Let us look closer at the different links in this economy.
The Assets
The resources are given at the setup (clay, wood, ivory and diamonds). The game board consists of a number of game mats with 6x6 squares, of which some contain resources.
The craftsmen (potters, wood carvers, ivory carvers and diamond cutters) are placed by the players themselves. They must be placed within reach of resources (no more than 3 squares away).
The monuments are also placed by the players themselves and they should be placed within reach of craftsmen (to enable additional levels). Each additional level requires 1 unique good but increases your score exponentially (1 for level 1, 3 for level 2, 7 for level 3 etc.). The higher you want your monument to be, the more craftsmen do you need in its vicinity.
The reach to a craftsman (but not to a resource) may be upgraded by using a monument as a hub, thus enabling the creation of longer routes to get those precious goods. Connected sea squares work as one big "hub", making adjacent land squares particularly interesting for the placement of craftsmen and monuments.
The Limits
Naturally, this economy does not have unlimited assets so let us continue by looking at the costs and the other limits of the zimbabwian economy. Thematically, all prices are paid in heads of cattle.
- Craftsmen cost cattle but earn victory points when placed. There are a limited number of craftsmen in the game.
- Craftsmen cost cattle to use (paid to the player who placed the craftsman). The resources used by the craftsmen are free but limited throughout the round, i.e. once used it may not be used again until the next round.
- Monuments cost 1 cattle to use as hubs (paid to the supply).
The Basic Challenges
This simple economy sets the stage for an interesting interaction between the players. You must ensure that you have access to both cattle and craftsmen to upgrade your monuments. Perhaps you want to place a craftsman that only you can reach to secure goods? Perhaps you want to place a craftsman within reach for the other players to secure cattle? Or perhaps you will focus only on craftsmen or only on monuments? The designer could have stopped here and have a simple, almost solvable, puzzle. But no, he decided to throw just the right amount of spanners in the works to make the game more challenging.
The Additional Challenges
The Increased Victory Requirements
The victory requirements are not fixed but can change during the game and be different for different players. One example (and more will follow) is the acquisition of a technology, which is a prerequisite for placing certain craftsmen. The technology is free but it increases the number of victory points you need to win. This adds some interesting challenges.
First, you can choose between a "cheap" strategy (ignore the "engine" and keep the victory requirement low) or an "expensive" strategy (build an "engine" and accept that the victory requirement will be harder to reach). Remember that the bulk of your victory points will come from monuments and although higher monuments increase your score exponentially, so will their cost since they require more unique resources.
Second, it's harder to tell who is in the lead. Is it the player who scores little every turn and is close to the low victory requirement or is it the player who scores a lot every turn but is far away from the high victory requirement? Or, in gamer language, who can you afford to help and who should you screw?
The Prices
The prices of the craftsmen's goods are not fixed but rather set by the players to a value between 1 and 3. This is supply and demand in its purest form. What will you earn the most from, low price and high volume or high price and low volume? At what price will your benefit from cattle be greater than your opponents' benefits from goods? And what happens if an opponent places a competing craftsman? To make your decision even more agonizing, once set prices can only be increased, never decreased.
The Secondary Craftsmen
Do you think that games like Power Grid and Santiago, where you can deny opponents resources, are evil? Then you haven't met the secondary craftsmen of The Great Zimbabwe. A secondary craftsman will use a resource AND a good from another ("primary") craftsman. To make a more valuable good? No, to make goods from the primary craftsman useless for monuments! A well placed secondary craftsman can make goods more expensive and/or rarer and completely cripple another player's economy. So much for product development!
The Bidding
Given that the resources are limited each round, turn order is important so naturally there is a game around that as well. However, the bidding of The Great Zimbabwe is not only to reward the highest bidder but also to distribute cattle between the players. It accomplishes this by having the bids placed on certain spaces (1st cattle on 1st space and so on) and give back the cattle to the players afterwards (1st space to the highest bidder and so on). Do you really want to bid high, knowing that most of your bid will end up with other players afterwards? Did I say that The Great Zimbabwe was evil?
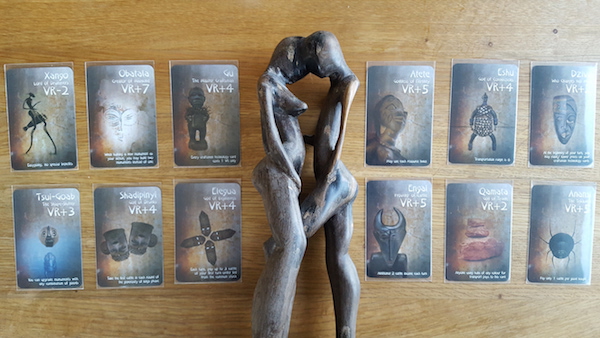
The Specialists and the Gods
I'm not a fan of cards in games. They often dictate your strategy randomly and lead to a gameplay where players look more at card tableaus than the board. But not so in The Great Zimbabwe.
First, the cards are limited - only 5 specialists and 8 of 12 gods are used in a game and known to all players in advance. Thus, their potential influence on the game is transparent and predictable.
Second, the cards are not random but rather chosen by the players themselves (at a cost of increased victory requirements). Thus, you can adapt your strategy to your choice of a specialist and/or a god and vice versa.
Third, given the interlocked economy, the other players' choices will have a profound impact on the gameplay and something that you must take into account in your own strategy.
Let's look at some examples:
- Elegua and Engai: The player gets cattle from the supply. This can be expected to increase the overall number of cattle in the game.
- Eshu, Qamata: The players get an increased range/paid when hubs are used, This can be expected to increase the distances in the game.
- Gu: The player gets cheaper innovations. This can be expected to increase the number of craftsmen on the board.
The result is that the presence or absence of a specialist or a god can drastically change the game from play to play. New players are spared the surprise of a god unknown to them while experienced players are rewarded by knowing how a god known to all players may impact the game. In my book, this is an example of cards done right in a game.
So what's on a Player's Mind?
There is a lot to think of in a game of The Great Zimbabwe.
First, we have the bidding. If I bid high, will I have enough cattle left to do what I want to do on the board? If I bid low, will there be enough left for me to do on the board after then other players have taken their turns?
Second, we have the choice of a god and/or a specialist. Which powers are good in this particular game and are they worth the increased victory requirement? Perhaps I should wait one more round before I decide, but what they are snatched by another player before then?
Third, we have the choice between craftsmen or monuments. If I choose craftsmen, should I help myself to cattle (from the other players using my craftsmen) or goods (by using my craftsman myself)? If I choose monuments, I increase my score in the short term but will I have enough cattle to upgrade them in the long term?
Fourth, if I choose craftsmen, which should I choose and where should I place him? Is proximity to many resources or many craftsmen best? Is a low price or a high price best? Which other craftsmen and prices are there on the board?
Fifth, if I choose monuments should I focus on few large monuments or many small monuments? Few large monuments increase my score quicker but are there enough resources? Many small monuments are cheaper but is there enough time?
Sixth, there is a question about which craftsmen and resources I should use. If I use my own craftsmen, I will get the money back next round. But perhaps it's more important to use craftsmen that other players need to deny them goods?
Seventh, there is another question about when is the right time and where is the right place for a secondary craftsman. To give myself more cattle or goods that only I can get or to block other players from using primary craftsmen? Or both?
Eighth, if I'm falling behind, how can I best wreck the economy for everybody else to catch up? (This is one of many things that I'm still learning.)
So many things to think about, yet so little time - a game typically only last 6-8 rounds!
The Components
Finally some words about the art. I hinted earlier that Splotter Spellen has often been bashed for poor components. Although the components of The Great Zimbabwe may be a bit flimsy, they do the job and the symbolic icons and images, based on authentic African art, is simply beautiful. I would certainly not trade the components for plastic miniature cattles.
Final Words
Games are so often described as having interlocked mechanics and subtle interaction that the words begin to lose their meaning but The Great Zimbabwe manages to revitalize them. This is not a game about taking an action that perhaps another player wanted to take. No, this is a game of perfect information where everything that happens does so because of the players' actions. You cannot directly attack other players but you can "subtly" destroy their very foundations. Yet, all those mechanics are so well tuned and balanced that the game itself resists all attempts break it. As a designer, I can't help wondering how many hours of testing that went into The Great Zimbabwe to reach this perfection. Jeroen Doumen and Joris Wiersinga have created a masterpiece and I bow my head humbly.
Strategi
The Great Zimbabwe är i mångt och mycket ett spel där man måste gripa tillfällena. En strategidiskussion skulle således behöva utgå från ett oräkneligt antal kombinationer av gudar, specialister och positioner på brädet för att genom exempel bygga en strategisk förståelse och jag erkänner villigt att jag har långt kvar. Dock finns det några grundprinciper att luta sig mot som ny spelare.
För det första måste man fundera på hur man ska få en inkomst, något som tas upp redan i reglerna. Med lägst inkomst kommer man så småningom att få spela sist i varje runda och därmed riskera att bli utan resurser för uppgraderingar.
Vissa gudar och specialister ger inkomster men till priset av en ofta kraftig höjning av poängmålet. Det alternativet bör kombineras med en plan för hur spelet ska kunna hållas vid liv så länge som möjligt - precis som i många andra ekonomiska spel behöver man tid för att hinna omsätta mycket pengar i mycket poäng.
Hantverkare är en annan väg till inkomster, särskilt om de kan byggas nära många resurser och därmed användas många gånger. Höjningen av poängmålet är i regel lägre jämfört med gudar och specialister men i gengäld kostar de tid att bygga, tid som behövs för att bygga och uppgradera monument. Det kan därför vara en idé att avvakta med att bygga dem så att man har råd att bygga två på en gång. Då kan man också bättre bedöma vilket pris man ska sätta på dem. Går man för lågt så riskerar man att hjälpa motståndare att bygga billigt och går man för högt så riskerar man att motståndarna inte använder dem.
En annan viktig fråga är vilken gud man ska välja. Här kan det vara klokt att ha lite is i magen och avvakta med valet tills man ser hur spelets ekonomi utvecklar sig. En ekonomi med många billiga resurser kan gynna en gud som Xango (som ger lägre poängmål) medan en ekonomi med få dyra resurser snarare gynnar en gud som ger god ekonomi.
Slutligen så är det viktigt att hålla motståndarna under uppsikt och ständigt fråga sig vem som leder (vilket inte är detsamma som den som är närmast sitt poängmål utan den som har störst chans att uppfylla det) och när och hur man i så fall bör stoppa denne. Ett sätt att göra detta på är att ta de resurser som spelaren i fråga behöver, ett annat att bygga sekundära hantverkare för att indirekt ta dessa resurser. Dock måste sådana åtgärder kombineras med en plan för hur man själv ska tjäna på den nya ekonomiska situationen.
Som synes är strategidiskussionen allt annat än konkret och det bästa är att helt enkelt spela många partier och efteråt fråga sig varför en viss spelare vann. Tänk på att The Great Zimbabwe inte har någon slump efter att spelet är uppsatt och att varje vinst kan ledas tillbaka till spelarnas val av handlingar.
Minnen
The Great Zimbabwe blev min inkörsport till Splotter Spelles tunga men fascinerande spel. Precis som fallet är med Tigris & Euphrates så är The Great Zimbabwe ett spel som det är svårt att hitta spelare till. Lyckligtvis så är graden av fullföljande betydligt högre på online-sajten Boardgamecore.net. Dessutom har turneringarna ett högre spelarantal genom alla omgångar och trots det hårda motståndet lyckades jag gå hela vägen till slutseger.
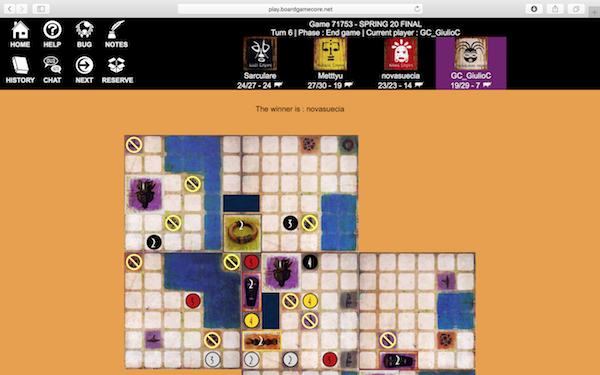
Efteråt sammanfattade jag finalen på Boardgamegeek.
- Start: As others pointed out, my favorite god Xango was missing. Thus, a low-cost strategy would not be likely to work but which god to choose instead?
- Turn 1: Sarculare chose Elegua, Mettyu chose Shadipinyi, and GC_GiulioC chose Herd. In addition, both Ivory Carver and Potter were added the first round with price 2. A lot of cows could be expected in the game but where was I supposed to get mine? I decided to build craftsmen as well but wait a round to be able to build two in one go.
- Turn 2: I managed to add two Wood Carvers with price 2 and access to two and four resources respectively, although the latter was a bit distant from the opponent monuments. However, I delayed my choice of a god to keep all options open. I considered either Gu to add second level craftsmen or Tsui-Goab to take advantage of my distant "private" Wood carver.
- Turn 3: I didn't want to commit to a god yet so I built a third monument to have more upgrade options in case Tsui-Goab would be worshipped elsewhere. (GC_GiulioC hadn't chosen a god either.)
- Turn 4: No level 2 craftsmen yet so I started upgrading two of my monuments. So far, I hadn't bid anything for turn order yet and by using my own craftsmen I managed to keep my economy afloat.
- Turn 5: What happened? In spite of going last in turn order, I was able to upgrade all three monuments and bring my score to 19/23. Now I was only one upgrade from victory but so was Mettyu and I was last in cows...
- Turn 6: To bid or not to bid? After Mettyu's bid of 1 and Sarculare's bid of 3, I could bid 10 to be sure to play before Mettyu but would I be able to afford the expected level 2 craftsmen afterwards? Since GC_GiulioC had passed and the other players could only consume 11 of the 13 resources available, I decided to pass again and save my cows. If things would go to worse, I would still be able to turn to Tsui-Goab and use my distant Wood Carver. However, the expected level 2 craftsmen never turned up. Since Sarculare took all Ivory, Mettyu was forced to take the Shaman and add more, but that left one Pottery for me. Thus, I could upgrade my third monument to level 3 and win with 23/23.
Reef Encounter (äger)
| Bakgrund: | Kamp mellan korallrev |  |
| Spelare: | 2-4 (bäst för 3-4) | |
| Speltid: | 90 minuter | |
| Svårighetsgrad: | 40% |
Allmänt
Reef Encounter är ett fantastiskt ekosystem av sammantvinnande mekanismer. Det är i grunden ett spel där du lägger ut brickor men med det tillägget att det krävs flera steg för att tjäna poäng och såväl brickornas styrka som värde kan manipuleras av spelarna.
För att lyckas måste du planera flera turer i förväg, både dina och motståndarnas, och du kan aldrig vila eftersom du bokstavligen måste äta upp din "ekonomiska motor" och börja om igen för att fortsätta få poäng. Lägg till detta ett vackert och färgstarkt spelbräde och du har ett nästintill perfekt spel.
Reef Encounter - A Beautiful Depth (engelskspråkig recension för publicering på Boardgamegeek)
The First Impression: Deceiving Characteristics
There are many characteristics usually associated with bad game designs. "Too many decisions" is one, referring to games that overwhelm the players with options and lead to analysis paralysis. "Convoluted" is another, referring to games where the link between an action and an objective contains so many steps that the challenge is not to do the right things but to do things right. "Pasted theme" is a third, referring to games where the theme does not help the players understand and apply the rules but rather add to the confusion. Nobody would want to design such a game, let alone play it. Or?
In Reef Encounter, you simulatenously play a coral, a parrot fish and four shrimps, which choose between ten actions (some of them in any order and any number of times) to pick, place, change strength of, change value of, capture and convert resources into victory points. Does this sound fun or even comprehensible? Probably not, but let's not dive into unknown waters straight away but rather enter the depth step by step.
The Objective: "Three-dimensional" Scoring
The objective of Reef Encounter is simply to accumlate victory points. Victory points come from polyp tiles in five different colors. Polyp tiles are grouped by color to form corals, collected during up to four scoring actions and multiplied by a number between two and five in the final scoring. Does this scoring sound arbitrary? On the contrary, you as a player have control over each part of this scoring.
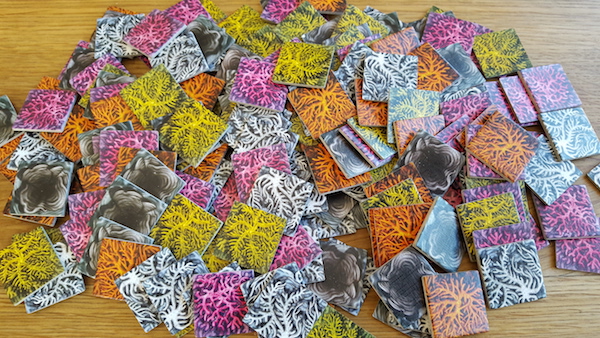
- The polyp tiles that you collect are laid out by you (or, in certain cases, by your opponents). Do you want to score through quantity? Build your coral as big as possible before collecting the polyp tiles! But will your opponents leave your coral alone?
- The scoring actions are chosen by yourself and a player's fourth scoring action triggers the game end for all players. Do you want to score many times and end the game early? Choose the scoring action as soon as you can. But then you won't have time to build big corals.
- The value of the polyp tiles can be manipulated by you. Have you collected (or intend to collect) many white polyp tiles? Then spend actions to increase the white value. But then your opponents may either try to decrease the white value or take advantage of it by collecting more white polyp tiles than you.
This "three-dimensional" scoring opens up many strategic and tactical opportunities. Should you focus on one color and maximize it? Should you stick to your chosen color or is it best to abandon it and focus on another color? Is it best to increase your own score or to decrease your opponents' score? There are many examples of simpler games that manage without much else and where the entire game is about knowing when to collect and when to manipulate. However, Reef Encounter has more up its sleeve, namely the "too many" and "convoluted" actions. But to understand the actions, we must first get to know the resources for accomplishing the actions so let's introduce the inhabitants of the coral reef.
The Resources: The Inhabitants of the Coral Reef
In Reef Encounter, you have several resources at your disposal. First, you have one parrot fish. Actually, this is just a container used for storing your collected polyp tiles and hiding your score from the other player.

Second, you have four shrimps. They are used to mark which corals that are owned by you and there may never be more than one shrimp on the same coral. The shrimps also help defending your corals against other corals. We'll get back to how corals attack each other later.
Third, you have larva cubes in the same colors as the polyp tiles. They are acquired during the game and required to build corals - play one yellow larva cube to place yellow polyp tiles etc.
Fourth, you have alga cylinders in different colors. They are also acquired during the game and required to change the scoring values - play one red alga cylinder to change all polyp tile values marked with red etc.
Fifth, you have the polyp tiles. Their function depends on whether they are kept hidden behind your screen or open in front of your screen. They may always be used as building material for your corals but the ones in front of your screen may also be used as a "currency" to acquire the larva cubes and alga cylinders.
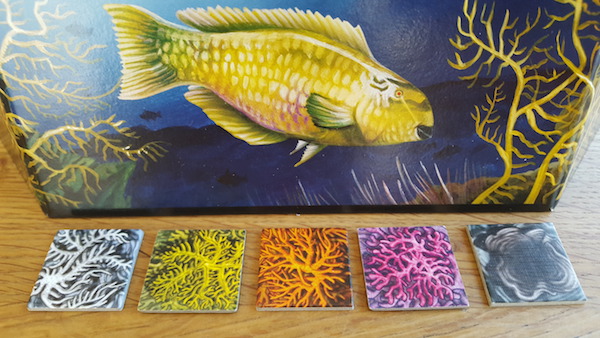
I admit that you have to be a marine biologist to appreaciate the thematic links so let's move on to the actions. Rememeber there are ten of them so take a deep breath before we dive into them.
The Actions: The Building and Consumption of Corals
The fixed actions: Score and refill polyp tiles
The first and the tenth actions are special. They must be taken as the first and the last action respectively, that is you may not take any other action before the first one, nor any more actions after the last one.
The first action lets you remove one shrimp from the board together with all polyp tiles of its coral. Four of the polyp tiles are discarded but the remainder goes to your parrot fish. This is the only action that lets you place polyp tiles in your parrot fish and hence add them to your final score. It's not an easy decision, though, since your shrimp is also discarded and hence leaves you with less influence on the board.
The tenth action lets you take resources from a supply that is refilled so that you always have one larva cube and one to three polyp tiles to choose from and place behind your screen. This is the only action that lets you place polyp tiles behind your screen and helps you "fuel up" your engine for the next round.
Wait, wouldn't it be easier to take polyp tiles first and score polyp tiles last? Yes, but Reef Encounter is not supposed to be an easy game!
The flexible actions: Acquire and use resources
The remaining actions are the missing links between the polyp tiles behind your screen and the polyp tiles in your parrot fish. They may be taken in any order and some of them may even be taken any number of times. Play them well and you will play Reef Encounter well.
Shrimp actions
The 4th and the 5th action are used to move the shrimps. The 4th action may only be taken once to introduce a shrimp to a board while the 5th action may be taken any number of times to move around the shrimp on or between the boards.
Larva cube board actions
Action 2 and 3 may only be taken once each and lets you play a larva cube, which in turn lets you place polyp tiles to the board (from behind or in front of your screen). One reason to do so is to build large corals for your scoring action. However, there is another reason with important strategic implications: replace already placed tiles and place them in front of your screen. This is the only action that lets you place polyp tiles here but there are some preconditions for doing so.
- First, the attacking coral must consist of at least two polyp tiles.
- Second, the defending polyp tiles must not be defended by a shrimp. (A shrimp defends all orthogonally adjacent polyp tiles.)
- Third, the color of the placed polyp tile must be stronger than the color of the replaced polyp tile. The relative strength between colors is random at start but can be manipulated with the 7th action, the Alga cylinder action.
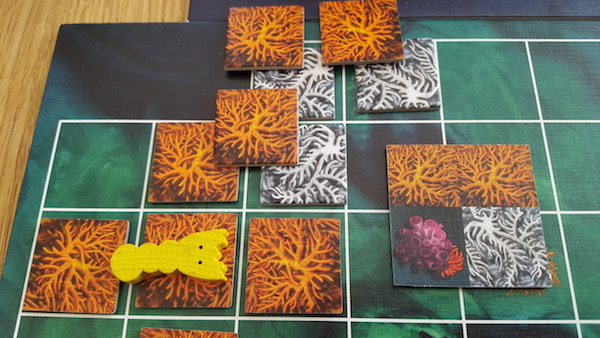
Currently, orange is stronger than white as shown by the tile with two white squres and one orange. Yellow (or any other player for that matter) may expand the orange coral at the expense of the white coral and place the white polyp tiles in front of her screen.
Alga cylinder action
Action 7 lets you exchange a polyp tile in front of your screen (I told you they were powerful!) for an alga cylinder and then use it to change the previously discussed polyp tile values. Not only does this change the value of a certain polyp color but also its strength. Hence, a well timed alga cylinder can suddenly change the strength balance on the board in your favor.
A red alga cylinder will flip the two red tiles. This will cause orange to become stronger than white and white to be stronger than gray.
Larva cube exchange actions
Action 6 and 8 may be taken any number of times and let you exchange larva cubes for polyp tiles and vice versa. Those actions may be good to get that missing tile or cube to execute your grand strategy.
Pass action
There is a 9th action as well but it's simply a pass action if you don't wish to take any of actions 2-8.
Are you about to drown? Grab a snorkel set and enjoy!
Do you feel overwhelmed by the game so far? Let's reiterate what you have to do and you'll see that it's quite straightforward.
- Get polyp tiles and larva cubes in the same color. They are needed to place polyp tiles on the board.
- Get your shrimps on the board. They are needed to protect your corals.
- Get alga cylinders. They are needed to change the value and the strength of the polyp colors and you pay for them with polyp tiles from in front your screen.
- Get polyp tiles in front of your screen, They are needed to acquire alga cylinders, larva cubes and polyp tiles and you get them by placing polyp tiles of stronger colors over polyp tiles of weaker colors.
- "Eat" corals that are big enough. They will earn you victory Points in the end.
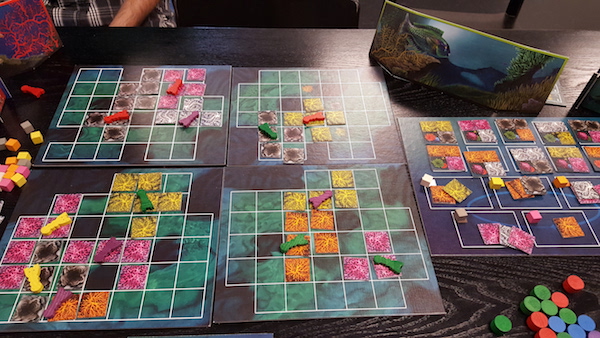
In this game, Yellow has already scored twice, proceeded to expand over her own pink and gray corals back and forth to get tiles in front of the screen, and eventually won.
In this respect, Reef Encounter is much more straight-forward than your ordinary heavy euro game. This is not a game about finding the most optimal way of converting resources into victory points. Instead, you must carefully manage your shrimps, polyp tiles, larva cubes and alga cylinders to be able to accomplish your goal: a strong and valuable coral. The slow way to do so is to rely on the 10th action to collect larva cubes and polyp tiles but you'll never win in this way.
Instead, you must collect and maintain a set of resources that gives you the tactical means to execute your strategy. Let's say that you have many white polyp tiles and want to build a strong white coral. Should you use your 10th action to collect a white larva cube, although that won't give you any more white polyp tiles? Not necessarily. It may be better to collet a pink larva cube, use pink polyp tiles to replace white polyp tiles, then exchange one of those tiles for a white larva cube. You will now be able to place white polyp tiles both from behind and in front of your screen AND you've made the white color more valuable.
This is only one of many examples of the strategic and tactical opportunities of Reef Encounter. It's a game that gives opportunities to manage your resources and change the board conditions in your favor rarely seen in other games. The rise and fall of the corals remind about Tigris & Euphrates, the value manipulations is a common element in economic games like Imperial and the shifting power balances is not unlike the survival of the fittest in Dominant Species. The way Reef Encounter combines and simplifies those elements turns it into a unique experience. Reef Encounter may not be the easiest game to grasp but its depth certainly makes it worth exploring!
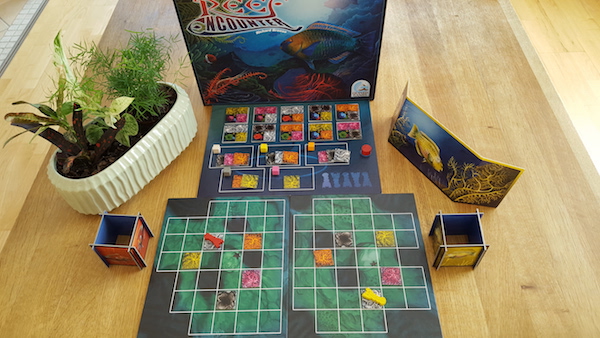
Strategi
Strategi kommer när jag spelat mer.
Minnen
Reef Encounter blev det första spel som jag köpte på "rekommendation" av så kallade geek buddies på Boardgamegeek då det var ett spel som rankades högt och liknades vid Tigris & Euphrates av flera av dem. Tyvärr har också detta spel svårt att hitta spelare och då det bara finns på mindre online-sajter är tillgången och kvaliteten på motståndare begränsad. Förhoppningsvis ska jag inte behöva vänta länge på fler minnen av själva spelet.
Automobile (äger)
| Bakgrund: | Producera och sälj bilar |  |
| Spelare: | 3-5 (bäst på 3-4) | |
| Speltid: | 2 timmar | |
| Svårighetsgrad: | 50% |
Allmänt
Jag har en svaghet för ekonomiska spel där spelarna agerar på en gemensam marknad som fluktuerar beroende på deras egna handlingar. Av den anledningen kickstartade jag Brass och medan jag väntade fick jag en chans att förvärva den här mer okända Wallace-titeln. Jag lockades genast den enkla men eleganta simuleringen av bilindustrin.
Automobile ger spelarna en svår balans mellan att spendera för att leverera de allra senaste modellerna och att spara för att ha råd med den nödvändiga utvecklingen för att fortsätta leverera på topp. Genomförs det här genom komplexa och pillriga marknads- och utvecklingstabeller? Nej, dra helt enkelt brickor (där du bara får se dina egna) för efterfrågan, spendera utvecklingskuber för att bygga nästa generation av fabriker och leverera bilar med början från den mest moderna fabriken. Det är det hela! Nåja, det är lite mer men jag förstår varför Wallace betraktar Automobile som ett av hans bästa spel.
Automobile – Ten small decisions are greater than one big (engelskspråkig recension för publicering på Boardgamegeek)
Introduction
Imagine a situation where you have to evaluate return on investment, free cash flow and market segmentation in the competitive and evolving car industry. A boring routine task at work? An even more boring assignment at business school? No, a surprisingly good time at a game of Automobile. The designer Martin Wallace has managed to collect several financial decisions, simplify and streamline them, and put them all together in a medium heavy game. One would almost think that Automobile was designed to teach future executives how to manage a manufacturing company.
The basics
The goal of Automobile is simply to earn the most money. To do so, you invest in production facilities, produce cars, invest in marketing activities and sell cars. This sounds like nine out of ten other euro games out there, where you build an engine, turn resources into victory points, and rinse and repeat until the runaway leader wins. However, every little link in this value chain has a special mechanic that turns the whole into something completely different. If the mechanic hadn’t been there, you wouldn’t have noticed that anything was missing, but once you’ve seen it in operation, you can’t possibly imagine the game without it. Similar to a well manufactured car, it’s not one big thing that stands out but the way the many small details work together. Let us review those seemingly small design decisions to see how they support the game and why they do it so well.
The investment action
One available action is to invest in a factory space. This could have been one big decision where you are free to set how much to pay for production, what to produce and how much to produce but not so in Automobile. Instead, the investment action has been broken down into several small and limited decisions, each of which only has a few discrete options, but where all those decisions together have a great impact on your strategy.
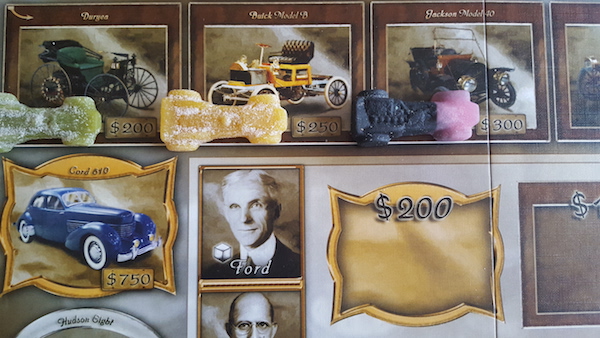
The factory spaces are neatly arranged in a clockwise pattern around the game board where each new space introduces a more modern (and more expensive) car model. This looks a bit like, although I shudder to mention the game in the same sentence as Automobile, how the streets in Monopoly are organized. Rest assured that there are no other similarities between those games!
Each factory space has a fixed price and a fixed car model. So you have no choice but to pick the first available factory space and pay the fixed price? Not quite. To give you a few small decisions, Martin Wallace introduced two additional currencies besides money: R&D cubes (white) and Loss cubes (black).
The pseudo currencies – and the action to get them
The R&D cubes allow you to jump empty factory spaces and pick more modern ones (that is, more modern than your competitors). The loss cubes are incurred if you are happy with picking the first empty factory space, even if that leaves you behind your competitors. You will not have to worry about acquiring and spending R&D cubes (two R&D cubes cost you one whole action) but your loss cubes will cost you money each round.
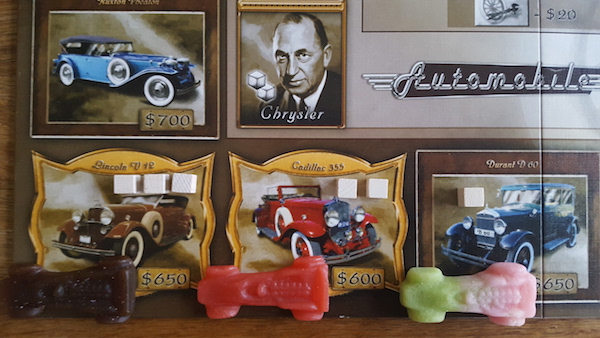
But wait, wouldn’t the game have been simpler with just one currency to immediately pay for R&D and losses rather than going via those pseudo currencies? One answer is that the cubes remove some fiddly cash transactions but more importantly, they serve as a limited currency that limit certain transactions and offer long term decisions. If you decide to jump factory spaces, you have to acquire white cubes first. Since white cubes are less abundant than money and the cost for jumping increases exponentially (one space costs one cube, two spaces cost three cubes and so on), you will rarely have the choice of jumping more than one or two spaces. If you want to keep a less modern factory one more round, you can’t take the entire loss this round but have to take into account future losses as well. A crazy design idea in theory but brilliant in practice.
The production action
Another available action is to produce cars. The number of cars you may produce must be within the boundaries of your production capacity, which in turn is determined by the number of factories you placed in the factory space during the investment action. (A factory space can have between one and three factories.) Take for example a factory space for middle-class cars with two factories. This may produce between four and seven cars – no more, no less. Again, we see an action that consists of small decisions with discrete options, some taken now and some taken in earlier actions. So how many should you produce? That depends on how many you will sell and that number is partially known and partially influencable.
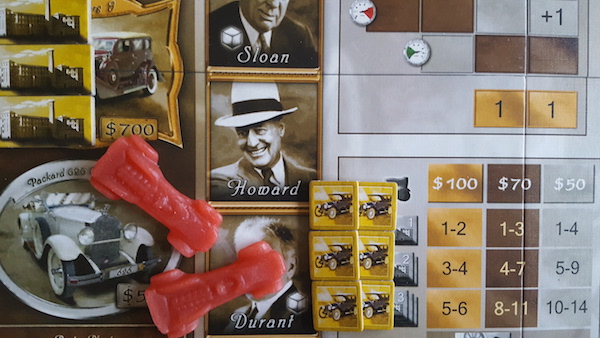
The market and the marketing action
At the beginning of the round, the players draw demand tiles with a value between two and five. At the end of the round, the total value of all the players’ demand tiles determine the total demand for all players. This means that you have a limited knowledge about the demand but also that the demand cannot fluctuate too much.
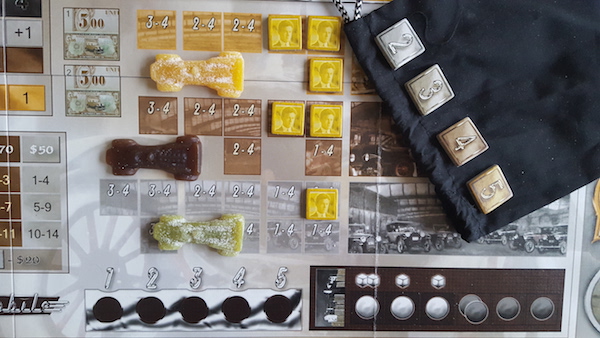
There is also an action available that lets you place one to three salesmen, each of which will let you sell one car in addition to the above demand. On the other hand, this means that you have less cars to cover the total demand so if you plan to sell through salesmen, also plan to increase your production, which you do in the production action, which you prepared in the investment action…
The market segments
OK, we’ve seen how the Automobile value chain requires many small decisions but does one round really differ from another? Oh yes, Automobile doesn’t simulate a mature market but an evolving one. We’ve already mentioned middle-class cars and there are actually two more market segments: premium-class cars and mass-market cars. Each segment differs in terms of investment cost, production cost and production capacity. More importantly, the demand for those cars fluctuate from round to round and consequently the players’ supply of those cars will shift as well. When is the right time to move to the mass-market segment? Do you have any competition in the premium-class segment? Is there still any demand for your old middle-class model? No matter how well your “engine” works in one round, it will be sadly obsolete the next round if you don’t pay attention to the evolving market.
The dreaded loss cubes – and the action to get rid of them
But how can an engine become obsolete, you may ask? Can’t I just keep producing more cars and placing more salesmen to earn more money to produce and place even more? No, the dreaded loss cubes prevent you from this. We’ve already mentioned how less modern factory spaces accumulate loss cubes. So do producing cars that don’t get sold on the limited market or placing salesmen that can’t be allocated to the limited selling spaces. In essence, the loss cubes are a simple but thematic mechanic to punish you for what would be a bad decision in real life. Remember that loss cubes are kept through the rounds and cost you money each round.
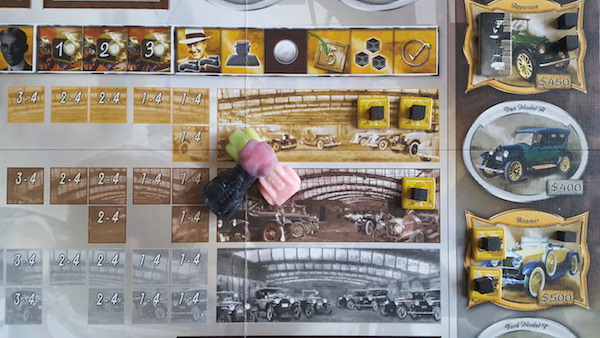
But don’t despair, there is an action that saves you. By closing a factory space, not only do you remove a source of loss cubes but you also get to discard half of your existing loss cubes. On the other hand, you only get half of your investment back so you want to make sure that you get a return on your investment before you trash it.
The number of actions
Automobiles wouldn’t be a euro game if you would have enough actions to do all this. But Automobile is only played through four rounds, each of which only gives you three actions. Add to this the fact that one of your action in most cases must be to produce cars and a second action often must be to invest in a new factory space and you will realize that your action space is… yes, you guessed right: limited.
The final sales race and the executive decision
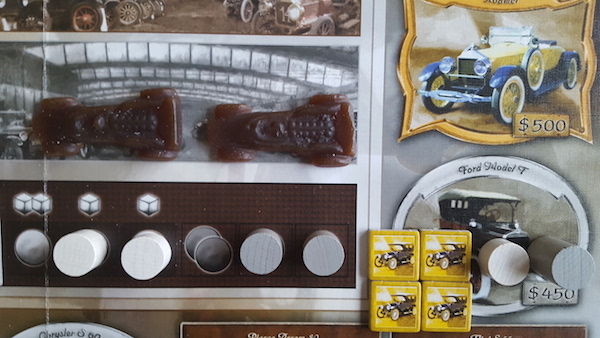
Ah, finally we get to sell the cars and get our well-deserved (and needed) money. The sales do not cost an action and thanks to the demand tiles and the salesmen, you have a pretty good idea about how many cars that will be sold. This should be a peaceful affair, right? Certainly not.
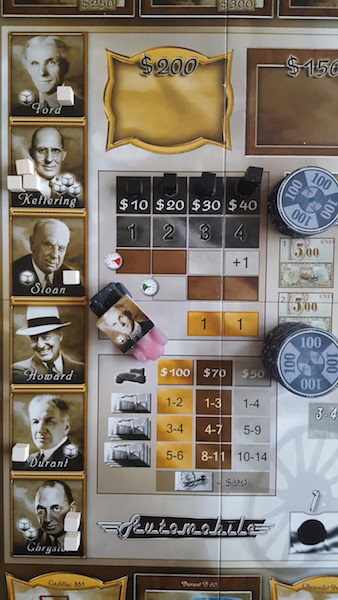
Cars are sold one at the time, starting from the most modern factory space of a specific segment and going counterclockwise as many laps as needed. However, Martin Wallace squeezed in another phase before that, the Executive Decision. This lets the players either pass or acquire advertisement discs or discount discs. The advertisement discs cost R&D cubes and the discount discs give you a lower price per car but they both let you sell more than one car at the time. Will the demand be high enough for all the cars to be sold? If not, should you pass, hoping that the other players won’t compete, or should you grab the discs yourself before it’s too late? This is possibly the best implementation of the prisoners’ dilemma I’ve seen in a game. If only one player competes, he or she will earn more than the others, but if all players compete, all will lose R&D cubes or sell cheaper to no avail since the total number of cars sold will remain the same.
The characters
As if there weren’t enough decisions already, you also get to choose one historical character each round to help you manage your corporation. The abilities of each character are seemingly limited (Ford lets you build one extra factory, Howard lets you sell two extra cars, Chrysler lets you discard loss cubes and so on) but they can be crucial to your strategy to give you that little edge you need at the right time and the right place.
The loans
Some reviewers say that a game is not a Martin Wallace game without a loan mechanic. Loans are indeed available in Automobile (1 or 2 fixed loans as you might expect) but at a high interest (10% per round +20% at the end of the game!). Does the return on your investment motivates such a draconic loan? It’s up to you to decide.
The decision spaces
Let us summarize what we have observed so far. Below is a list of the most important decisions. Each of them has a limited decision space but they can be combined into a huge number of strategies.
- Select 1 of 6 characters
- Draw a demand tile numbered 2-5
- Manage 1-3 currencies
- Select 3 of 5 actions
- Jump 1-2 factory spaces
- Build 1-3 factories
- Enter 1-3 market segments
- Produce 1-3, 4-7 or 8-11 cars (middle-class 1/2/3 factories)
- Place 1-3 salesmen
- Take 0-2 loans
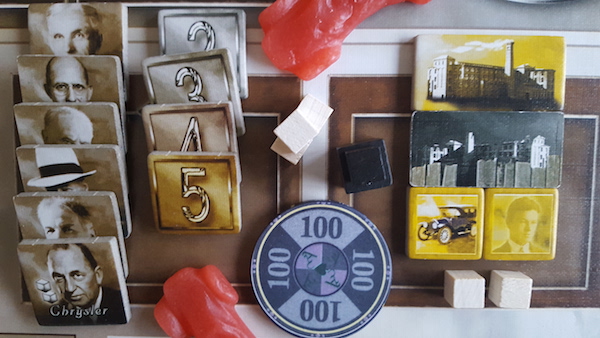
More importantly, each decision that a player takes will have a profound impact on the market as a whole and force all players to adapt their strategies accordingly. There is no take that in Automobile but the interaction is nevertheless fierce and ruthless. I’ve seen games where the players stick to their old factory spaces, manage their loss cubes and flood the market with cheaply produced models. But in my latest game, the rush for the more expensive models led to the final factory space being claimed already in the second to last round while we barely could afford to supply all the cars that the market demanded. My initial fears that Automobile would feel repetitive from game to game been disproved.
But is it too much?
If you agree with me in this review, Automobile appears to be a complex maze where you can only choose to go left or right but where the wrong direction will be devastating. But is it Automobile a punishing and unforgiving game? Not for an experienced gamer in my opinion. The limited decisions also limit the damage an unknowing player can inflict on himself or herself. The really bad decisions are often obvious, such as forgetting to produce cars (and get no money) or producing too many cars on an already saturated market (and get loss cubes for unsold cars).
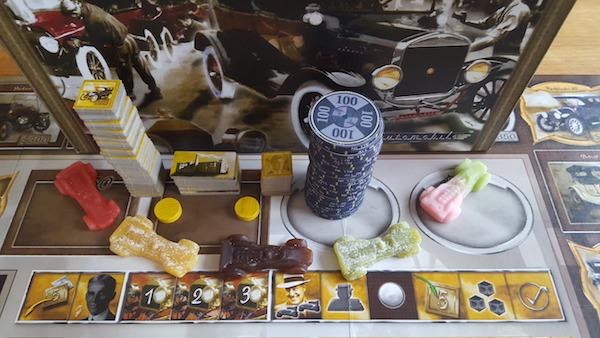
Instead, the challenge is to identify and take advantage of the many small opportunities that this maze may provide. Perhaps it is good to produce cars on this saturated market, if that denies the other players profit. Remember, the goal of the game is not to earn money but to make sure that no other player earns more than you. Most information in Automobile is open to all players and it’s the skilled player that will benefit most of it. Automobile does not punish weak players but it rewards strong players.
A more valid argument against Automobile is that it can be too mathy. If you invest X now will you have enough money to produce Y cars for Z each in each of the market segments where you’re present? Is it better to close a factory now and accept a loss of investment X now or is it better to accept loss cubes that will cost you Y times Z for the remaining rounds? The math is not difficult, I would argue it’s on the same level like in Power Grid, but it is there and may not be for everybody. However, I strongly recommend the use of poker chips instead of paper money to speed up the cash transactions. The cash transactions are remarkably few for a financial game but poker chips are most welcome during the sales, when three markets with cars of up to five different player colors have to settled.
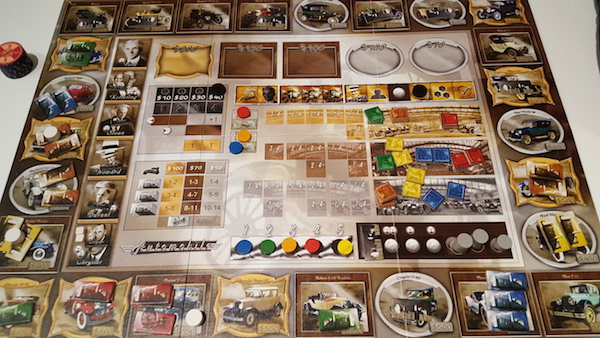
5 player end game - the aggressive R&D competition has opened up even the most advanced models
Summary
My first encounter with Martin Wallace was when I, fully trusting my geek buddies, decided to back Brass. Shortly afterwards, Onward to Venus became my first Martin Wallace game to play and I started to wonder whether I should cancel my pledge. But then I got an opportunity to acquire Automobile and a quick read-through of the rules convinced me to give Martin Wallace a third chance. I don’t regret it.
Automobile is a game packed with interesting decisions that have been compressed, limited and spread over time to make them “gameable”. Every little player decision adds a piece to the history of the early car manufacturing and has to be taken into consideration by all players. This does not mean that Automobile is a purely tactical game where you have to optimize individual actions. On the contrary, the game rewards a good strategy that outlines the conditions for entering and exiting the different market segments to maximize your profit and minimize your losses. It’s up to you to use your limited actions in the way that best supports your strategy. Hence, Automobile is a highly interactive game with next to no downtime as the actions are short and each player has to assess the impact of each other player’s action. Martin Wallace has said that Automobile is the favorite of his designs and I completely agree!
Strategi
Strategi kommer när jag spelat mer.
Minnen
Mitt främsta minne av Automobile är att recensionen ovan ledde till att jag handplockades av Alex Yeager, en före detta medarbetare på det nu nedlagda Mayfair Games, till ett litet team för hjälpa till med en ny utgåva. Tyvärr blev projektet försenat av olika anledningar och om det fullföljs återstår att se. Tyvärr är också Automobile ett svårt spel för nybörjare att komma in i då det är svårt att se konsekvenserna av beslut utan att ha spelat åtminstone ett parti innan och det har därför fått betydligt mindre speltid än jag önskat. Mitt favoritspel av Martin Wallace's många ekonomiska spel förblir det dock.
Dominant Species (äger)
| Bakgrund: | Kamp mellan arter inför istiden |  |
| Spelare: | 2-6 (bäst för 4-5) | |
| Speltid: | 2 timmar | |
| Svårighetsgrad: | 50% |
Allmänt
Dominant Species är ett briljant designat spel som ger områdeskontroll flera nya betydelser. Du strävar inte bara efter områdesmajoritet utan måste också anpassa dina arter till omgivningen (genom att lägga till element till dina arter) och anpassa området till dina arter (genom att lägga till element till området). Dessutom måste du beakta hur element som inte väljs av spelarna "flödar genom" spelmaskineriet och så småningom kan skada dina arter och/eller deras boplatser. Alla handlingar väljs genom en programmeringsmekanism där de är tillgängliga för den förste som väljer dem, något som kräver både planering och prioritering.
Det mesta av spelet kan förutses med en lagom dos av osäkerhet orsakad av den slumpmässiga dragningen av element som spelarna måste anpassa sig till (skämt avsiktligt). Korten kan orsaka lite väl stora svängningar men de är ganska få och spelarna kan memorera dem och förbereda sig för dem. De påminner lite om katastroferna i Civilization som ger ett regelbundet kaos till spelet.
Sammantaget skapar detta ett spel fullt av spänningar och interaktion där spelarna konstant måste vara uppmärksamma för att försvara sig där de är svagast och anfalla där de är starkast för att bibehålla deras komparativa fördelar. I slutändan handlar allt om överlevnad för den bäst anpassade.
Dominant Species - If You Thought Nature is Cruel, Try Putting a Gamer in Charge (engelskspråkig recension för publicering på Boardgamegeek)
In the beginning...
Similar to the story of many other gamers, my entry into the hobby started with war games. Today I mainly play the more peaceful euro games but my fascination for maneuvering and controlling events on a board has never left me and is probably a reason why area control is my number one favorite mechanic. This is also the reason why Dominant Species caught my attention.
Dominant Species is commonly described as a war game disguised as a euro game. The euro part is that you use action pawn placement to manage an animal class. The war part is the "survival of the fittest" - what you build in the game can and will be destroyed. If that wasn't enough to sell the game to me, the designer Chad Jensen's idea of area control certainly was. Not only do you control areas but you also control the conditions that determine your control. Does it sound complicated? Not at all, let us look at the different aspects of control.
Expand your animal
First you need to bring your species, represented by cubes, to the tiles with the actions speciation and migration. The animal with the most species on a tile earns the most victory points during the special domination action. As most area control games, it doesn't matter how many species you have as long as you have the most. Many tiles award victory points for the second most species, the third most species and so on so it is possible to get a free ride at others' actions.
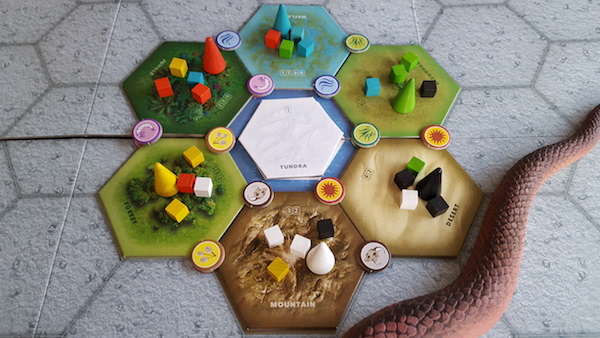
Fit your animal
Second, you need to fit your animal class to the tiles. You do this by placing elements, represented by chits, on your animal AND/OR on the corners of the tiles with the actions adaptation and abundance. The best fit, as measured by the matching elements on your animal times the matching elements around the tile, gives you dominance and earns you potentially powerful dominance cards during the special action. That's right, you have the power to fit both your animal and the nature around it! You need to balance the two - no adaptation at all will endanger your animal and remove your species.
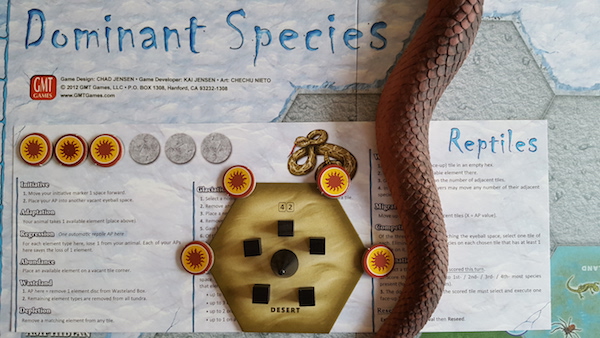
Expand the world
Third, you need to decide which new fertile tiles to add to the world with the wanderlust action and which tiles to cover by non-fertile tundra with the glaciation action. The former action can be used to give your animal (and potentially competing animals) more areas to grow and score in while the latter action can be used to devastate areas where competing animals grow and score.
Fight your competitors
Other options include actions such as competition (remove opponent species), regression (remove elements from animals) and wasteland (remove elements from tiles). I told you this was a war game in disguise, didn't I? It is not enough to build a strong animal, you have to constantly defend it as well.
Limited actions
As in all good euro games, you will want to take all those actions but both your action pawns and the action spaces are limited so the competition will be fierce.
However, unlike the normal euro game you will not do all this on a private player board but rather in a crowded common world. Your species may prosper in a fertile land one round only to be endangered in a wasteland the next round so you must pay close attention to the other players' plans.
Is Dominant Species for you?
Given all this, how does it feel to play Dominant Species? Well, it is certainly a challenging experience. The game gives a lot of control to the players. There is randomness when it comes to which elements are available on the action board and which dominance card a dominant player may choose from but this information is open to all players at the beginning of a round so that they may modify their strategies accordingly. In a way it feels like an epic civilization game, where you start building an empire from scratch and experience its rise and fall through history. Dominant Species will give you plenty of memorable tales.
So who would enjoy Dominant Species? Both euro and war gamers. The euro gamer may enjoy planning his or her actions and timing when to switch from resource focus (actions to maximize presence) to victory points (actions to score from your presence). The war gamer may enjoy assessing the terrain of the board and predicting the plans of the other players to assess where to fight and where to withdraw.
So who would not enjoy Dominant Species then? The answer is again both euro and war gamers. The hard core euro gamer may shun the confrontative aspects of the game while hard core war gamers may feel to restricted by the limited actions. My own main objection is that the game can be a bit too swingy at times, particularly since most victory points are earned in the end game scoring. Even the strongest position, carefully built up during several rounds, can be reduced to nothing when the game is over. This can lead to a feeling that the first part of the game is meaningless. On the other hand it also means that Dominant Species is often an open affair to the very end. Is this good or bad? It is a matter of personal taste. The important thing is to set the expectations before introducing Dominant Species - I have seen it utterly fail with some gaming groups.
Is Dominant Species for me? (Spoiler: Yes!)
My personal opinion is that Dominant Species is a very well designed game with mechanics that fit together like a well oiled machine. The production is also great with chunky wooden pieces and big sturdy tiles. The rules deserve a special mention and I know that many agree with me on this point: they are simply the best rules ever written with a logical structure and clear examples. If you want to play an epic game that satisfy both your inner euro gamer and your inner war gamer and do not have time for Advanced Civilization (reviewed here), Dominant Species is your choice!
Strategi
Strategi kommer när jag spelat mer.
Minnen
Att Dominant Species kan vara ett krävande spel bevisas av att mitt främsta minne av spelet är en misslyckad spelsession med goda vänner. Att tro att gamla krigsspelare skulle kunna ta till sig detta "krigsspel maskerat till euro" efter några whisky var ett stort misstag och deras oförmåga att komma ihåg skillnaden mellan dominance och domination avslutade partiet i förväg. Spelets längd gör det tyvärr svårt att få till bordet och det är kanske Dominant Species öde att bli min minst spelade tiopoängare.
Civilization (äger)
| Bakgrund: | Antikens kulturer från stenåldern till romarrikets uppgång |  |
| Spelare: | 2-8 (ju fler, desto bättre) | |
| Speltid: | 5-12 timmar (med möjlighet till tidsbegräsning) | |
| Svårighetsgrad: | 50% |
Allmänt
Civilization (icke att förväxla med dataspelet!) skiljer sig mycket från traditionella konfliktspel. Spelets mål är att utveckla sin civlisation kulturellt, ekonomiskt och politiskt. Spelarna är såväl motspelare, i det att de utkämpar strider, som medspelare, i det att de handlar med varandra. Civilizations stora styrka är den omfattande interaktionen mellan spelarna och de snabba vändningarna. Ena stunden kan din civilisation vara på väg mot Mare Nostrum, den andra kan den vara på väg mot sin undergång.
Advanced Civilization - Does it stand the test of time? (engelskspråkig recension för publicering på Boardgamegeek)
Classic or obsolete?
In my youth, in the previous century that is, I played many Avalon Hill games but none was more popular than the revered Advanced Civilization. A few years ago I returned to the board gaming hobby and since then I have got to know another 300+ games. But in spite of that, only one game has managed to beat this old classic on my list of favorite games (reviewed at Boardgamegeek). Is this because I still remember those epic sessions from before or is Advanced Civilization really that good? One way to tell is to play the game, which I recently did. Another way is to review the game and reflect on its qualities, which I try to accomplish here.
With today's standards, it may be difficult to imagine how ground-breaking Civilization was when it was published back in 1980. This was not a game of elimination but a game where all players participated to the end. They also did it by building something greater than they started with, a characteristic that is inherent in most, if not all, modern euro games. Some mechanics, like the elegant balance between population, stock and treasure, could have been considered innovative even today, while others, like the sometimes cumbersome calamity resolutions, could have been contemporary with the dinosaurs (and perhaps the reason why they got extinct - they simply could not handle them anymore). But let us not jump to conclusions and instead examine Advanced Civilization piece by piece.
This review will focus on Advanced Civilization rather than the original Civilization, not because I claim one to be better than the other, but because I'm more familiar with the advanced version. There are many threads discussing the pros and cons of the two versions and in my opinion, both sides offer valid points. Nevertheless, most of my points will be applicable to both.
The goal of the game - and how to get there
The civilization cardsAdvanced Civilization puts the players in charge of civilizations around the Mediterranean Sea from Stone Age to Late Iron Age. The overall goal is to end the game with the greatest civilization of them all. The main measurement of "great" is the value of civilization cards acquired during the game. This is something I emphasize to new players, who may confuse Advanced Civilization with a war game and focus on geographical conquests, or an economic game and build a productive engine. While both land and resources provide advantages during the game, they are only means to the end and will be forgotten by history if you fail to turn them into civilization cards.
The resource cardsOK, so how do you acquire civilization cards then? By exchanging sets of resource cards AND by taking advantage of discounts provided by other civilization cards. The latter is another aspect that new players tend to neglect. Each round, you should aim at not only maximizing the value of your resource cards but also at utilizing your discounts. Postponing the acquisition of a civilization card one round to have a better set of resource cards next round may sound good but also means foregoing a discount.
To get resource cards, you need cities, and to get sets, you need to trade with other civilizations. Let us look at the trade first. Trade in Advanced Civilization is not a zero sum game. One pair of resource cards is more valuable than two single resource cards, one triplet is better than two pairs and so on. Since all trade is simultaneous, you will need to be attentive to find out who holds the cards and you need to be able to negotitate to acquire said cards. This also means that the trade may be time-consuming and chaotic but there is certainly no lack of tension and interaction here.
How about the cities then? Each city awards you one resource card. The more cities you have, the higher the value of the resource card and the better your opportunities for a successful trade. Building and maintaining cities is thus critical in Advanced Civilization. But to do so you need tokens on the board.
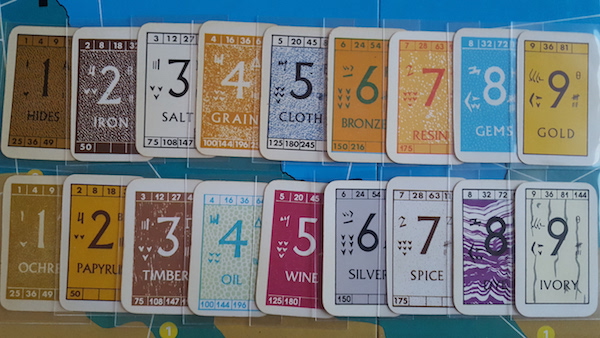
The stock, the tokens and the treasure
Six tokens are needed to build a city and another two tokens are necessary to maintain it.The tokens start in your stock and enters the board where you already have tokens (but not where you have cities). In addition, each city forces you to move tokens from the stock to the treasure as tax (which can be used for to purchase civilization cards, resources cards and ships to move the tokens across water). However, there is one big catch.
Your tokens are limited. A shortage of tokens will be critical whereever it occurs. An empty stock means that you cannot pay tax and that your cities will revolt. An empty board restricts your ability to build and maintain cities. An empty treasure gives you less flexibility when it comes to purchases. The latter may seem less important but being one token short to that expensive civilization card you really need is annoying to say the least. This delicate balance puts Advanced Civilization in a class for itself compared to the many more straightforward games of its time.
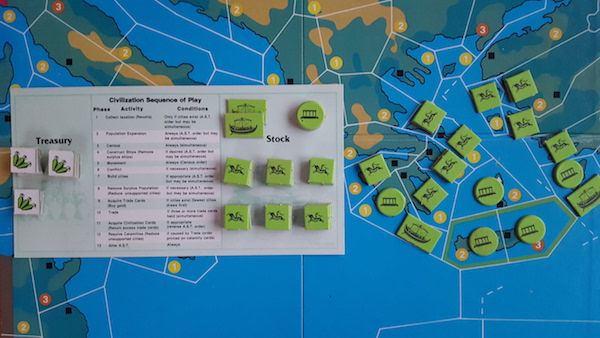
The calamities
If you understand how all those intertwined mechanics fit together, will you be a able to play the perfect game of Advanced Civilization? Well, I haven't mentioned the calamities, the most fun/nasty/memorable aspect of the game (depending on how they strike). Shuffled into the stacks of resource cards, and frequently and secretly traded between players, are the calamity cards. Whoever ends the trade with such a card becomes the primary victim of a calamity, often resulting in the loss of cities and tokens.
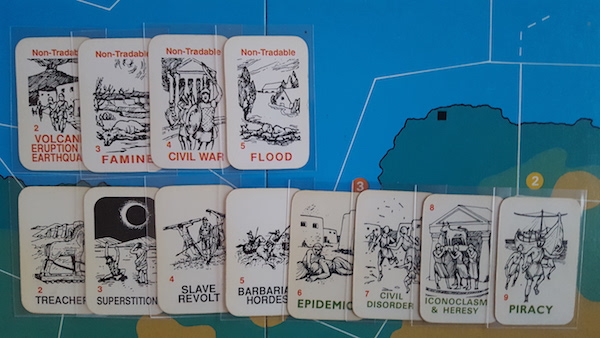
Many complain that calamities strike randomly and while this is true, they also serve other important purposes. Most importantly, they add risk assessments to the gameplay. Should you do one more trade to get that extra resource card, although you may get a devastating calamity with it? Should you play safe and go for civilization cards that reduces the impact of calamities or gamble and go for civilization cards that give you other benefits but aggravate calamities?
Another important function of the calamity cards is to serve as a catch up mechanic, since the primary victim selects secondary victims to share the calamities.
Finally they shake up things on the board by moving borders and opening up new opportunities, hence preventing the game from stagnating once the civilizations have reached some kind of equilibrium.
The lack of control may indeed be hard to bear but I recommend you to simply accept your fate and rebuild your civilization afterwards, just like the leaders of the historical civilizations had to do.
Completing the cycle
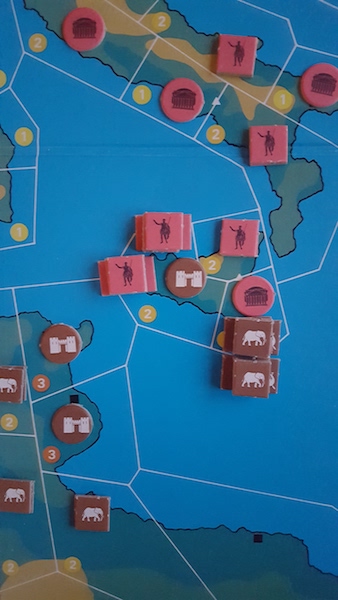 The final distinguishing aspect of Advanced Civilization that I would like to highlight is the variability of the player conditions. In the beginning, all civilizations are alike. In fact, they all start with one token each and nothing else. However, geographical advantages and restrictions will quickly mark them. Egypt has access to rich but potentially dangerous rivers while Africa on the other hand struggle to feed its population. Babylon has plenty of land to spread out to while Crete is surrounded by water and so on.
In addition, the players may choose their own paths throughout the game by choosing which civilization cards to acquire. Some civilization cards help you overcome geographical constraints (such as Agriculture, which lets more people survive in a region). Others gives you advantages in conflicts (such as Metalworking) or economy (such as Mining). There are also several cards that reduce the impact of calamities, as discussed above.
This completes the civilization cycle: you need tokens to get cities to get resources to get civilization cards to help you repeat the cycle as efficiently as possible, while also mitigate all bumps on the way. This reminds about the economic engine you often build in modern euro games. However, Advanced Civilization constantly forces you to reassess your strategy to successfully navigate through the many tides and turns of History. The experience of playing Advanced Civilization is bound to be different from game to game.
The game of the civilizations
We have now covered the basic path towards the goal of Advanced Civilization. But how does this translate into a gaming experience? I will try to answer the question from three important perspectives: the decisions, the interaction and the feelings of the game.
The decisions
Many players assess a game experience based on the meaningful decisions offered to the players and Advanced Civilization offer several:
- Where should I expand? I need to consider fertile lands (to supply tokens), city sites (to build cities), access to water (for flexible movement), race against other civilizations (to lay claim to a territory) among other things.
- Should I grow my population first or build cities first? Building cities gives you early resource cards but hampers your growth while population growth allows more cities later but earn you nothing now.
- Where should I build my cities? Building in fertile land means less room for tokens but more tokens back if the city is reduced. Building central may restrict movements but building along borders may make them difficult to defend.
- How should I balance between tokens and cities? A low ratio of tokens to cities gives you more resource cards per token but also makes you vulnerable to attacks and calamities.
- Do I need ships and if so, where and how many? Ships give you more flexible movements but cost you tokens from treasury (which may be a good thing if you have too many) and may provoke preemptive attacks from threatened neighbors.
- How much do I need in my treasury? A big treasury helps you pay for the civilization cards you want but since you may not pay more than necessary, your treasury may grow too big and leave too few tokens in the supply to pay taxes and grow.
- Which relations should I have with my neighbors? You want to push your borders but not provoke an endless war, benefitting only the other civilizations.
- How can I influence relations between other civilizations? Do I need to act against a leader or weaken a hostile alliance and if so, through diplomacy or military intervention?
- Which civilizations act before me and which act after me? If a civilization acts before me, I may consider an attack, but if a civilization acts after me, I may have to consider defensive measures.
- Which resources should I keep and which should I trade away? You want to monopolize certain resources to get valuable sets but you do not want to give other players too valuable resources, nor do you want to keep them too long out of fear of getting them taken from you in case one of your cities would get destroyed.
- Should I make another trade to get the resource card I need, taking the risk to get a calamity card as well? The more valuable a set is, the better the civilization cards you can buy, but this must be weighed against how long it takes to recover from a calamity.
- Which civilization cards should I prioritize? Does your civilization need certain cards to prosper or even to survive or can you focus on the best discounts?
The interactions
Other players have certain requirements regarding the interaction with each other. Some games suffer from too little interaction that turn them into multi-player solitaires while other games contain so much take that that the players are denied all control of their destinies. Advanced Civilization manages to find a balance between those extremes.
You have a lot of control when it comes to which civilization you want to build and how to accomplish it. However, you cannot do this in isolation. You must compete with the other civilizations to get the land and the cities necessary to acquire resource cards but you must also cooperate with them to turn your resource cards into valuable sets. If you haven't made the mistake of playing on a too large map, you must use both diplomacy and force to establish the borders necessary for your growth.
Yet, you are never totally at the mercy of your opponents. Each civilization has a limited supply of units, effectively preventing runaway leaders and elimination. War efforts must always be weighed against other pressing needs in your empire and even if you would face an alliance of all the other players at once, it is not likely that all of them would be able to strike at you. With flexible planning, you can often find mitigations to problems that may arise.
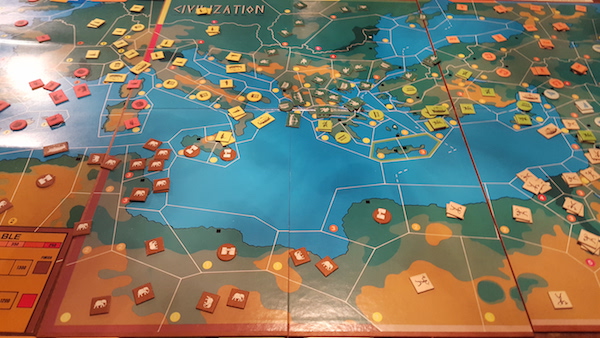
In one of my latest games, I managed to execute a rather successful strategy. As Crete, I quickly stretched out in all directions to establish borders, leaving my heartland empty. Initially my neighbors avoided conflicts and left me with plenty of room to grow/recover after calamities. As my neighbors started to move closer, I was able to use my fleet to quickly move my units around, either to defend my claims or withdraw from one border and push another border instead, depending on the current strength and weaknesses of my opponents. I did not win but in spite of being the smallest nation for almost the entire game, I managed to be the first to both eight and nine cities and eventually ended up second. Most importantly, I had fun!
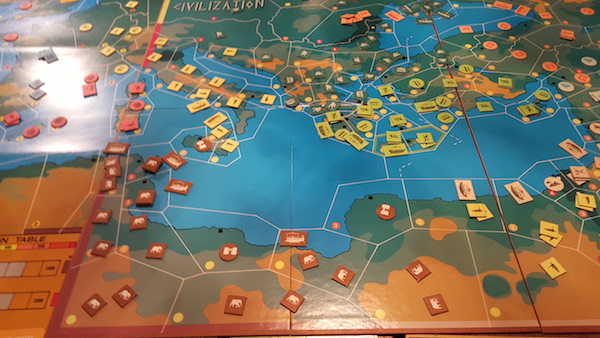
The feelings
There are also players to which the feelings that a game evokes is the most important thing. Advanced Civilizations delivers in this respect as well. You start building your civilization from nothing, watch it rise and fall and rise again in the struggle with calamities and other civilizations, and (hopefully) end with a strong, rich and innovative empire - an advanced civilization. During this long journey, spectacular actions and events have given birth to legends remembered long after your civilization is gone. Perhaps an unexpected civil war brought an invincible empire to its feet, perhaps the remnants of an overseas revolt managed to return home just in time to save the motherland from an invasion. All this and much more can happen in Advanced Civilization.
One of my many memorable moments of Advanced Civilization was when my poor Africa was struck by one calamity after another, including two consecutive barbarian hordes. In the end, only one single token remained in the African heartland. Yet, the people managed to rise again, kick out the foreign invaders and reach a second place, beaten by only two (!) points. Few other games have given me stories like that.
The flaws of Advanced Civilization
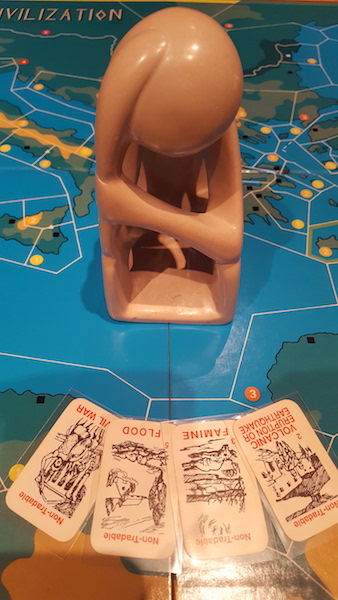
Given all the praise so far, is Advanced Civilization the perfect game? No, there are some valid complaints about the gameplay. The main one is the playing time. A full experience of Advanced Civilization requires one whole day. Many games have tried to provide the epic feeling of rising and falling civilizations in a short timeframe but in my opinion, none has succeeded. My only advice is to compare one session of Advanced Civilization to several sessions of a shorter game and decide what you prefer. I confess that Advanced Civilization does not hit my table very often but when it does, we turn the session into a social event where we include food breaks and other activities. This mindset also makes it easier to deal with downtime. If things happen at the other part of the board, take the opportunity to walk around and do some small talk. Advanced Civilization does not require full attention and detailed optimization, something that the seasoned player may find relaxing every once in a while.
Another issue concerns some of the complex rules and convoluted mechanics of Advanced Civilizations. Where most modern games are intuitive and possible to learn on the fly, Advanced Civilizations has many small and easily forgotten rules. I still keep forgetting that you get to take a resource card from an opponent whose city you destroy and only recently realized that you cannot "virtually" replace an attacked city with more tokens than you have in stock. Fortunately, the fact that you start small means that you can introduce the rules gradually to new players.
But even when you do know the rules, there will be time-consuming moments, particularly the resolution of calamities. Take civil war for example. Counting all players' stock to identify the beneficiary player, adding and subtracting civilization card modifiers, and selecting which individual tokens that go to which side is time-consuming. On the other hand, civil war does add flavor to the game and I cannot think of a way to streamline it.
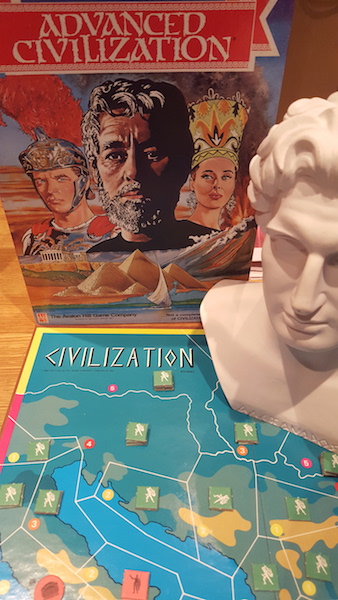
A related issue is that of the randomness, particularly of the calamities. Drawing a calamity instead of a resource card is a double blow to the unfortunate player. The likelihood that calamities will even out in the long run is a small consolation to the player who gets struck by two calamities several consecutive rounds. Sometimes I would like to see a system that gives the calamity to the "most deserving player" (civil war to the strongest player, slave revolt to the richest player, iconoclasm to the player with the fewest religious cards etc.) but would that really be better or would it just lead to an even worse situation where the players micro manage to avoid them?
Whoever succeeds in elminating those flaws will have found the Holy Grail of the perfect civilization game but until then, Advanced Civilization remains the worst form of civiliazation game except for all the others.
Summary
To sum up, Advanced Civilization has many aspects and attributes that puts it in par with modern board games. There are several intertwined mechanics that offer you an intriguing maze to navigate through. To do so, you have several strategies to choose from and whatever you choose, it must prepare you for the many tactical challenges you need to face during the journey. Advanced Civilization is full of meaningful decisions and tense interaction as you create your own story of your civilization.
Advanced Civilization does demand tribute from its players in terms of time and commitment and is not a game I would like to play every day. Nevertheless, I never turn down an offer to play and look forward to the session in the same way as I look forward to a vacation trip or a reunion with old friends (or combining all three).
Strategi
Civilization har två strategiska mål: Expansion och utveckling. Under de inledande dragen är det absolut viktigaste att karva ut land för den egna civilisationen och hävda "naturliga" gränser. Utan möjlighet att bygga maximala nio städer kan man inte vinna. Därefter är det dags att tänka på utveckling. Man ska inte vara rädd för att byta till sig en naturkatastrof om det kan leda till bättre varukombinationer. Om man har en stor landbas så kommer man att återhämta sig på ett drag men om man byter in en dålig varukombination så tar det många drag att bygga upp en ny. Vilken utveckling ska man då välja? Vissa utvecklingar är kritiska, såsom Agriculture för Afrika eller Engineering för Egypten, men utöver dessa så ska man utveckla sig så att man optimerar utvecklingskortens bonuspoäng. Att välja militära utvecklingar som Military och Metalworking är bara kontraproduktivt då det skaffar fiender och förvärrar naturkatastrofer. Vinner gör ofta den som köpt mest utveckling för billigast belopp.
Minnen
Civilization är liksom Diplomacy ett spel man sällan hinner spela fullt ut. Mitt mest minnesvärda parti är därför ett av de få exempel på ett komplett parti som jag spelat och dessutom vunnit. Det svårspelade Afrika föll på min lott men genom hårda förhandlingar med Egypten ("Jag behöver stadsrutor så ge mig en gräns jag vill ha eller jag blir din fiende för resten av spelet.") så fick jag en hyfsat bra bas att börja med. Vändpunkten kom när Asien drabbades av inbördeskrig med Afrika som förmånstagare. Asien avstod från städer i Anatolien i förhoppningen om att kunna återerövra utbrytarstaterna såsom brukligt är. Jag skaffade dock Astronomy och såg till att knyta samman mina "östra kolonier" med moderlandet. Eftersom Afrikas obördiga land sällan tillåter en stor befolkning så fick jag ofta flytta efter Asien och kunde hävda mina nya "naturliga gränser". Därmed hade jag fått en bra landbas och kunde satsa på att optimera utvecklingskorten. Detta var något jag var ensam om eftersom övriga spelare inte hade insett hur effektivt det var. När nästa dag grydde och det långa partiet äntligen nådde sitt slut så blev överraskningen stor när Afrika stod som segrare.
Imperial (äger)
| Bakgrund: | Investeringar i krigsekonomier | 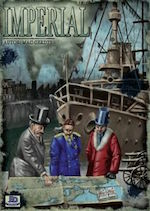 |
| Spelare: | 2-6 (bäst för 3-4) | |
| Speltid: | 2-3 timmar | |
| Svårighetsgrad: | 40% |
Allmänt
Förr spelade jag ofta konfliktspel, och jag uppskattar fortfarande deras strategiska och diplomatiska svängningar, men på senare tid har jag övergått till ekonomiska spel, där krass avkastning snarare än (o-)trohet mot allierade styr dynamiken. Imperial är ett spel som tilltalar både generaler och affärsmän. På ytan är det ett krig mellan militärorganisationer och produktionsapparater där den som kan producera och föra fram arméer och flottor i rätt tid och på rätt plats vinner. Men under denna yta döljer sig det verkliga spelet: kapitalister som hänsynslöst stöder och överger nationerna allt beroende på krigets förväntade avkastning.
Spelarna investerar pengar i nationer som dessa i sin tur spenderar på fabriker för att producera arméer och flottor i syfte att erövra territorier. Framgång på slagfältet betyder mer skatt till nationen och högre värde för investeraren. Handlingarna väljs via en enkel men elegant rondellmekanism där varje handling är viktig för att bygga upp krigsekonomin men samtidigt fördröjer den för segern så viktiga beskattningshandlingen.
Denna mekanism hade varit fullt tillräcklig för ett "vanligt" konfliktspel men Imperials storhet ligger i att nationerna ständigt växlar ägare. Går det bra för en nation? Investera i den för att ta över den och själv skörda resultatet. Går det dåligt för en nation? Använd den som murbräcka för att gynna andra nationer och överge den. I krig och affärer är allt tillåtet.
Imperial påminner en del om 18XX-spel med sin andelsekonomi och totala avsaknad av slump men har ett betydligt bättre flyt i spelet genom sina enkla regler och snabba men meningsfulla spelturer. Spelarna kan förvisso inte dumpa nationer på varandra men det kompenseras mer än väl av de skiftande allianserna på brädet allt eftersom ägarförhållandena förändras. Resultatet blir ett spel som är svängigt men alls inte oförutsägbart för den som förstår samspelet mellan spelarnas motiv och spelets mekanismer. Imperial är helt enkelt ett spel där spelarna driver spelet och inte tvärtom, precis som det ska vara i ett bra spel. Att till fullo förstå detta samspel kommer dock att ta tid.
Strategi
För att lyckas med en strategi i Imperial måste man kunna utläsa varje enskild nations ebb och flod för att bedöma när tiden är rätt att investera i en nation och när tiden är rätt att offra en nation. Jag har en bit kvar till den förmågan men utifrån Imperials rondell kan följande "nationscykel" identifieras. (Att påskynda rondellen ur egen kassa är sällan värt insatsen.)
- Factory: Använd nationens kassa till att investera i fabriker.
- Production: Använd fabrikerna till att investera i arméer.
- Maneuver: Använd arméerna till att invadera länder (och öka skattebasen genom att länder erövras och/eller arméer förstörs).
- Taxation: Öka nationens skatt och ta emot provision kopplad till ökningen.
- Next step: Om nationen har förutsättningar för fortsatt tillväxt, använd provisionen till att öka ditt innehav. Om inte, lägg dina pengar på en annan nation.
Detta måste dock vägas mot en viktig egenskap hos investeringarna: ju högre insats, desto mindre relativ poängavkastning. i stället för att köpa 5 aktier i en nation för 12 kan du köpa 3 aktier i två olika nationer för samma summa. Det är därför ofta bättre att hålla fast vid små aktieposter än att växla in dem mot större aktieposter. Det är en fälla som är lätt att gå i när kampen om aktiemajoriteten hårdnar och jag faller ofta själv i den så glöm inte bort spelets mål: värdefulla aktier!
Minnen
Imperial är udda i det avseendet att alla jag spelat med gillar spelet men det har ändå varit svårt att få det tillbaka till bordet. Kanske beror det på att det kräver insatser i form av både tid och tankekraft (tänk på att det inte finns någon som helst slump i spelet!) men för långhelger med gamla vänner har Imperial en given plats i bagaget.
Keyflower (äger)
| Bakgrund: | Kolonisering och nybygge | 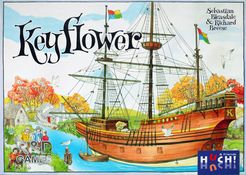 |
| Spelare: | 2-6 (bäst för 3-4) | |
| Speltid: | 90 minuter | |
| Svårighetsgrad: | 50% |
Allmänt
Keyflower har hyllats av många spelare och det är välförtjänat. Det här är ett spel där de olika euromekaismerna fungerar väl tillsammans. Bjud på brickor, producera från brickor, transportera mellan brickor och uppgradera brickor - allt detta genom att använda spelets karakteristiska "keyples".
Jag är vanligtvis inte förtjust i spel med många olika brickor men i Keyflower är brickornas funktioner lättförstådda och de är kända av och tillgängliga för alla spelare.
Men vad jag gillar mest är den intressanta interaktionsmekanismen: du kan använda en motståndares brickor genom att ge upp en keyple men därmed också göra den dyrare för motståndaren att använda. Detta leder till ett spel där du aldrig saknar handlingar (eller möjligheter att ställa till det för dina motståndare).
Keyflower - How can a chaotic point salad with lots of mechanics be so good? (engelskspråkig recension för publicering på Boardgamegeek)
The Journey to the Key World
I'm generally a fan of elegant game designs where the goal is clear and where the players play against each other instead of against the game. Keyflower should be the opposite of all this but is yet one of my favorite games. How is this possible?
My journey to the key world started with the great review "The charms and challenges of Keyflower" by BGG user entwife, particularly this beautiful paragraph that I would like to quote in full:
Beyond the above restrictions, I found the rules surprisingly liberating.
“Can I place workers on buildings in other people's villages?”
“Yes”
“What about on the buildings which are being bid on?”
“Yes!”
“Can I use a building that's already got someone else's Keyple on?”
“Yes!!”
“Can I add to a bid after I've been outbid?”
“Yes.”
“Can I still add to my bid if I've not been outbid?”
“Yes!”
“Can I move and then use my outbid Keyples?”
“Yes!!”
“Can I pass on one turn, and then decide to take an action on a future turn?”
“Yes”
“Can I keep on taking turns even when everyone else has passed?”
“Yes!”
One would think that such a lack of restrictions would deprive any game of all its challenges but not so with Keyflower. Let's start with an overview of the gameplay.
In Keyflower, you bid for various village tiles. On a tile you may place workers to produce resources and/or transport them to other tiles. Tiles and resources will earn you victory points at the end of the game and most victory points wins. This sounds like the standard euro on steroids. Keyflower has managed to squeeze in mechanics like bidding, trick-taking, modular board, worker placement, resource conversion, network building, pick-up & deliver, and set collection into the same game. (Did I miss any?) Yet, it's not any of those mechanics that make the game stand out but rather main characters of the game: the workers or the Keyples.
The Keyples are more than simple workers but rather the body and soul of the game. Your Keyples are your universal currency that are used in all of the mechanics. Let's continue our journey by following the everywhere present Keyples.
The Keyples
The Multi-Tasking
The Keyples are very versatile. They are used both for bids (on tiles) and for taking actions (by being placed on tiles). Some tiles let you pay with Keyples to get resources, others give victory points for Keyples in the end game scoring. I think they can make a good coffee as well.
Is this a lazy design by Richard Breese to avoid balancing monetary values? No, it's a brilliant design that provides a challenging restriction. Do you want to bid with a Keyple? Sorry, that means one less Keyple for tile placements. You will never have enough Keyples.
The Suits
The Keyples come in four colors. The different colors are just colors without any special powers. The tricky part (pun not intended) is that you must follow suit whenever you use them. Did someone place a red Keyple? It doesn't matter if you have tons of blue, you can only place red there from now on. There is also the rare color of green, available only through certain tiles (or, in some cases, lucky draws).
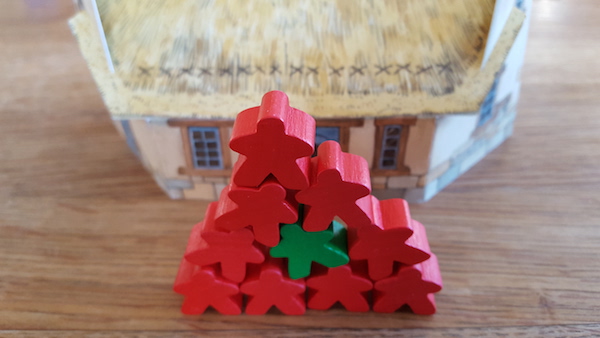
We see here how Richard Breese with the simple attributes of colors and scarcity has managed to create a lot of tension regarding which colors to use and which to save for later.
The Diminishing Value
All Keyples are not equal. As in many good games, actions are available on a first-come, first-serve basis. Whether you bid or place, being first is good. But as entwife hinted above, Keyflower is a friendly game in the sense that spaces are never completely blocked.
However, the later you come, the more Keyples you have to add. (Well, not really, there is a limit of six keyples on a tile but if you would like to place more Keyples on a full tile, you're probably in trouble anyway.) Do you really want to spend three keyples on that tile when they could be spent on three other tiles instead?
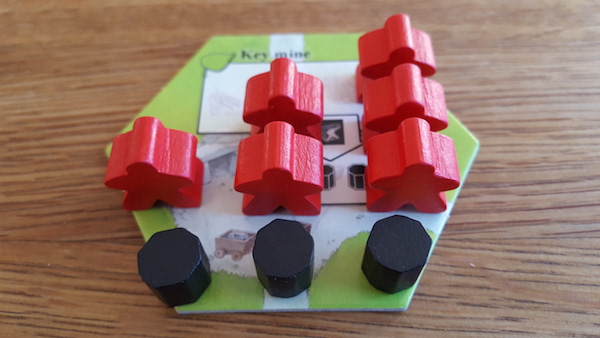
When I first saw Power Grid's market mechanic I was amazed at how the concept of supply and demand was made simple in a game. Richard Breese has done something similar with the concepts of limited resources and diminishing value.
The Villages
Now that we know the Keyples of Keyflower, let's visit the Villages they inhabit. In many games where you improve your engine, you just do it with impersonal modifiers (+1 good or whatever). However, the village tiles of Keyflower add both flavor and challenges to the game.
Tiles
Each tile of Keyflower is unique. If you miss a tile, there won't come another one later. Unless playing with the full player count, there will also be different tiles that appear in different games. This adds variability (good) but also unpredictability (less good). However, since all tiles enter the game through the bidding mechanic, they are equally available to all players so there is no luck of the draw.
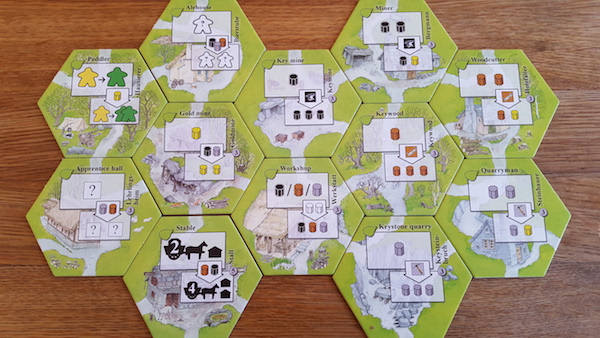
Is there a risk that your strategy makes or breaks because a specific Summer or Autumn tile is missing? I haven't seen it happen myself and I think that any mix of tiles work for any strategy. The Winter tiles, which earn you a lot of victory points, are more critical but since you see some of them at the start of the game and get to choose which ones to enter the game, you retain control.
Roads
Having individual tiles in your village is not enough, you make sure that they are connected to each other through their roads as well. Why? Because it's often necessary to move resources produced on one tile to another tile to upgrade it or score victory points (and the longer you have to move, the more movement actions you need and those cost - you guessed it - Keyples.)
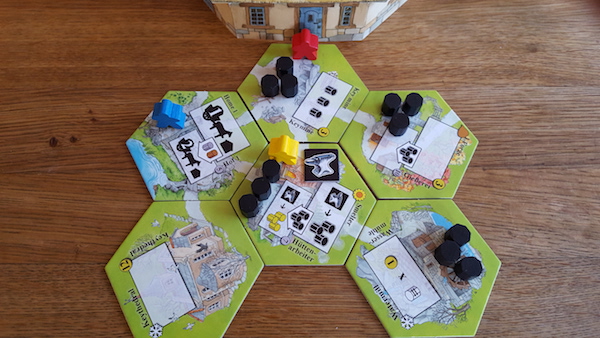
This aspect, however intriguing, can be challenging to new players, so it may be good to advise them to keep roads from resource producing tiles open. Again, your road network doesn't make or break your strategy but rather affects how well future tiles fit and hence how much you're willing to bid for them.
Neighbor Borrowing
Does your village lack the tiles you need? Don't worry, you can Always borrow from neighbor. You'll have to leave your Keyple behind (for use by your opponent the next season) but you'll get the resources you need.
With this simple mechanic, Richard Breese has turned what could have been a multi-player solitaire, with players hoovering over their own villages, into a highly interactive game, where the players keep visiting others' villages.
So neighbor borrowing is a win-win situation? Not necessarily, remember that your opponent will have to use more Keyples if he or she also wants to use the tile. Did I say that Keyflower was friendly? I lied.
The Art
To me, art is usually a minor aspect in game but the art of Keyflower is worth mentioning. Personally, I find the fairy tale art by the artist Juliet Breese, most appealing. Every little tile you acquire tells a story and every game of Keyflower ends with your personal and beautiful village.
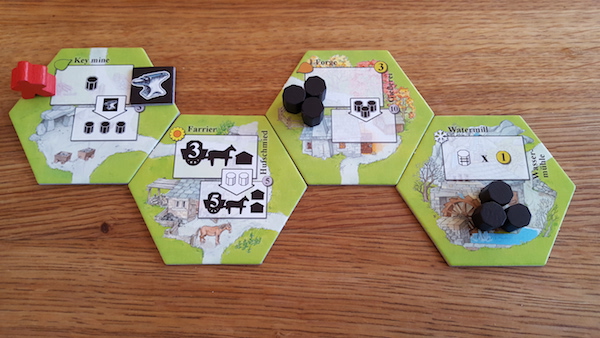
But there are players that are put off by what they think is childish art. More crucial is the risk that players think Keyflower is a shallow and friendly game whereas the truth is the opposite. I have indeed found it difficult to get Keyflower to the table, but the loss is entirely the other players'.
What does it all boil down to?
This review started by characterizing Keyflower as a chaotic point salad with lots of mechanics. There are indeed a lot of mechanics but they are all connected by the key element of the game: the Keyples. (Is this why they are called Keyples?) To have such a multi-tasking character for only one or two tasks would be pointless so it's necessary to give them as various options as bidding, producing and transporting.
How about the point salad then? Yes, there are many ways to score points but points don't come to you for every action. The biggest mistake you can do in Keyflower is to do everything, only to find yourself with a lot of resources but no victory points. Instead, you have to choose a few victory point sources and then use your Keyples optimally to maximize them. Keyflower doesn't reward short-term gains but long-term planning.
But aren't the many tiles a false depth, preventing long-term planning and resulting in chaos? A valid point but there is a logic in the order that the Season tiles appear. I've tried to outline this in the strategy article Keyflower - How to see your Village for all the Tiles and Keyples and one statement is that Spring is for resources, Summer for upgrades and Fall/Winter for victory points. You won't do well after your first game but you will grow fast in your following games. As for me, I crush newbies and get crushed myself by experienced players so you may not trust my strategic insights but trust me when I say that Keyflower is good!
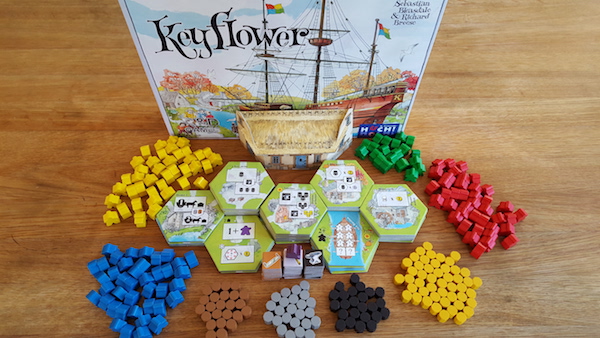
Strategi
Vid första anblicken kan Keyflower te sig som en kaotisk affär där spelarens strategiska planer får stå tillbaka för taktiska utnyttjanden av de tillfällen som ges av spelet. Keyflower har inte bara en utan fyra slumpmässiga uppsättningar, en per säsong, och resurser som arbetare och verktyg kommer också de slumpmässigt. Spelarna måste fatta rätt beslut inom så skilda mekanismer som budgivning, produktion, transporter och uppgraderingar. Besluten påverkar i sin tur hela spelekonomin och gör det svårt att ange riktvärden för bud, produktionsnivåer och slutpoäng. Dock finns det några generella riktlinjer du kan följa för att åtminstone öka sannolikheten att lyckas. Låt oss göra som man ofta bör göra i spel och börja från slutet.
- Keyflower är ett spel om poäng.
- Poäng erhålls från brickor.
- Brickors värde beror på insats, utkomst och slutvärde.
- Brickors insats är arbetare (för bud), råvaror och verktyg (för produktion och uppgradering) samt transport- och uppgraderingskapacitet (för att öka utkomst och/eller slutvärde).
- Brickors utkomst beror på om brickan är uppgraderad samt hur mycket relevanta resurser du lyckas flytta till brickan.
- Brickors slutvärde beror på om de uppgraderats samt hur mycket relevanta resurser du lyckas flytta till brickan.
Sett i det här perspektivet skiljer sig inte Keyflower så mycket från traditionella ekonomiska spel. Du har en snöbollseffekt där producerar resurser, investerar i produktion och producerar än fler resurser tills det är dags att växla över från investering till poängsamling. Med "resurser" menar vi allt som du måste hushålla med i spelet, alltså inte bara råvaror och verktyg utan också arbetare och transport- och uppgraderingskapacitet, som Utmaningen ligger därför i att förstå vad som är en bra investering och när det är dags att övergå till poängsamling. För att förstå detta behöver vi först förstå skillnaden mellan de olika säsongerna och framför allt vad den slumpmässiga uppsättningen av var och en av dem får för påverkan på strategin.
Våren innehåller typiskt brickor som ger utkomst av diverse resurser. Sommaren innehåller typiskt brickor som kräver insats av diverse resurser för att ge ökad utkomst i form av produktion. Hösten innehåller typiskt brickor som kräver insats av diverse resurser för att ge ökad utkomst i form av poäng. Vintern har brickor som spelarna själva valt och som kan ge en ansenlig mängd poäng förutsatt att man samlat på sig rätt resurser.
Exempel: Vårbrickan Key Mine ger 1 järn. Sommarbrickan Ferrier ger transport- och uppgraderingskapacitet så att Key Mine ger 3 järn och järnet kan transporteras. Höstbrickan Forge kan uppgraderas med 3 järn och bli värd 10 poäng. Vinterbrickan Watermill ger 1 poäng per järn.
En strategi bör därför besvara följande frågor:
- Vår: Vilka resurser ska jag förvärva?
- Sommar: Vilka investeringar i ökad produktion ska jag göra?
- Höst: Vilka investeringar i ökad poäng ska jag göra?
- Vinter: Har jag lyckats samla på mig rätt resurser eller ska jag avstå från att lägga till en viss bricka till vinterns budgivning?
Under våren är det viktigt att identifiera vilka resurser som det kommer att vara gott om och vilka det kommer att vara brist på för att förstå vilka investeringar du ska sikta på nästa säsong. Om det till exempel är ont om brickor med järn som utkomst under våren är det inte tillrådligt att under sommaren förvärva brickor som kräver järn som insats. Däremot kan det fortfarande vara bra att förvärva en sådan vårbricka, eftersom alla spelare som behöver järn då tvingas lämna sina arbetare på din bricka så att du får dem nästa säsong. Jag brukar också föredra att förvärva en transport- och uppgraderingsbricka, antingen för mitt eget behov eller för att andra kan behöva använda den och då betala mig med arbetare.
Under sommaren och hösten är det dags att förvärva de brickor som behöver resurser som det finns gott om. Men du måste dessutom producera från och uppgradera brickorna så hur ska du prioritera? En tumregel är att prioritera brickor som sällsynta och/eller kostar arbetare permanent. Om du behöver järn och det bara finns på en motståndarbricka kommer du att förlora arbetaren till motståndaren och då är det bättre att lägga den där tidigt då priset är lågt. Om det däremot är din egen bricka kan du avvakta då du får tillbaka arbetarna efteråt. Jag försöker också se till att uppgradera alla mina brickor hellre än att förvärva många brickor som jag sedan inte hinner uppgradera, detta eftersom uppgraderade brickor både ger bättre avkastning och mer poäng.
Under vintern gäller det att börja räkna. Hur många poäng kan du få för dina vinterbrickor och hur många poäng kan de andra få? Svaret på den frågan avgör vilka brickor du ska släppa till budgivningen och vilka du ska kasta. Gör också motsvarande beräkning för vinterbåtarna så att du vet hur högt du kan gå i budgivningen.
Budgivningen är naturligtvis viktig även i de andra säsongerna så låt oss uppehålla oss en stund vid den. Medan vinterbrickor är hyfsat enkla att värdera (du vet hur många resurser du har och vad de har för värde på den brickan vid spelets slut) så beror tidigare brickors värde på hur du utnyttjar dem. I och med att arbetare i bud förloras så måste du väga arbetarens förlorade framtida produktion mot brickans potentiella produktion. En tumregel är att en bricka för en arbetare är billigt medan en bricka för tre arbetare är dyrt. I det sistnämnda fallet är det ofta bättre att släppa brickan och använda arbetarna för att producer på motståndarens bricka. Du förlorar arbetarna i båda fallen men får produktion för dem i det senare fallet.
Liknande tumregler kan användas för hur många arbetare du ska låta producera på samma bricka. I detta fall är det bra att balansera din hand så att du har två arbetare per bricka. Då har du råd att använda en till två arbetare per bricka för produktion och resten för bud och får därmed god avkastning på varje arbete. Att använda tre arbetare på en bricka ger inte lika god avkastning då de hade kunnat producera på två eller tre andra brickor i stället. Dock är dessa regler långt ifrån utan undantag. Om det är brist på en resurs kommer alla spelare få dålig avkastning och det kan bli nödvändigt att bjuda högre för att få någon avkastning överhuvudtaget.
Så långt har vi uppehållit oss vid antalet resurser men för arbetare har även färgen betydelse i spelet. Eftersom du måste "följa färg" är det bra att försöka ha en balanserad hand så att du inte utestängs från brickor för att du saknar rätt färg. Du kan visserligen inte styra så mycket vilka färger du får men däremot vilka färger du förlorar (d v s vilka du lägger på bud eller andras brickor). Om du ändå skulle få brist i en färg så se till att lägga dem tidigt medan platser på brickor ännu är billiga.
De gröna arbetarna är ett fall för sig. De hjälper dig att utestänga andra spelare från brickor men måste användas klokt. Om du lägger dem som bud förlorar du dem till påsen och om du lägger dem på andras brickor förlorar du dem till en annan spelare (och därmed din förmåga att utestänga den spelaren). Om du lägger dem på egna brickor får du behålla dem men utestänger dig själv om du inte har fler gröna arbetare. Bäst är att använda dem sparsamt de tidiga säsongerna för att sedan stänga ut de andra spelarna från de mest värdefulla vinterbrickorna.
Det finns många fler stenar att vända i detta mångfacetterade spel men ovanstående borde ge lite stöd i de många beslut spelaren stalls inför. Det viktiga är att du förstår hur spelets övergripande ekonomi hanger ihop så att du förstår de taktiska möjligheter som öppnar sig under spelets gång. En sak är dock säker: det ena partiet Keyflower är inte det andra likt.
Minnen
Minnen kommer när jag spelat mer.
Hansa Teutonica (äger)
| Bakgrund: | Handelsrutter mellan Hansastäder |  |
| Spelare: | 2-5 (bäst för 3-4) | |
| Speltid: | 60 minuter | |
| Svårighetsgrad: | 30% |
Allmänt
Hansa Teutonica omfamnar många element jag tycker om i brädspel. Det har placering av arbetare, där du måste hinna före de andra spelarna till attraktiva platser på kartan. Det har ruttbyggande, där du måste bygga ett handelsnätverk. Det har områdeskontroll, där du måste kontrollera städer. Det har en ekonomisk motor, där du ständigt måste avgöra vilken färdighet som ska förbättras härnäst. Lägg till detta möjligheten att flytta på andra spelares arbetare som inte bara kostar dig en arbetare utan också ger den andre spelaren en arbetare.
Allt detta åstadkoms genom mycket få komponenter (en karta, en mängd kuber och några markörer) och mycket snabba handlingar (lägg kuber för rutter och flytta kuber för att låsa upp färdigheter) som gör spelet snabbt och strömlinjeformat.
Hansa Teutonica har mycket gemensamt med andra bra spel som Power Grid och El Grande men i ett mer komprimerat och lättillgängligt format. Ett parti Hansa Teutonica är helt enkelt en njutbar upplevelse full av utmanande beslut och knivskarp interaktion.
Hansa Teutonica - A Study in Good Game Design (engelskspråkig recension för publicering på Boardgamegeek)
Our first Meeting
When I first met Hansa Teutonica, it was love at first sight. Well, perhaps not at first sight (the box cover isn't that engaging) but at least at first encounter. The elegant unlocking of abilities on the player board, the fierce competition along the routes on the map, the completely different strategies available in the game... the game just felt so unique.
As I got to meet other games, the initial impression began to fade. It turned out that none of the many intriguing parts of Hansa Teutonica were particularly unique but rather standard design elements of many eurogames out there. In fact, individual elements even seemed better designed elsewhere and my copy was often left behind when I went out gaming.
But yet, every time I returned to the game, I was offered a great and varied experience and everybody I've played it with so far agree that Hansa Teutonica is a fun game. Let's look closer at the design of Hansa Teutonica to see if we can understand why.
The Basics
Hansa Teutonica is basically a game about placing cubes (traders) and cylinders (merchants) on trade routes between cities. Once all spaces between two cities are occupied, you may claim the route and receive a reward. There are many different rewards to choose from but they all boil down to resources (improved abilities) or victory points (immediate or at the end of the game).
One interesting feature of Hansa Teutonica is that placed workers, sorry traders, only partially block other players as they can be pushed (but the pusher has to pay and the pushed gets paid). One other interesting feature is that the game contains nothing of what one may normally associate with a game about building trade routes. There are no vehicles to transport them on, no market to sell them at, no money for trading them, no buildings to build for them. In fact, there are no goods at all in Hansa Teutonica.
So where's the game then? The answer is that all the game elements have been abstracted into the wooden components. Won't this remove all fun from the game? No, this is actually what makes the game fun!
The Multi-Skilled Cubes
As in many eurogames, the core of Hansa Teutonica's gameplay is the balance between resources and victory points. Produce resources to build up a strong engine and switch to victory point production at the right time. Your "engine" is your player board and the fuel is your action cubes (traders or merchants). Removing cubes from your player board not only gives your more action cubes to work with on the board but also unlocks abilities that gives you stronger actions.
This simple mechanic is the first key to the Hansa Teutonica's successful design. There is no fiddly resource conversion that interrupts the smooths gameplay. Everything that happens in the game is taken care of by this multi-skilled cube. It's an action cube when you take it from your supply, it's a trader when you place it on a route, it's an office when you place it in a city and so on. Heck, even its absence means something in the game thanks to the mechanic of unlocking abilities.
However, "stronger" actions does not mean more and more resources but it literally means stronger actions. Hansa Teutonica is not a game of crazy combos where you get so many resource modifiers that you start forgetting about them. No, Hansa Teutonica modifies your actions in a way that may help you get resources, but only if you know how best to use your actions. This is the second key to Hansa Teutonica's successful design so let's look closer at your action board.
The Action Ability
The ability that usually gets the most attention is the number of actions. The more cubes you remove, the more actions you get to take each turn. Easy to use and powerful, particularly the first cube, that gives you 50% more actions (3 instead of 2). Beginners are often recommended to start here and I'm inclined to agree, since I've never seen anyone win with only 2 actions. But removing more cubes to get more actions (2 more cubes for 4 actions and another 2 cubes for 5 actions) is not necessarily worth the actions required to accomplish this. There are other abilities that may be more interesting.
The Income Ability
Another important ability is the income. When you take actions, your action cubes are moved from your supply via the map to the general stock, from where you eventually have to retrieve them. Initially, you may only retrieve 3 cubes so and unless you unlock this ability, you may have to spend your hard earned actions to retrieve cubes.
The Blocking Game
But isn't there an alternative to get your cubes back? Yes, let's pause our action walkthrough to learn more about perhaps the most distinguishing feature of Hansa Teutonica, the blocking and pushing game. By placing a cube on an opponent's unfinished route, you block him or her from completing it. Your opponent may push away your cube but not only does this cost him or her an extra cube, this also gives you an extra cube from the stock to place at an adjacent route. A good blocking game can earn you a lot of cubes and make income less important. But what's the point of having many cubes on the board if they're scattered along different routes? This is where the next ability becomes interesting: the "Liber Sophiae".
The Liber Sophiae Ability
The Liber Sophiae tells how many cubes you may move around on the board in a single action. With a powerful Liber Sophiae ability and a well played blocking game, you can essentially take more actions in a turn than a player with many "normal" actions. Another advantage of unlocking Liber Sophiae is that this is the only ability that gives you more cylinders (merchants) to work with so let's take another pause and talk more about them.
The Traders and the Merchants
In most respects, there is no difference between cubes and cylinders. They are placed on routes and retrieved as ordinary cubes. However, the merchants are "heavier" than the traders. Not only do they cost more to push for your opponents but they also give you more when pushed. (Because of this and their round shape, we always refer to them as "fat guys".) Another important distinction between traders and merchants is that they have dedicated spaces on the map. One of the rewards for claiming a route is to leave a merchant or a trader in the city but some city spaces are squared while others are round. I leave it to the reader to figure out who goes where.
The Privilegium Ability
Another restriction when placing trades and merchants in a city space is the color of the space. Is there an ability to unlock for this as well? You bet! It's called Privilegium and the more you unlock this ability, the more cities are open to you. But why would you want to place your traders and merchants in the cities rather than unlocking abilities? The answer to this question leads us to the victory points of the game.
The Victory Points
No matter how fun it is to unlock abilities, they don't earn you any victory points (unless you unlock an ability completely, which earns you 4 victory points). It's actually common that new players get so engaged in unlocking abilities that they forget the objective of the game. The bulk of your victory points comes not from the abilities but from your traders and merchants in the cities. Controlled cities at the end of the game (where you have the most or the rightmost trader or merchant in a city) earns you 2 victory points, connected cities at the end of the game earns you 1 victory point each and a certain route across the middle of the map earns you up to 7 victory points immediately depending on whether you're first or not.
Not too bad, but this is something to focus on later in the game, after you've built your engine, right? No, there is a reward for placing traders and merchants in cities early. Not only are the city spaces limited and restricted (remember the Privilegium ability) but more importantly, the controlling player earns 1 victory point EVERY time a player completes an adjacent route. Control of both cities around a route can turn into a very fat cash cow if the route is popular.
The Victory Point Ability
The fifth and final ability is the least powerful when it comes to actions. However, it's a multiplicator for the victory points earned per city in a network. A completely unlocked multiplicator ability will give you five times as many victory points - nothing to sneeze at!
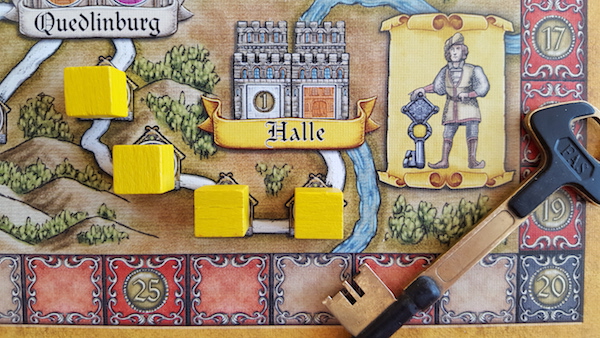
The Bonus Plates
So far, the game is completely deterministic but there is one element adding the often needed healthy randomness: the bonus plates. Completing certain routes give randomly drawn (but known in advance) bonus actions. One example is a number of free actions, another the ability to place a trader or merchant outside the normal city spaces. They are also worth victory points in the end, whether used or not.
The End
What we've seen so far is an action board with literally many different paths towards the victory but there is more to come. We haven't answered the common question of when the game ends yet. The answer is another key to Hansa Teutonica's successful design: it depends. There are several end game triggers, all of them controlled by the players. The most common trigger is that a player reaches 20 victory points during the game (excluding end game victory points). However, 10 full cities or depleted bonus plates may also trigger the end. The key point is that you must adapt your strategy to the expected game length and/or work to shorten or prolong the game to fit your strategy.
The Map
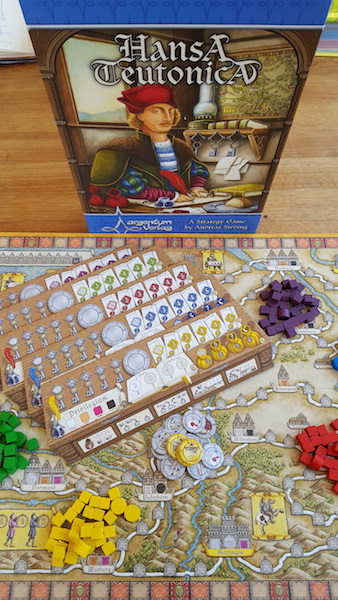
The only thing that may seem less elegant is where all the actions take place: the map. For the uninitiated, it may look like a random mix of route lengths, routes scores, bonus plates, city shapes, city colors and cities for unlocking abilities. However, a closer look reveals that a lot of thinking has gone into the process of designing the map. The cities that unlock abilities are located along the edges, making it difficult to unlock abilities and build a network at the same time. The 7 victory points route is located in the middle of the board, far from other valuable routes, while the bonus plate routes are scattered.
The map offers a lot of variability and engagement as players try to match different part with different strategies and is another important key to Hansa Teutonica's successful design. I'm sure a lot of thinking has gone into the distribution of shapes and colors because I never seem to get the "perfect" placement of my traders and merchants.
Conclusion
So where does this case study lead us? We have a game that may be using known mechanics but in the most fun way. Your engine doesn't simply give you more resources to pile but rather more fun actions. The constant blocking and pushing turns this into one of the most vicious eurogames out there. The many different strategies require completely different actions and approaches as well as good timing. All this is accomplished in a very smooth and streamlined gameplay thanks to the multi-skilled cubes.
Hansa Teutonica is far from the multi-player solitaire optimization games that are too often seen today, this is game where you must understand what the other players are up to and how best to take advantage of them. But is it really about traders and merchants of the Hansaetic League? Well, not really but who cares?
Strategi
I diskussioner om strategi och taktik brukar taktiken definieras av strategin såtillvida att alla taktiska manövrar måste stödja den övergripande strategin. Dock gäller inte detta i Hansa Teutonica utan här gäller det att utifrån de taktiska möjligheterna forma en hållbar strategi.
Den nyckelmekanism i Hansa Teutonica som ger upphov till detta är blockeringen. Spelarna kan och ska blockera varandra och provocera fram "knuffar" som ger knuffaren en nackdel och den knuffade en fördel. Den taktiske spelaren i Hansa Teutonica kan därför hela tiden söka efter "billiga" handlingar som inte kräver någon knuff såväl som möjligheter att göra de andra spelarnas handlingar "dyra" genom att blockera dem.
Men att enbart spela taktiskt fungerar inte i längden då de andra spelarna inte kan blockeras i evighet och då de egna handlingarna bara ger ströpoäng om de inte knyts ihop i en poängvinnande strategi. Precis som i många andra spel så gäller det inte bara att balansera sin utveckling (låsa upp förmågor på spelarbrädet) för att få flexibilitet utan också att specialisera sig för att få så effektivt utbyte av sina handlingar som möjligt (utnyttja de starkaste förmågorna där de ger mest poäng). Låt oss därför titta på ett antal grundläggande strategier för vinst.
Lås upp slutbonus + bygg lång handelsrutt
- Fördel: Ger poäng löpande, då varje ny rutt ger dig poäng för dina angränsande städer på rutten, och ger extra mycket poäng om du lyckas knyta ihop Standal och Arnheim. Det är svårt för motståndarna att blockera dig då du kan välja rutt fritt.
- Nackdel: Slutbonusen ger inga fördelar under själva spelet. Motståndare med andra förmågor kan ta over dina städer och neka dig de två bonuspoängen för att kontrollera dem.
- Omdöme: Undvik att knuffa motståndare utan ta hellre omvägar. Försök att avsluta spelet tidigt.
Lås upp handlingar
- Fördel: Fler handlingar än motståndarna ger i längden fler poäng.
- Nackdel: För att få fler handlingar måste du först lägga handlingar och om motståndarna lyckas avsluta spelet tidigt så hinner du aldrig få någon nytta av dina extra handlingar. Det är lätt för motståndarna att blockera dig.
- Omdöme: Det krävs bara ett steg för att öka dina handlingar med 50% (från två till tre) och det är svårt att vinna utan det. I ett medellångt spel lönar det sig ofta att ta två steg till och få fyra handlingar medan ytterligare två steg för fem handlingar bara lönar sig om spelet verkar bli långt (till exempel om de andra spelarna låser upp handlingar och därmed inte vill avsluta spelet tidigt).
Lås upp privilegium (färger) + bok (diskar) och placera diskar på Coellen-Warburg-rutten
- Fördel: Ger mycket poäng om alla diskar erövras
- Nackdel: Det är lätt för motståndarna att blockera dig eller själva knipa någon disk. Poängen räknas först i slutet och bidrar inte till att avsluta spelet tidigt vid behov.
- Omdöme: Kombinera med strategier fokuserade enbart på privilegium eller bok så att du kan växla over till någon av dessa om du blockeras.
Lås upp privilegium (färger)
- Fördel: Ger stor frihet att bygga rutter och ta över kontrollen av städer från andra spelare, något som ger både löpande poäng och slutpoäng.
- Nackdel: Ger lite poäng om motståndarna undviker dina rutter.
- Omdöme: Ta kontroll over städer längs rutter som är viktiga för motståndarna samt kombinera med någon av strategierna för handelsrutt eller Coellen-Warburg ovan.
Lås upp bok (diskar)
- Fördel: Ger fler diskar samt möjlighet att flytta runt knuffade kuber.
- Nackdel: Ger inga fördelar om motståndarna inte knuffar dig.
- Omdöme: Kombinera med aggressiv blockering, särskilt längs rutter som är viktiga för motståndarna, samt med valfri annan strategi för att flytta knuffade kuber till poänggivande rutter.
Lås upp penningpåse (kuber från stock)
- Fördel: Sparar handlingar då du får in fler kuber i spel för varje handling.
- Nackdel: Inte lika flexibelt som att låsa upp handlingar. Matchar blockeringstaktiken dåligt, eftersom denna ger dig kuber utspridda på brädet snarare än i din stock.
- Omdöme: Kombinera med strategier som tvingar dig att knuffa motståndare.
Ta bonusbrickor
- Fördel: Bonusbrickor ger fördelar i sig och poäng i slutet.
- Nackdel: Spridda bonusbrickor ger spridda rutter som i sig inte ger poäng i slutet.
- Omdöme: Kombinera med strategin för handelsrutt och se till att lägga de nya bonusbrickorna på rutter nära dina andra rutter och som motståndarna är mindre intresserade av (till exempel rutter vid städer utan förmågor).
Med vetskapen om dessa grundläggande strategier så kan du ta dig an ett parti Hansa Teutonica enligt följande:
- Skaffa en tidig tredje handling utan att behöva knuffa för mycket alternativt blockera andra spelares forsök att få en tredje handling för att själv bli knuffad.
- Placera kuber där du kan skaffa andra tidiga förmågor och där konkurrensen är liten.
- Givet de tidiga förmågor du fått, välj en strategi ovan och fokusera på den.
- Var aktsam på de andra spelarnas strategier och blockera dem/växla till en batter anpassad strategi om nödvändigt.
- Avsluta spelet när du kan det hellre än att låta motståndarna få fler handlingar och sedan själva avsluta spelet.
Minnen
Mitt bästa minne av Hansa Teutonica kommer faktiskt inte av detta spel utan av dess möjliga efterföljare Chicago Mobsters. Jag fick nämligen äran att speltesta en prototyp tillhandahållen av designern Andreas Steding och se några av mina förslag i kommande iterationer. Förhoppningsvis realiseras denna version då den innehåller en del intressanta tematiska nyheter som tillför strategiska möjligheter (korruption, poliser, fängelse) utan att urvattna de många möjligheter som Hansa Teutonica redan har.
Arkwright (äger)
| Bakgrund: | Driv fabriker under den industriella revolutionen | 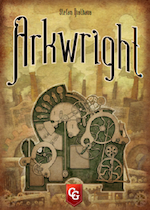 |
| Spelare: | 2-4 (bäst på 4-5) | |
| Speltid: | 3-4 timmar | |
| Svårighetsgrad: | 50% |
Allmänt
Arkwright är sannerligen inte ett spel för alla. Det här är ett ekonomiskt spel med nästan vetenskaplig precision. Placera handlingsbrickor på ett bräde för att bygga fabriker, anställa arbetare, öka kvalitet, förbättra distribution och bygga maskiner (för att ersätta arbetare). Ju fler arbetare som anställs, desto mer ökar lönerna men det gör också efterfrågan på varorna. Dock så bestäms antalet sålda varor och ordningen som de säljs av deras attraktion, som i sin tur bestäms av fabrik, priser, kvalitet och distribution. Med andra ord, varje handling kommer att förändra marknadsvillkoren och tvinga spelarna att ständigt handla för att förbli konkurrenskraftiga, vilket åter vill förändra marknadsvillkoren och så vidare.
Målet i spelet är också en intressant matematisk övning: aktier multiplicerat med aktievärde. Du behöver köpa aktier och öka deras värde men köper du dem tidigt får du mindre pengar över till investeringar och köper du dem sent blir de dyrare.
Arkwright erbjuder inte mindre än tre varianter av ökande komplexitet. Den grundläggande, Spinning Jenny, har ingen slump efter uppsättningen och kan nästan kännas möjlig att lösa. Nästa steg är Spinning Mule, som lägger till specialister som kan "bryta mot reglerna" och slumpmässiga händelser att beakta. Slutligen har vi Waterframe, som dessutom erbjuder möjligheten att skeppa och sälja till utländska marknader.
Det finns många regler att ta in men de är alla ganska intuitiva så snart du förstått det ekonomiska flödet. Det som kan avskräcka många spelare är den matematiska aspekten av Arkwright. Det är möjligt och ofta nödvändigt att beräkna exakt vilken attraktion du behöver för att sälja ett visst antal varor. Det räcker med enkel addition och subtraktion men jag kan förstå varför Arkwright har kallats "Spreadsheet - The Game". Men för spelare som är beredda att konkurrera på en marknad där ingenting annat än deras egna handlingar räknas så har Arkwright få konkurrenter.
Strategi
Strategi kommer när jag spelat mer.
Minnen
Minnen kommer när jag spelat mer.
Brass: Lancashire (äger)
| Bakgrund: | Industriella revolutionen i England |  |
| Spelare: | 2-4 (bäst på 3-4) | |
| Speltid: | 2 timmar | |
| Svårighetsgrad: | 40% |
Allmänt
Brass är en fascinerande smältdegel av korthantering, nätverksbyggande och ekonomisk motor. Spela kort för att placera industrier och transportera varor till andra platser låter i sig inte så intressant. Men det intrikata nätet av ömsesidiga beroenden mellan industrier samt den delade infrastrukturen där spelare får använda varandras industrier förvandlar spelet till en intressant blandning av samarbete och konkurrens.
Förbindelser (kanaler och senare järnvägar) krävs för bomullsfabriker. Järn krävs för att utveckla industrier (genom att helt enkelt slänga brickor av lägre värde för att få tillgång till brickor av högre värde). Kol krävs för att bygga järnvägar. Järn och kol kan krävas för att bygga industrier. Hamnar krävs för att sälja varor. Det finns inte en chans att göra allting själv men att använda motståndares infrastruktur ökar värdet på den. Lägg till detta ett briljant finansiellt system där försäljning ökar din inkomst per tur och lån minskar densamma.
Den främsta skillnaden mellan Brass: Lancashire och Brass: Birmingham är att den förra kräver hamnar för försäljning medan den senare kräver öl. Vilket är bättre? Varför välja?
Strategi
Strategi kommer när jag spelat mer.
Minnen
Minnen kommer när jag spelat mer.
Brass: Birmingham (äger)
| Bakgrund: | Industriella revolutionen i England |  |
| Spelare: | 2-4 (bäst på 3-4) | |
| Speltid: | 2 timmar | |
| Svårighetsgrad: | 40% |
Allmänt
Brass är en fascinerande smältdegel av korthantering, nätverksbyggande och ekonomisk motor. Spela kort för att placera industrier och transportera varor till andra platser låter i sig inte så intressant. Men det intrikata nätet av ömsesidiga beroenden mellan industrier samt den delade infrastrukturen där spelare får använda varandras industrier förvandlar spelet till en intressant blandning av samarbete och konkurrens.
Förbindelser (kanaler och senare järnvägar) krävs för bomullsfabriker. Järn krävs för att utveckla industrier (genom att helt enkelt slänga brickor av lägre värde för att få tillgång till brickor av högre värde). Kol krävs för att bygga järnvägar. Järn och kol kan krävas för att bygga industrier. Bryggerier krävs för att sälja varor. Det finns inte en chans att göra allting själv men att använda motståndares infrastruktur ökar värdet på den. Lägg till detta ett briljant finansiellt system där försäljning ökar din inkomst per tur och lån minskar densamma.
Den främsta skillnaden mellan Brass: Lancashire och Brass: Birmingham är att den förra kräver hamnar för försäljning medan den senare kräver öl. Vilket är bättre? Varför välja?
Strategi
Strategi kommer när jag spelat mer.
Minnen
Minnen kommer när jag spelat mer.
Schack (äger)
| Bakgrund: | Abstrakt spel om att fånga varandras kungar | 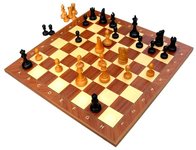 |
| Spelare: | 2 | |
| Speltid: | Varierar | |
| Svårighetsgrad: | 30% |
Se Schack.
Chess - The Antithesis of a Modern Boardgame (engelskspråkig recension för publicering på Boardgamegeek)
What follows is a modernized translation of a 15th century Italian manuscript on chess. The author did not sign his work but presented himself as an authority on modern boardgames.
"Having returned from my journey to the Teutonic city of Essen, I hereby share my impressions of the centennial game fair. I regret to inform you that most of the new games were disappointing. The expansion to knucklebones left most players lukewarm, the innovative sphere-shaped dice were deemed outright broken, as were the cube-shaped marbles, and the long awaited demonstration of new art for playing cards was cancelled due to copyright issues between the abbey and the city.
Instead, the game on everybody's lips was a modernized version of an old boardgame called chess. At first glance, this game gives a very contradictory impression.
The board is abstract, consisting of eight times eight squares. Half of the squares are black but as far as I can tell this has no impact on the gameplay and is just confusing. Perhaps the board is meant to represent the German fractured political map? The pieces on the other hand are the opposite - crude miniatures that remind more of the vulgar New World trash games that the Spanish brought back to our continent.
Moving on to the setup, this is a cumbersome activity as thirtytwo pieces has to be positioned on specific squares before you can start playing. Words have reached me about an Asian chess version called Run or possibly Go, where all pieces start off the board with no setup time at all. The designers of chess should have learned from this example.
The gameplay itself is fairly simple. Take turns to move one piece to one square, discard any piece on the square you move to, and end when one player's King piece cannot avoid being discarded. As you can tell from this, chess represents everything that modern European boardgames have abandoned centuries ago.
First, the pieces are terribly unbalanced. The Pawn may only move one square at the time and only forward, the Bishop may only move diagonally while the Rook may only move orthogonally, and do not get me started on the Knight's complex movement rule. But stronger than all of them is the Queen, which may move both diagonally and orthogonally. Why anyone would ever choose to move another piece than the Queen is beyond me.
Second, chess suffers from a severe runaway leader problem where it is very difficult to recover from initial piece losses. Some argue that there is a catchup mechanism in the rule of Pawn promotion, allowing a pawn which reaches the last row to be exchanged for any other piece, but good luck getting this weak piece all the way there.
Third, there is a distinct lack of progress and arc in the game. You are supposed to be a ruler of a kingdom with a strong army but neither of them improve during the game. Your kingdom will produce no resources, your military will not unlock any new abilities and your soldiers will earn zero experience points. The only "upgrade" is the aforementioned Pawn promotion but in my humble opinion, a pawn deserting from the battlefield should not be promoted but rather executed.
Fourth, there is a disturbing disconnection between gameplay and theme. The idea that the Queen is stronger than the King is preposterous and the rule that a simple peasant can defeat a mounted knight by merely moving to its square proves that the designers are either blatantly ignorant of military theory or secretly supportive of subversive thoughts.
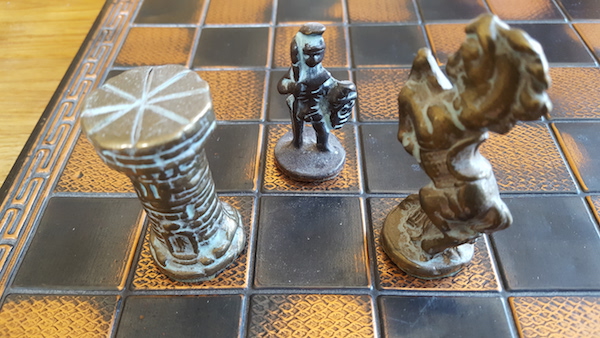
Why not let the encounters be determined by dice or cards instead? Imagine if chess would have captured the noble one-on-one duels of the battlefield where heroes are born. What an epic storytelling we would have got. What a lost opportunity we got instead.
This leads us to the fifth problem, namely that this lack of healthy randomness makes chess prone to analysis paralysis. Many are the men in the bloom of their youth that I have seen pondering in vain at the chess board. And who can blame them? 16 pieces to choose from, each with several options which are difficult to predict anyway due to the constantly changing game state. A basic rule of boardgames is to provide the players with few but meaningful decisions. I regret to say that chess fails utterly in all those respects and I seriously fear for our youngsters' health if they spend too much time staring at a checkered board instead of seeking outdoor leisures.
Each of those problems is in itself enough to break a game and then I haven't even mentioned the player elimination, the take that mechanic and the lack of solo versions.
My final verdict is that chess is an expression of the prevalent cult of the new, doomed to be gone from the hotlist and forgotten by everybody within a decade or two."
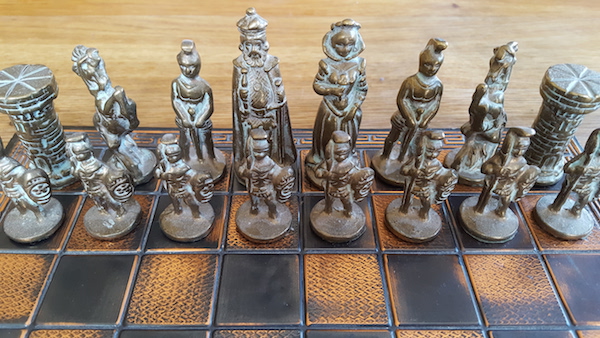
Translator's comment: Some scholars believe the author of the manuscript was Pedro Damiano, who would later write Questo libro e da imparare giocare a scachi et de li partiti, the first known book to describe modern chess rules and strategies. I guess he eventually changed his mind about chess.
Backgammon (äger)
| Bakgrund: | Abstrakt spel om att flytta brickor från start till mål |  |
| Spelare: | 2 | |
| Speltid: | Varierar | |
| Svårighetsgrad: | 20% |
Se Backgammon.
9 - Ett spel som skulle ha fått en 10:a om det inte hade varit för spelen som redan fått en 10:a
Go (äger)
| Bakgrund: | Abstrakt spel om att ta kontroll över områden | 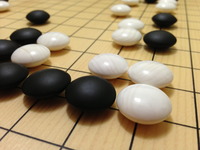 |
| Spelare: | 2-8 (ju fler, desto bätre) | |
| Speltid: | Varierar | |
| Svårighetsgrad: | 30% |
Se Go.
Kanban (äger)
| Bakgrund: | Bygg bilar |  |
| Spelare: | 2-4 (bäst på 3-4) | |
| Speltid: | 2 timmar | |
| Svårighetsgrad: | 70% |
Allmänt
Kanban EV är en nyutgåva av Vital Lacerdas Kanban. Vital Lacerda är känd för sina komplexa spel med många kopplade mekaniker men med Kanban EV har han skapat ett elegant spel där "lean management" krävs för att vinna.
Den korta beskrivningen är att spelet simulerar en bilfabrik där spelarna väljer handlingar från en action board som i slutändan levererar testade bilar.
- Design: Välj en bildesign. Det finns fem bilmärken som var och en kan kombineras med en av sex bildelar.
- Logistik: Välj en av sex bildelar.
- Tillverkning: "Mata in" in bildelar som matchar bilen på det löpande bandet så att bilar "knuffas ut".
- Utveckling: Uppgradera bildelar för att öka bilars poängvärde och testa bilar för att själv få poängen.
En av många finesser är att allt detta görs på en gemensam spelplan. Det är alltså inte ett "multiplayer solitaire" där du sitter och optimerar ditt eget spelbräde. i stället måste du ibland samarbeta med de andra spelarna för att få ut bilar ni alla har ett intresse av men oftare konkurrera om de begränsade handlingarna och resurserna.
Ytterligare en finess är fabrikschefen "Sandra", som går runt och utvärderar spelarna (och samtidigt stör arbetet, som brukligt är för en chef). Dessutom måste spelarna gå på möten och berätta för henne vad de gjort (genom att samla speech tokens och spela ut på målkort) för att få sina poäng.
Kanban EV kan varmt rekommenderas för den som gillar tunga strategispel med hög grad av interaktion.
Kanban EV - If you work and no one is around to see it, have you really worked? (engelskspråkig recension för publicering på Boardgamegeek)
According to Wikipedia, Kanban is "a lean method to manage and improve work across human systems". Lacerda's games on the other hand are known for "having the most crazy interlocking mechanisms" according to the designer himself. Most of his games have a complexity rating of 4 or higher and some critics argue that they contain layers of layers of complexity just for complexity's sake. Whatever you think of his games, "lean" may not be the first word that springs to mind when someone mentions Lacerda. So how did he tackle the theme of efficient assembly lines in the automobile industry?
Hardcore games for hardcore gamers
The basics: Place Workers to convert Resources
The basic gameplay of Kanban EV is actually not that complex. There are only five worker spaces of the game, each of which has one or two actions. Using those actions, you acquire resources (designs and parts of different colors) and convert them to victory points (cars). This sounds even too simple, doesn't it? Well, each individual task is simple but to connect them in an efficient workflow you will need a lean mindset. Let's look at the different tasks and how they relate to each other.
The Design Department: Which cars do you want to build?
Car designs come in five different colors (the black concept car, the red sports car, the gray truck, the blue SUV and the green city car) are selected through simple drafting: the first two designs in each line come with a bonus, the next two come without a bonus and the designs in the draw piles require an unlocked ability.
So far nothing interesting. However, if you look closer at the designs, each one is uniquely associated either with one of the six different car parts or with no car part at all, adding up to a total of 5x7 = 35 car designs. The short explanation is that this tells you which car part that may increase the value of the car and that your choice of design should be based on just in time thinking: which design should you take now to have the right resources when you need them in future departments?
If this advice doesn't sound very helpful, let's move to the next department and learn more about the car parts.
The two rightmost green cars come with a book and the black and red cars next to them come with a shift, more about them later.
The Logistics Department: Which parts do you need to produce your cars?
Car parts come in six different colors (teal motors, maroon autopilots, green systems, tan bodies, gray electronics and pink drivetrains). They are also selected through drafting but a more elaborate one. Here you place a kanban card with six car parts depicted so that four of them point towards three of the car part spaces on the board and the other two point towards the other three car part spaces on the board. For each match between the card and the board you place a car part and then you take all car parts in any one car part space.
The point of all this is that not only can you decide to increase the number of car parts that you need but you can also decide which car parts that will be left for the other players. There is also the interesting concept of the recycling center to take into consideration. This is a space which always holds three of the six car parts and which may be used to exchange resources. Thus, if you manage to play your kanban cards well, you can take resources that the recycling center is missing and exchange one of each of them for resources that you are missing to get a variety of resources. This will give you flexibility in future departments.
So is this simply a case of maximizing "your" car parts and minimizing the other players' car parts? Not necessarily, you may actually WANT the other players to get certain car parts and use them to promote your interests in future departments. If you're even more confused than after the Design Department, let's move to the next department where you actually get to produce the cars.
The kanban card as placed add 1 maroon part, 1 pink part and 2 tan parts.
The Assembly Department: Which cars do you want to produce first?
The Assembly Department is exactly this, an assembly line where you put car parts at one end and get cars at the other end. This is also a kind of drafting mechanic, where you have some influence regarding which ways the cars should take on the assembly line, which in turn determines which cars eventually get pushed out. However, there are (at least) two tactical challenges to manage at this department.
First, you cannot use any kind of car part to push the car you want to push but only car parts that haven't been used for that car yet. (Obviously it wouldn't make sense to use two bodies for a car.) But more importantly, if a car has had a car part upgraded in the R&D Department, this part must be used first. Ideally, this is in your interest since it means that "your car" is worth more victory points but it also means that you should have planned for this and have the necessary car part just in time.
Are you fed up with the lean management and just want to take your arduously produced car? Sorry, there is more work in the next department before you can take it.
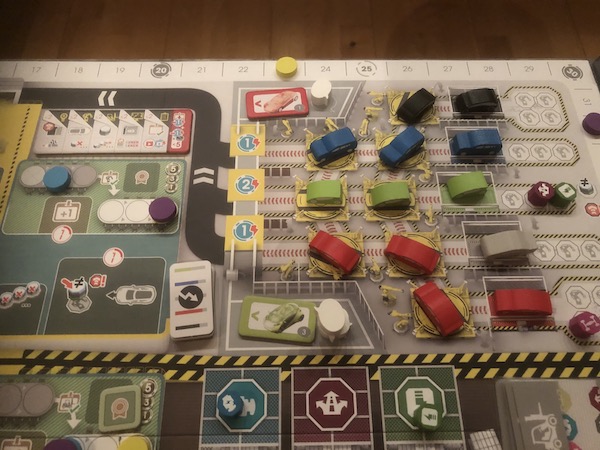
A blue, a green and a red car are in front of the assembly line, waiting to be pushed out depending on where car parts will be placed further back in the assembly line.
The R&D Department: Which cars do you want to upgrade and which cars do you want to claim?
The R&D Department is where you use your designs to improve and claim those cars you've worked so hard for. This department contains two important tasks.
First you may use use a design to "upgrade" the car part depicted on it. Simply return the design and place the car part on the car space. Don't worry about the exact victory point calculation for now, it's suffice to know that this will earn more victory points for the players with such cars. Wait, what? Can other players take advantage of my labor? Of course, did you think you were alone at this factory? And just wait till I've described the second task.
In addition to the upgrade task, you can also claim cars from the "test track". The test track is where the cars pushed out from the assembly line end up. We see the drafting mechanic here as well, where early pushed cars cost less actions to take. Thus, it does not matter who actually got the car to the test track in the first place (although they will have earned some victory points from the Assembly Department) and there will be frequent situations where a player "steals" another player's car or where a free-riding player picks up leftover cars that were pushed there to make room for other cars.
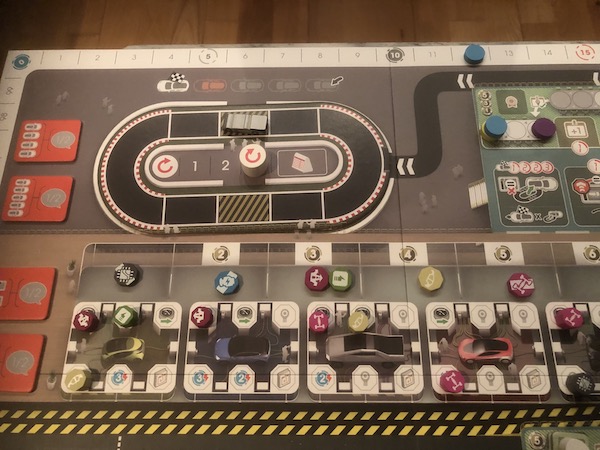
The test track is empty but for the pace car. The leftmost green car has been upgraded three times with a maroon, a green and a tan car part.
The Administration Department: Which department do you need to visit an extra time?
No company is complete without an Administration Department so of course there is one in Kanban EV. And as all other Administration Departments, no work is done here. Instead, a worker placed here may work at any other department. This is why Administration Departments tend to be full of workers. Well, maybe not but you may wonder why you would bother placing workers at other departments. To answer that question, we'll move on to discuss how the actions are executed in Kanban EV.
"Yup, keep an eye on admim. Evil place on any company."
Vital Lacerda
The Action Execution: Do you want to work much or fast?
As you might have guessed, there is more to the worker placement mechanic than simply selecting the best action for you. Each department has two spaces, one that lets you take two actions at the department and one that lets you take three actions. However, a worker on a two action space get to act first so if you are in a hurry you'll have to accept less actions.
Do you remember the flexible Administration Department? It only has spaces with two actions and one action respectively. To make things even worse, it's the last Department to execute its actions. OK, so now you may wonder why you would ever placing workers at the Administration Department.
One obvious reason is that the department you really want to work at is full. However, a more important reason is that departments are chosen and executed in department order from top to bottom. If you want to play it nice, you can use it to take two consecutive turns without having to worry about some guy coming in between and take advantage of your work. If you want to play it less nice, you can be that guy and take advantage of someone else's work. A typical example is when someone selects the Assembly Department with the intention to push out a valuable car to the test track, after which you select the Administration Department with the intention to take an R&D action and claim it for yourself before the other player has time to select the R&D Department.
The Training: Do you want to be good or look good?
There is one more thing you can do at each department, namely training. The training does give you immediate bonuses that help you in your work (part vouchers that act as jokers, books that provide free training and shifts that may be banked and used to take more actions in the future). The training also unlocks department specific benefits on your player board, such as more space to store the fruit of your labor. But more importantly, training is important to please the factory manager. It's now time to introduce Sandra.
Sandra acts as an AI worker. Her moves are partly determined by the players as she will always move to the next available department. In her turn, she will do some clean-up and then assess the players with the LEAST training in that department. If you're assessed and can't live up to her requirements for that department you will be penalized and lose victory points. This, and the fact that her work disrupts all players' work (she blocks a worker space, she removes resources placed by players and so on) makes her the perhaps most thematic part of the game.
Another interesting aspect about Sandra is that the completion of her supervision tour through the factory is one of the two game clocks (the other being the number of claimed cars) so the game length is variable and indirectly determined by the players.
Oh well, at least your hard work will pay off with more victory points than you lose due to this. Not quite, although you do earn a lot of victory points from cars (for each car you earn 1 VP per upgrade + 1 VP per matching upgraded design tile), a considerable amount of victory points come from telling Sandra about your work at the Meeting and training matters here as well.
A player board with some cars, parts vouchers and books. The padlock indicates an ability that may be unlocked through a certification.
The Meeting: If you work and no one is around to see it, have you really worked?
At certain times (when a certain number of cars have been claimed), the game is interrupted for a meeting. In turn order determined by the training level, the players get to play speech tokens (often earned from training) on goal cards to earn victory points for work done. You may for example be rewarded for each design tile you have that has been upgraded with a certain car part. Rewards are given on first come, first served basis, meaning that the first player may be rewarded for more goal items than the second player. Thus, you will earn some victory points out in the factory but unless you brag about it at the meeting, you will miss out on the large chunk of them. Did I tell you Sandra was the perhaps most thematic part of the game?
A meeting in progress. The leftmost goal, green cars in the player's garage, has been accomplished (and presented to Sandra!) by purple and blue player.
The Lean Player Mind
So what makes Kanban EV stand out from other games? It mixes worker placement with various drafting mechanics, turn order timing and contract completion. That doesn't sound very innovative, does it? But where Kanban EV really shines is in the way all those parts come together. This is not a point salad where you play different mini games to collect victory points. As you may have gathered from the department overview, your input at one department won't yield you anything if you don't have a plan for how to use the output at the next department, and the next and the next.
Nor is this game a multiplayer solitaire, where you can hover over your little private factory and optimize your actions. Instead, you will have to sharpen your elbows and claim your place in the department and at the meetings to be successful in the eyes of the factory manager Sandra. But this doesn't mean that Kanban EV is a knife fight in phone booth, at least not always. Sometimes it makes sense to cooperate with other players. Perhaps a player is upgrading a certain car model. Why not investing in the same car model and help increasing the value of it for the benefit of both. Kanban EV is a highly interactive game where interaction can be both positive and negative.
How about the complexity then? Here I would argue that the game itself is not that complex, if we accept Professor Rick Nason's distinction between complex and complicated. Complex problems involve unknowns and interrelated factors but there is very little unknown in Kanban EV. The randomly drawn reward tiles have marginal effects while the randomly drawn goal cards give you several turns to prepare for. Is Kanban EV a complicated game then, a game that is hard to solve but addressable with rules and recipes? New players may be indeed be overwhelmed, not by the many decisions (there are only five departments to choose between) but by the effort to understand how a decision now results in victory points at a meeting ten turns later. But no, the gameplay can't be reduced to simple heuristics. Understanding how all parts fit together is just the first step to mastering Kanban EV.
My best advice is not to worry and simply play in your first game. In the round preceding the first meeting, grab some resources and realize that you have the wrong resources later on. In the round preceding the second meeting, grab some other resources and realize that you have the right resources later but that someone else benefitted from them. When the game is over, you will have scored miserably but you will know what to do next time and you will want to play again immediately.
Once you've reached this stage, you will understand that Kanban EV's complexity comes not from a heavy ruleset but from the many interrelated factors created by other players. In this respect, Kanban EV is representative for Lacerda's designs and although the gameplay differs from that of other titles like Lisboa and On Mars, the player mindset is the same. When you start understanding how a player action now cascades into a future game state, then you will understand how to set up a strategy that gives you the necessary tactical means to react and then you will have achieved a lean player mind.
"The game is that heavy because players play it only once. After 5 plays, what keeps the heaviness is the challenge and how hard the decisions are to take."
Vital Lacerda
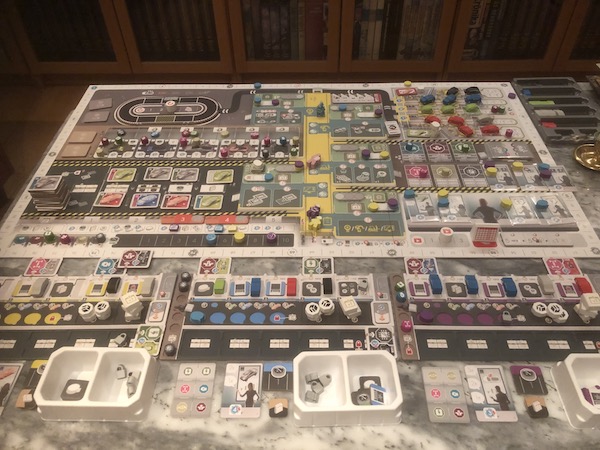
A 3 player game has ended after 2 weeks and 3 meetings. Hopefully Sandra is not too displeased.
Strategi
Strategi kommer när jag spelat mer.
Minnen
Minnen kommer när jag spelat mer.
Wildcatters (äger)
| Bakgrund: | Prospektera olja |  |
| Spelare: | 2-4 (bäst på 4) | |
| Speltid: | 2 timmar | |
| Svårighetsgrad: | 40% |
Allmänt
I Wildcatters konkurrerar spelarna om att utvinna och frakta olja över hela världen. Värdekedjan från investering till avkastning är ganska lång: bygg oljeborrtorn-utvinn olja-utveckla oljefält-bygg järnväg-bygg oljetanker-bygg oljeraffinaderi-transportera olja. Allt detta betalas med den begränsade resursen arbetare och utförs i en kontinent i taget enligt ett utvalt områdeskort. Till råga på allt har spelarna bara sju rundor att åstadkomma allt detta.
Dock är all infrastruktur delad och spelets främsta utmaning är därför att utnyttja detta till sin fördel. Genom att bygga oljeborrtorn i kontinenter där andra spelare finns kan man åka snålskjuts på deras oljeborrnings- och transporthandlingar. Genom att bygga järnvägar och tankers i transportintensiva områden kan man tjäna på andra spelares handlingar. Allt detta betalas dock med den andra begränsade resursen egna aktier, något som främst erhålls genom att andra spelare levererar olja till egna raffinaderier.
Jag var till en början tveksam till vinstkriterierna. I princip är Wildcatters reducerat till ett enkelt majoritetsspel där relativa majoriteter av levererad olja avgör poängen. Utmaningen i att balansera intäkter och kostnader och bygga rätt infrastruktur på rätt plats fyller dock Wildcatters med intressanta beslut. Den andra utgåvan bjuder dessutom på ytterligare en utmaning: för en balanserad hand av andra spelares aktier kan så kallade konsolideringsbrickor förvärvas, något som ger såväl egna aktier regelbundet som poäng i slutet.
De många och till synes godtyckligt prissatta aktietransaktionerna och den något otematiska användningen av aktier ger spelet en viss inelegans men vad gör det när kampen om oljan är så spännande som i Wildcatters.
Container (äger)
| Bakgrund: | Sälj, skeppa och köp containrar |  |
| Spelare: | 3-5 (bäst på 4-5) | |
| Speltid: | 90 minuter | |
| Svårighetsgrad: | 30% |
Allmänt
Container måste vara en av de mest eleganta ekonomisimuleringarna i spelvärlden. Containers produceras i fabriker, säljs till hamnar, lastas på skepp och skeppas till en ö för en auktion. Det låter enkelt men haken är att du inte får göra allt själv - din fabrik måste sälja till en annan spelares hamn som måste sälja till en annan spelares skepp, varvid alla spelare får delta i auktionen på ön. Kostnaderna för infrastrukturen är fast (eller för att vara exakt, ökar ju mer infrastruktur du redan har) men containerpriserna sätts av spelarna själva.
Detta skapar en liten ekonomi där spelarna själva måste välja vilken infrastruktur de ska investera i, vilka priser de ska sätta och och vilka andra spelares infrastruktur de ska använda. Dessutom har varje containerfärg ett unikt och hemligt värde för varje spelare så spelarna måste också beakta vem som efterfrågar vilken färg och till vilket pris.
Container kan kännas för torrt och/eller öppet för några spelare men med rätt grupp erbjuder det en mycket intressant upplevelse som växer för varje nytt parti.
Strategi
Strategi kommer när jag spelat mer.
Minnen
Minnen kommer när jag spelat mer.
Indonesia (äger)
| Bakgrund: | Driv handelsrutter i Indonesien |  |
| Spelare: | 2-5 (bäst på 4-5) | |
| Speltid: | 3-4 timmar | |
| Svårighetsgrad: | 50% |
Allmänt
Indonesia är ett spel späckat med spännande ekonomiska mekanismer som fungerar överraskande bra ihop. Köpa företag? Japp! Producera varor? Japp! Skeppa varor? Japp! Forskning och utveckling? Japp! Företagsfusioner? Japp!
Trots detta flyter spelet på mycket bra tack vare den nästan fullständiga frånvaron av pengar (!). Pengar används främst där de gör skillnad, det vill säga när det är dags likvidera investeringen. De delas mellan producent och skeppare vid skeppning och de används som betalning vid fusioner. Företag, expansioner och FoU är gratis. Vidare leder den delade infrastrukturen och i synnerhet fusionerna till att förutsättningarna förändras drastiskt från runda till runda, något som förhindrar snöbollseffekter.
Det enda som talar emot Indonesia är att den sista rundan med sina långa skeppningsrutter kan bli lite utdragen och att den långa speltiden gör svårt att få spelet till bordet. Jag kommer dock aldrig att tacka nej till ett parti!
Strategi
Strategi kommer när jag spelat mer.
Minnen
Minnen kommer när jag spelat mer.
Food Chain Magnate (äger)
| Bakgrund: | Driv en snabbmatskedja |  |
| Spelare: | 2-5 (bäst på 3-4) | |
| Speltid: | 3-4 timmar | |
| Svårighetsgrad: | 60% |
Allmänt
Food Chain Magnate ger spelarna stor frihet att bygga sina egna snabbmatskedjor. Läge? Japp! Menyer? Japp! Anställda? Japp! Kunder? Japp! Detta åstadkoms genom att låta spelarna bygga sina egna organisationsstrukturer med roller som chefer (för att leda anställda), kockar (för att producer mat), chaufförer (för att hämta dryck), marknadsförare (för att öka efterfrågan) och utbildare (för att utveckla anställda).
I likhet med Indonesia så är pengatransaktioner begränsade (gratis drycker, inga löner för lägre anställda etc.). Dock kan själva försäljningen vara lite omständlig då utbud, efterfrågan och avstånd måste kontrolleras för kundhushåll. Jag är också orolig för att spelarnas organisationsstrukturer kan drivas mer av milstensbelöningar än affärsbehov. Jag förstår att mekanismen uppmuntrar olika organisationer och därmed olika strategier men det känns nästan som om spelet handlar mer om att bygga organisationen än att sälja snabbmat. Det blir därmed också svårt att hämta upp ett underläge, något som också designerna erkänner.
Trots detta är Food Chain Magnate inte bara en utmärkt affärssimulator utan också ett roligt spel.
Strategi
Strategi kommer när jag spelat mer.
Minnen
Minnen kommer när jag spelat mer.
Taj Mahal (äger)
| Bakgrund: | Maktkamp i det gamla Indien |  |
| Spelare: | 3-5 (bäst för 4-5) | |
| Speltid: | 60 minuter | |
| Svårighetsgrad: | 30% |
Allmänt
Taj Mahal kombinerar budgivning och områdesmajoritet och kryddar det hela med diverse mekanismer för att samla set till en mustig men het gryta. Kärnan i spelet är helt enkelt att kämpa om regioner och samla poäng genom att a) koppla ihop tidigare utplacerade palats, b) förvärva värdefulla medhjälpare eller c) samla set av likadana varor. Så långt är ingenting nytt.
Men det som verkligen utmärker Taj Mahal är budgivningen där du turas om att spela ut kort med värden i sex olika kategorier. Så snart du passar så får du belöningarna för de kategorier du har majoritet i men du drar också dig tillbaka från andra kategorier, vilket kan öppna vägen för dina motståndare. Så accepterar du en liten belöning för att spara kort till kommande regioner eller satsar du allt på en stor belöning och riskerar att fördärva din hand till nästa rond? Det indiska köket är ingenting för den nervöse!
Strategi
Strategi kommer när jag spelat mer.
Minnen
Minnen kommer när jag spelat mer.
The Palaces of Carrara (äger)
| Bakgrund: | Palatsbygge i Italien |  |
| Spelare: | 2-4 (bäst på 3-4) | |
| Speltid: | 1 timme | |
| Svårighetsgrad: | 40% |
Allmänt
The Palaces of Carrara ser ut som ett fredligt byggarspel men det är i själva verket ett brutalt ekonomiskt spel. Färgade block blir tillgängliga på en rondell där priserna faller varje gång rondellen vrids men om du väntar för länge så kanske någon annan tar de block du väntat på. Ju dyrare block du får, desto pampigare byggnader kan du uppföra, men ska du satsa på byggnader som ger pengar och finansiera nästa bygge eller byggnader som ger poäng för segern? Ska du samla likadana byggnader eller byggnader i samma stad? Och när är tidpunkten rätt för att poängsätta dina byggnader?
Till en början var jag inte säker på hur annorlunda varje parti skulle vara men ju mer jag spelat The Palaces of Carrara, desto mer har jag kommit att uppskatta elegansen och djupet hos detta unika mästerverk. Det här är ett mycket interaktivt spel där du ständigt måste anpassa din strategi och taktik till de hela tiden ändrade förutsättningarna på brädet - precis så som ett perfekt spel ska vara. Till skillnad från många andra resencenter tycker jag att grundspelet är bra i sig men de variabla målen och möjligheterna att uppgradera i expansionsspelet ger än fler utmaningar.
The Palaces of Carrara - The Bare Stone Euro Game (engelskspråkig recension för publicering på Boardgamegeek)
A simple game
Designing a euro game is simple. Let the players acquire resources, invest in engines, and use them to earn more resources and victory points. Finally you need some kind of unique twist. Simple, isn’t it? At least this is what Kramer and Kiesling seem to tell you with Palaces of Carrara.
While many other game designers put all their creativity into various resources, convoluted conversion chains, and spectacular victory point sources, Kramer and Kiesling strip those core elements down to the bare bones in Palaces of Carrara, as if the game was discovered rather than invented. Everything is mathematically balanced, as if either a mathematician or a numerologist was involved, and there are only three actions in the game. Let’s look at them one by one.
The resource action
To build The Palaces of Carrara you need to buy stones. Period. No other building materials, no workers, no contracts. Just stones. The stones do come in six different colors with different values (more about this later) but they all have one use only: build buildings.
This may sound very generic and that would be true if it hadn’t been for the game’s first unique twist: the price wheel. The price wheel works similar to a Dutch auction. Stones are randomly drawn from a bag and placed on the first of six segments. In this segment, the stone prices range from 1 for the cheapest stone (black) to 6 for the most expensive stone (white). Every time a player wants to acquire resources, he or she must (may in the advanced version) turn the wheel one segment, after which all prices decrease by one. The player may then buy any number of stones but only from one segment, meaning that the next player is likely to get cheaper segments to choose from but with fewer and fewer stones.
This creates the opposite of a ”chicken race” towards the bottom, where a player may wait for the prices to fall only to lose the stones to another player willing to pay more. Buy now, next turn it may be too late! Few euro games have got so much tension from a simple resource action.
The two black stones in segment I cost 2 coins. For the same cost, you could instead pick up two green and one blue stone from segment III or one white stone from segment V.
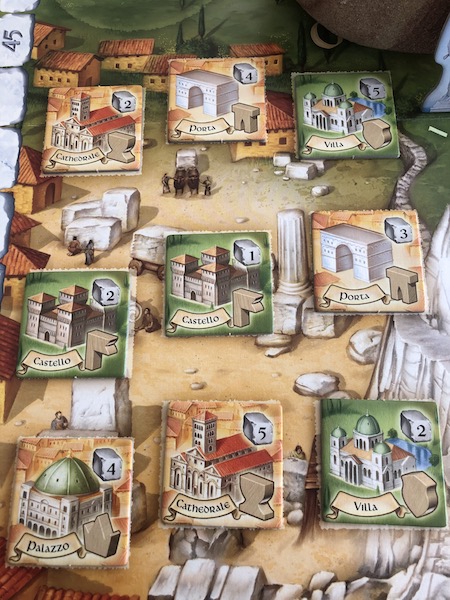 The building action
Actually, there are no less than 30 buildings to choose from, of which 9 at a time are on display and available. However, the only difference between them is cost (ranging from 1 to 5 stones) and type (6 types, differing in name only). Similar to the stones, the buildings have few uses: generate coins or generate victory points.
Again, this sounds very generic, even dull. However, the second unique twist of The Palaces of Carrara isn’t WHAT you build but WHERE. Every player has a player board with six cities, matching the six colors of the stones. The ”white city” of Livorno accepts only the (usually) expensive white stones, the next ”yellow city” of Lucca accepts both white and yellow stones and so on down to the sixth ”black city” of Lerici, which accepts stones of any color.
The tension here comes from the sunk cost fallacy, well-known in economics, whereby players who have invested in expensive stones want to use them for buildings in the most expensive cities rather than using them as substitutes for cheaper stones in cheaper cities. However, it’s often good to build one big but ”suboptimal” building in one action rather than wasting two actions to build two small but ”optimal” buildings. If you thought acquiring resources was an agonizing decision, spending resources may be even more agonizing.
The scoring action
Your buildings earn you coins and victory points, as in most euro games. The coins and victory points you earn depend on the building size and site. The two ”cheapest” cities earn you 1 coin and 1 victory point respectively per stone used for the building, the next two cities earn you 2, and the last two cities earn you 3.
This means that your score ranges from 1 coin for a 1-stone-building in Lerici to 15 victory points for a 5-stone city in Livorno. In addition, each scored building earns you a special symbol representing the building, e.g. a crown for the palace, that is worth additional victory points.
Scoring is either horizontal, meaning that you score all buildings in one city, or vertical, meaning that you score all buildings of a type, no matter which city they were built in. Thus, having many buildings in a city or many buildings of the same type may score a lot in one action. A simple and elegant engine.
However, not even the scoring action is without tension. Each city may only be scored once per game and although each building type may be scored once per player, the building symbols are limited. The tension is similar to that of the price wheel: the longer you wait, the better the return of your action, but if you wait too long, you risk missing the best parts.
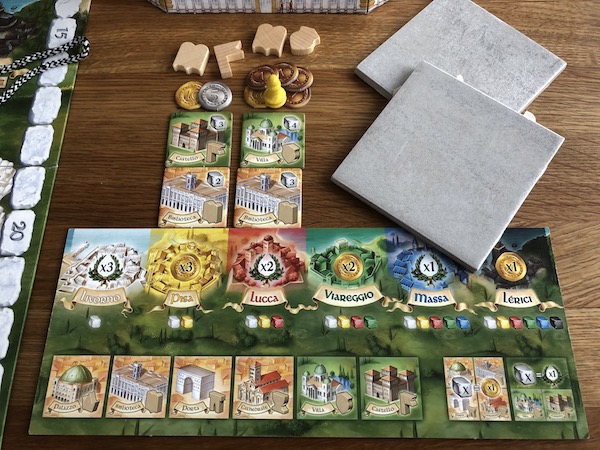
Scoring Pisa earns 5x3=15 coins. Scoring Lucca earns 7x2=14 victory points. Scoring Books earns 2x3=6 coins from Pisa and 3x2=6 victory points from Lucca.
The common denominator of the actions
All those actions have one thing in common, namely timing. Timing gives you the best stones for the best prices. Timing gives you the buildings that match your stones. Timing gives you coins to build more buildings and eventually victory points to win you the game. In particular, timing determines when the game ends.
In the base game, there are three objectives that must be completed for a player to announce the end of the game. First, the player must have scored four times. Second, the player must have collected 8/7/6 symbols (2/3/4 players). Third, the player must have built buildings for 30/25/20 stones (2/3/4 players). Although it’s optional to announce the end of the game, it’s usually wise to do so, since it’s a sign that the player is in the lead and earns the player 5 victory points as well.
Ideally, your last action is a fourth scoring action with the necessary buildings built that earn you the necessary symbols. To accomplish this you need - you guessed it - timing!
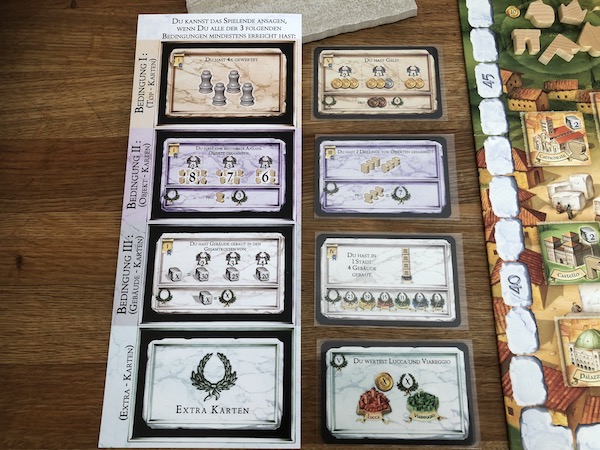
The basic objectives to the left, some of the advanced ones to the right (collect coins, collect triplets of symbols, build 4 buildings in a city, score Lucca and Viareggio).
The actions from the player’s perspective
We’ve already hinted at the tension surrounding every single action of the game. This is what may go through a player’s mind during a typical game (which, as I often warn newer players about, may end sooner than you expect).
- Help, where do I start? Cheap stones or expensive stones? Small buildings or large buildings? I'd better get some of everything to be flexible.
- I’m running out of coins quickly. Perhaps I should build some coin buildings first so that I can score them and then switch to victory points buildings? Sounds easy enough.
- Hm, the player ahead of me goes for medium crown buildings and the player before her fills Lerici with large but cheap buildings of any symbol. Perhaps I can afford to build a couple of book buildings in Pisa if I don’t waste coins on cheaper stones?
- Hm again, if I leave those red and green stones on the wheel, the players after me will get them for almost nothing. Can I afford to disrupt their plans?
- Oh no, now they build in Pisa too. I guess I have to score Pisa before it’s too late.
- OK, now I have coins again but which should be my next crown building and in which city should I build it?
- Ah, now I’m all set for a final victory point push… What do you mean you announce the end of the game!
If you’re looking for a game that lets you build your own engine in your own pace, you’d better look elsewhere.
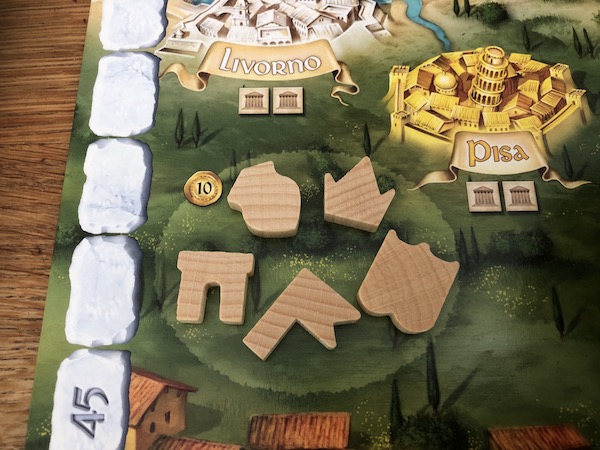
The five symbols of the game: Coat of arms, Crown, Gate, Flag, Book
The advanced game
I like to describe The Palaces of Carrara as my only legacy game. This is because the box contains a sealed envelope which may only be opened after two games and which will permanently alter the game (because once you’ve played the advanced game, you’ll probably don’t want to return to the old again).

Do not open until Xmas, sorry Xperienced.
One of the rule changes is the previously mentioned option not to turn the wheel in the resource action. This does give you more expensive stones but if you can afford them, you don’t have to worry about leaving too cheap stones to the next player.
Another rule change concerns the building and scoring actions. The advanced game introduces buildings with a cost of 8 coins, which may be built either directly or by upgrading an existing building. The reward for such a building is an upgrade tile, which increases the coins or victory points earned during scoring. This is a further boost to your engine but timing remains an issue - you need time to fully take advantage of your upgrade tile so choose it wisely.
Finally the three fixed objectives have been replaced by several variable objectives. They give each game a unique mix of objectives in such different areas as buildings, coins, victory points, objects, and cities. This forces you to reassess your strategy for each new game since a successful strategy in one game may lead to a disaster in another.
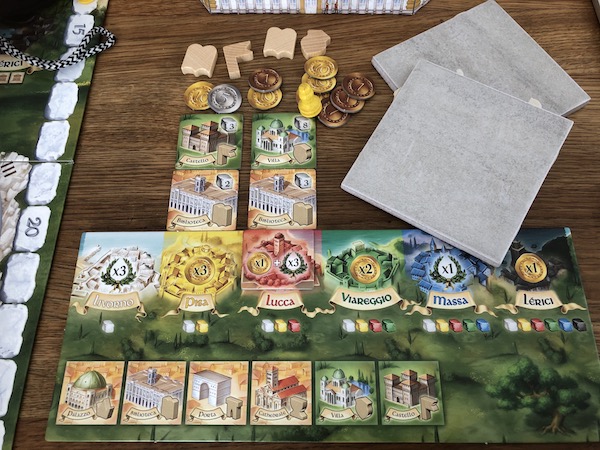
The Lucca upgrade tile scores 1 coin and 3 victory points per building value. Scoring Lucca in this example earns 11x1=11 coins and 11x3=33 victory points.
So is Carrara marble still good enough for Palaces?
According to Tom Vasel’s law ”Any game that is good will not remain out of print and will be eventually available”, the answer is no, this is not a good game. The Palaces of Carrara may be hard to find, particularly the English edition (I was happy to find a German edition), and the few games available on the GeekMarket may be offered for €50-€100. Yet, Palace of Carrara still waits for a reprint.
Perhaps simple mechanics aren’t enough for a game to stand out in today’s saturated market? Or perhaps there is no market for a medium weight games as casual gamers move towards party games (judging from recent Spiel des Jahres winners) while hobby gamers move towards heavier games (judging from criticism against recent Spiel des Jahres winners). Personally, I hope for a revival of the ”old modern boardgames”, when games were elegant and gameplay interactive. If The Palaces of Carrara does get a reprint, it may be a sign that such a revival is indeed coming. Meanwhile, don't hesitate to go to Carrara if you get the opportunity!
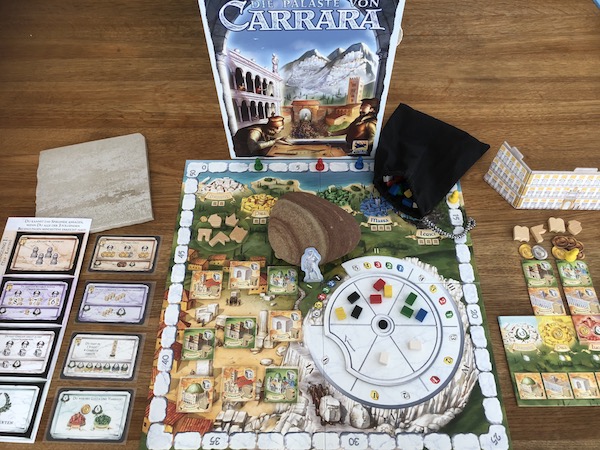
Strategi
Strategi kommer när jag spelat mer.
Minnen
Minnen kommer när jag spelat mer.
Power Grid (äger)
| Bakgrund: | Drift av kraftverk utbyggnad av kraftnät |  |
| Spelare: | 3-5 (bäst för 3-4) | |
| Speltid: | 1 timme | |
| Svårighetsgrad: | 30% |
Allmänt
Power Grid kombinerar sömlöst flera bra mekanismer för ett intensivt och interaktivt spel. Spelarna konkurrerar både på marknaden, genom att bjuda på kraftverk och köpa resurser till ett fluktuerande (men förutsägbart) pris, och på kartan, genom att knyta samman egna kraftverk och blockera motståndarnas tillträde.
Jag gillar särskilt "gummibandsmekanismen", där ledaren bjuder först och köper sist, vilket ger honom eller henne mindre förmånliga marknadsvillkor och håller spelet öppet ända in i slutet.
Spelet kan kännas något repetitivt och långt men utvecklingen av mer effektiva kraftverk och öppnandet av nya orter för dem ger lite variation. Power Grid förtjänar sitt goda rykte.
Strategi
Strategi kommer när jag spelat mer.
Minnen
Minnen kommer när jag spelat mer.
Samurai (äger)
| Bakgrund: | Maktkamp i det feodala Japan |  |
| Spelare: | 2-4 (bra oavsett antal) | |
| Speltid: | 45 minuter | |
| Svårighetsgrad: | 20% |
Allmänt
Det medeltida Japan ligger inför dina fötter. Din uppgift är att förvärva stöd från de tre fraktionerna i landet - militären, prästerskapet och bönderna - och du gör det genom att placera dina styrkor runt städerna och byarna. När inneslutningen är klar så ansluter fraktionen till den största styrkan av deras slag. Det är allt!
Så vad är då så fantastiskt med Samurai?
För det första så är det enkelheten. Spelet kan läras snabbt och spelas snabbt.
För det andra så är det elegansen. Spelpjäserna är utsökta och kartstorleken ändras med antal spelare.
För det tredje så är det det överraskande djupet. Dina styrkor har små skillnader (styrkan varierar mellan 1 och 4) och några jokrar som påverkar alla tre fraktioner) och du behöver placera dem noggrant för att optimera deras inflytande.
För det fjärde så är det den hårda kampen under den lugna ytan. Varje bricka som placeras är en strid om inflytande och du måste alltid beakta dina motståndares svar så att du inte besegras av den sista brickan som innesluter en stad eller by.
Samurai tål att jämföras med klassiker som go fast med fler spelare. Det ska erkännas att det inte är ett spel för alla men om du uppskattar en kaotisk hjärnkamp så finns det få bättre spel än detta.
Samurai - The Emperor of Area Majority (engelskspråkig recension för publicering på Boardgamegeek)
The Tile-Laying Trilogy
Samurai is part of Reiner Knizia's Tile-Laying Trilogy, the other games being Tigris & Euphrates and Through the Desert. The three games offer completely different takes on tile-laying and do not have anything else in common (besides all being good). On the other hand, the fact that they are different, not only compared to each other but also to other games, shows the versatility of Reiner Knizia. We will look at what makes Samurai so unique but start with an overview of the gameplay.
The Goal of Samurai
You play a warlord in Medieval Japan with a number of forces at various strength at your disposal. Your goal is to obtain influence of the three different factions Militaries (Helmets), Priests (Buddhas) and Farmers (Rice Paddies) in the country. Whoever obtains the most influence will rise to become Shogun of Japan. Well, to be honest I made this up since not even the rules provide any background story. Nevertheless, the whole idea of carefully balancing your forces across the map to exercise the right influence at the right time and the right place does align with the Japanese theme and the elegant components further strengthen this feeling.
Let us now move on to the meanings of majority in Samurai. Meanings? Yes, there are many aspects of majority in Samurai.
Area Majority
The core of the gameplay is to lay tiles to obtain majority in areas and earn figures. The tiles represent your forces, the areas represent cities and villages, and the figures represent the three factions. The player with the most forces claims the figure - the other players get nothing. So far nothing new under the sun but there is more, much more.
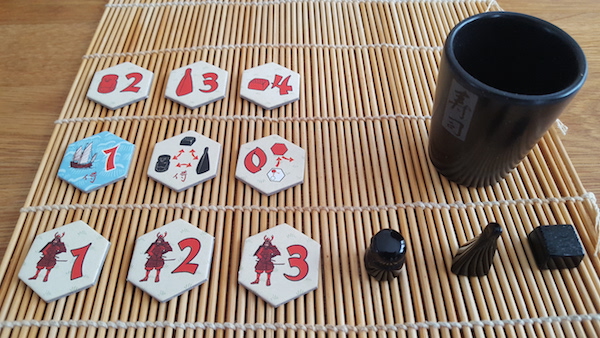
Majority from Outside
The tiles are not placed in an area but next to an area so that each tile will always count towards the majority in two areas, never more, never less. Perhaps you can compete in both areas, perhaps it can be worth giving up the majority in one area if you can be guaranteed the majority in the other area? One little extra rule adds a completely new dimension to the area majority.
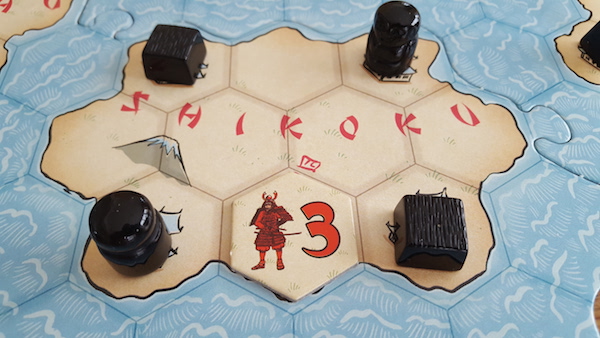
Surrounding an Area
How often do you score an area? Once (and only once) when (and not before) the area is completely surrounded by land tiles. Here is another little rule that adds a lot. If you start surrounding an area, will you also obtain the majority or will you only help an opponent to do so? Remember, the runner up gets nothing, neither do uncompleted areas. Every tile placement is an agonizing decision, but we are far from done yet.
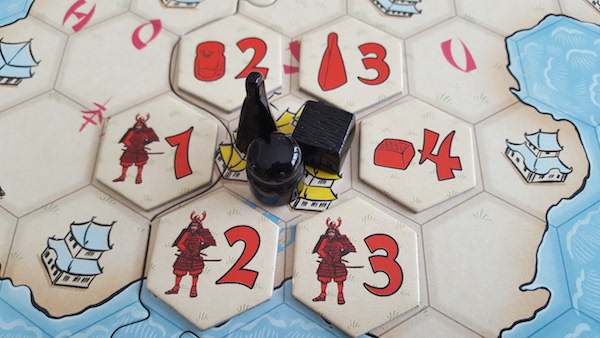
Numbered Tiles
All tiles are not equal in Samurai. Their strength ranges from one to four. But how do you use them? Placing a weak tile may invite a stronger opponent tile to complete the surrounding and claim the figure. Placing a strong tile may deter opponents, leaving to you to complete the surrounding yourself. Remember that a big majority does not earn you more than a small one and only means that you have wasted tiles that could have contributed to a majority elsewhere. Oh, the agony, and yet there is more to come.
Faction Tiles
Most of your tiles are linked to specific factions and will only influence figures of this faction. A Buddha tile with strength four will indeed put a strong pressure towards an area with a Buddha figure but will be useless against another area with a Helmet. As a matter of fact, such a tile may even help an opponent to complete the surrounding of the other area and claim the Helmet. Are we done yet? No!
Fast Tiles and Special Tiles
Normally you may only place one tile at the time but there are also "fast" tiles that you may place several of in the same turn in addition to a normal tile. Most of them are ships or sea tiles, which do not help you completing a surrounding but may help you get that extra strength you need for a majority.
There are also two special tiles designed to surprise your opponents. The Token Exchange lets you move a previously placed tile to a new place, effectively using its strength twice in the game. The Figure Exchange (which is also a "fast" tile), lets you switch places between two figures. Perhaps that useless Buddha mentioned in an earlier example is not so useless anymore.
But what if there is no Majority?
Sorry, no shared victories. If no player has the area majority, no player gets the figure and it is removed from the game. This is also one of the end game triggers (the other one being the exhaustion of one figure type) - the game ends if four figures are removed. Having a figure removed may be better than letting an opponent having it but who will benefit from an early game end?
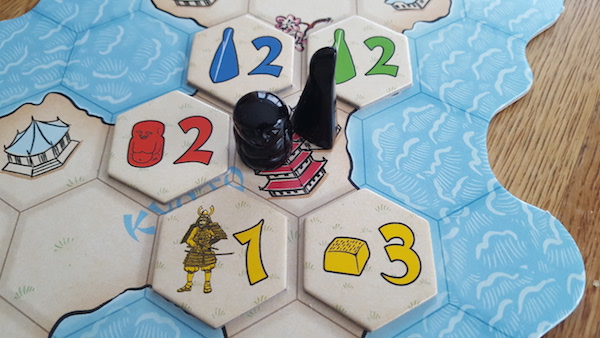
The city of Kyoto is surrounded. Red claims the Buddha. Blue and Green are tied for the Helmet so it is removed. Yellow is strong in Rice but to no avail since there is no Rice to claim in Kyoto.
The Scoring
Have we had enough of majorities now? Then take a deep breath because here comes the famous "Knizian scoring" of Samurai.
The goal of Samurai is to get figures but it is not the number of figures that is important but the figures where you have a majority compared to the other players. A majority in two of the three factions will win you the game immediately whereas no majority at all will put you out of the contest. Similar to the rule about tied area majorities above, tied figure majorities do not count so a player may theoretically win with only one majority.
What if several players have one majority then? Well, then you count the number of OTHER figures. Again, a big majority only means that you have wasted tiles on figures you did not need in the end (unless it was necessary to prevent other players from obtaining majorities that is).
In case you have missed it, the idea of balancing your efforts is a red thread throughout the entire game. I have discussed this further in the strategy article A Samurai prefers Fighting Alone.
The "Healthy" Randomness
But is not a game like this prone to the dreaded analysis paralysis? Indeed, but three small rules help mitigating this. One is that you draw your tiles and never have more than five to work with. Another is that your tiles are hidden from your opponents. A third is that the score is hidden.
The first and the second rule limit your decision space by reducing the number of options that you have and obscuring the possible opponent responses that you need to take into account. This does add an element of push your luck (will I get this majority or does my opponent have the Buddha four necessary to thwart my plan?) that I'm normally not a fan of but here I think it is preferrable to the analysis paralysis that would otherwise be the result.

More controversial is the hidden but trackable scoring. Given the tight majorities and the special tie breaking rules, I fear that open scoring would lead not only to analysis paralysis but also kingmaker discussions towards the end. I would not strongly object if the other players would like to house rule open scoring but I see the benefit of closed scoring and prefer playing Samurai as intended by Reiner Knizia.
The "Seating Problem"
Another more valid argument against Samurai is the seating problem. A weak player may very well give away areas to the player to the left and hence the victory too. Any attempt to fix this would ruin the tight game of checks and balances that makes Samurai such a great experience. Beginners should be introduced to basic strategies but Samurai is definitely best played with equally strong players.
Conclusion
Samurai is truly a game of balance. Place your limited tiles around the areas where their number and figure has enough (no more, no less) impact to obtain enough (no more, no less) majorities. Every placement will be an agonizing decision and you will often find yourself inadvertently helping an opponent. But at the same time, you need to "cooperate" with your opponents to use your own tiles as effectively as possible. The winner will be the player who makes the most of those cooperations and establish the right presence at the right time and the right place. If there is an Empire of Area Control, Samurai is a worthy Emperor.
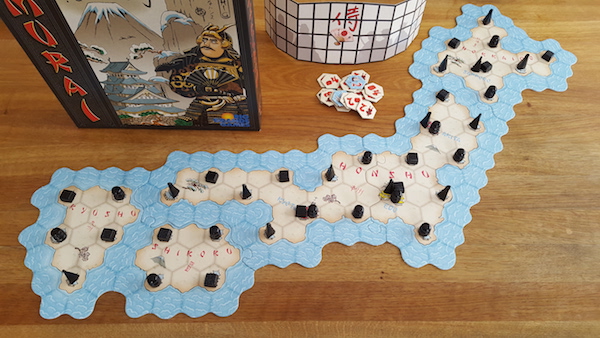
Strategi
Målet i Samurai är kort och gott att placera brickor för att omringa byar och städer och därmed erövra pjäser. En strategi måste därför syfta till att med så få brickor som möjligt erövra så många pjäser som möjligt. (Vi bortser inledningsvis från regeln att det är majoritet av pjäser och inte antal pjäser som avgör segern.) Låt oss därför börja med att titta på antalet brickor och pjäser i spelet.
En spelare förfogar över tjugo brickor och det finns tio pjäser per spelare (3x7 för 2 spelare, 3x10 för 3 spelare och 3x13 för 4 spelare). Normalt hinner inte alla brickor spelas och alla pjäser tas innan spelet är slut men låt oss räkna med att varje pjäs kostar i genomsnitt två brickor. Innebär det att du har "råd" att spendera två brickor för att omringa en stad? Nej, tre av dina brickor är skepp som bara kan läggas i vatten och inte bidrar till att slutföra omringningen av en stad. En fjärde bricka låter dig byta plats på två pjäser, något som kan vara taktiskt bra men som heller inte bidrar till att slutföra omringningen av en stad. En pjäs kostar i därmed i genomsnitt 16 / 10 = 1,6 brickor. Men det räcker inte heller, för att vinna måste du erövra mer än "din" andel av pjäserna och då får du för varje pjäs inte spendera mer än i genomsnitt 16 / 11 = 1,45 brickor. Vi ser därmed hur viktigt det är att varje lagd bricka utnyttjas så effektivt som möjligt.
Låt oss fortsätta med ett titta på hur många brickor som krävs för att omringa de olika byarna och städerna på kartan. En mycket illustrativ karta har tagits fram av Boardgamegeekanvändaren mdornbrook i strategiartikeln Strategy Guide: Comprehensive.
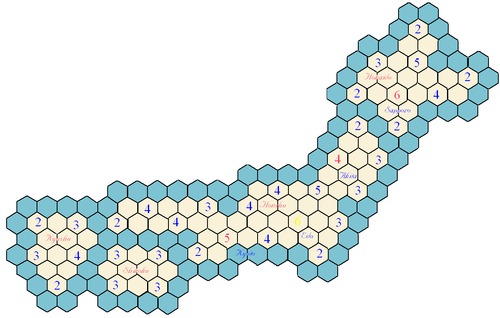
I kartan har varje by och stad ersatts av en siffra som anger hur många brickor som krävs för att omringa den. De röda siffrorna visar städerna med två pjäser och den gula siffran visar huvudstaden Edo med tre pjäser. Kartan hjälper oss hitta "rika" områden, som den västra ön Kyusho där sju brickor erövrar fem pjäser (7 / 5 = 1,4) och "fattiga" områden, som Shikoku där sex brickor erövrar fyra pjäser (6 / 4 = 1,5). En strategi skulle således kunna utgå från att fokusera på rika områden.
En sådan strategi är dock inte utan risker. Att själv omringa byar och städer är kostsamt även i rika områden och det är troligt att övriga spelare kommer att "parasitera" på din strategi och knipa en och annan pjäs med bara en bricka. Sådana exempel utgör de södra och västra spetsarna av Kyushu, där det räcker med två brickor för att helt omringa byn. Om du lägger en bricka intill en sådan by bjuder du in andra spelare att med en enda högre bricka slutföra omringningen och erövra pjäsen i stället.
Detta leder oss till några viktiga taktiska regler:
- Placera figurbrickor så att de utövar inflytande på fler än en pjäs. En buddhabricka med styrka fyra bör inte placeras intill en by med en buddha och en by med en militär.
- Placera samurajbrickor så att de utövar inflytande på städer. Därmed utöver de inflytande på tre pjäser, två i staden och en i en intilliggande by.
- Placera inte en bricka så att spelaren efter dig kan slutföra en omringning. Om du bara knappt har störst inflytande kan näste spelare i tur slutföra omringningen med en bricka som ger denne större inflytande. Var däremot själv uppmärksam på möjligheter att slutföra omringningar.
- Använd de "snabba" men svaga landbrickorna (som kan läggas flera åt gången) för att snabbt slutföra omringningar. Om du inte kan slutföra en omringning är det oftast bättre att spara dem, eftersom du annars bidrar till en omringning där du har lågt inflytande.
- Använd de "snabba" men svaga skeppen (som kan läggas flera åt gången) för att lägga till inflytande i en omringning. Använd dem däremot inte i förebyggande syfte. Det kan vara frestande att lägga ett skepp i en av rutorna som gränsar till två byar för att maximera dess inflytande men det avskräcker också andra spelare och kan leda till att du ensam måste slutföra omringningen.
- Använd specialbrickorna endast om du samtidigt kan slutföra omringningar, annars är de inte mer värda än vanliga brickor. Deras styrka ligger just i överraskningsmomentet och rätt använda kan de ge en pjäs eller mer för bara en bricka.
Dessa regler är naturligtvis inte utan undantag. Det kan vara bra att lägga en buddhabricka med styrka fyra som nästsista bricka runt en by om den samtidigt påverkar en buddhapjäs i en annan by. Näste spelare tvingas då välja mellan att lägga motsvarande buddhabricka samt ett skepp för att erövra buddhapjäsen och därmed betala två brickor för den eller ge upp den till dig. I och med att din buddhabricka påverkar ytterligare en buddhapjäs blir din kostnad lägre än två brickor.
Nu har vi diskuterat hur du ska erövra pjäser och det är dags att övergå till vilka pjäser du ska erövra. Samurai vinns inte av den spelare som har flest pjäser utan flest majoriteter. Du bör därför tidigt välja ut två (varken fler eller färre!) pjästyper och fokusera på att erövra dessa. En hand med till exempel sex buddhor, fem militärer och en ris har en god chans att vinna majoriteten i buddhor samt blocka en annan spelares majoritet i militärer. En balanserad hand på fyra av varje pjäs riskerar däremot att inte vinna någon majoritet alls.
Slutligen några ord om spelfaserna. I spelöppningen kan man tala om två motpoler. Den ena är den aggressiva ansatsen, där starka brickor läggs ut först på platser där de kan utöva maximalt inflytande. Risken är att motspelare avskräcks så mycket att du själv tvingas slutföra omringningarna. Den andra motpolen är att starka brickor sparas till slutet för att sättas in precis där de behövs för att ändra inflytandet till din fördel. Risken är dock att de inte hinner påverka fler än en pjäs eller i värsta fall inte hinner sättas in alls. En mellan variant är att försöka ha en blandad hand med starka och svaga brickor för att utnyttja taktiska möjligheter. Risken här är att du har "fel" brickor för "fel" möjligheter, till exempel en stark buddhabricka när du hade behövt en stark militärbricka. Viktigast torde vara att observera hur de andra spelar och anpassa din hand därefter. Du kan visserligen inte välja vilka nya brickor du drar men du kan välja vilka brickor du sparar till rätt tillfälle.
I slutspelet är det viktigt att försöka påverka vilka som blir de sista pjäserna som tas innan spelet tar slut. Tänk på att spelet kan ta slut antingen genom att en pjästyp tar slut eller genom att fyra pjäser avlägsnas på grund av oavgjorda omringningar.
I det första fallet (det "sena" slutet) ska du fråga dig om du behöver fler av en viss pjästyp eller om det är bättre att se till den sista av den pjästypen blir kvar på brädet vid spelets slut. Du ska också fråga dig vilka pjästyper de andra spelarna behöver och förhindra att de får dem. Det kan ibland vara värt att skapa en oavgjord omringning bara för att hindra att pjäser faller i motståndarnas händer. Det kan till och med vara värt att skapa en omringning som ger en pjästyp till spelare A i stället för spelare B, om du vet att spelare A ändå är svag i den pjästypen och vill hindra att spelare B får den.
I det andra fallet (det "tidiga" slutet) ska du fråga dig om du redan har en majoritet och därför vill avsluta spelet så fort som möjligt. Det kan vara mycket effektivt om motståndarna verkar spara sina starka brickor och ännu inte erövrat några pjäser. En oavgjord omringning av Edo avlägsnar tre pjäser och därefter räcker det med att en oavgjord omringning till för att spelet plötsligt (för motståndarna) tar slut! Jag har själv inte sett detta hända ännu men det är bara ett av många exempel på hur många viktiga strategiska och taktiska dimensioner Samurai har!
Minnen
Samurai är ett spel som jag i likhet med klassiker som schack och go skulle vilja spela flera gånger mot erfarna spelare för att upptäcka nya strategiska djup. Tyvärr tvivlar jag på att så någonsin kommer att bli fallet. Samurai har snart tjugo år på nacken och det är relativt få som fortfarande spelar det. Visserligen brukar de flesta som jag introducerar till Samuari uppskatta spelets elegans men det visar sig också att Samurai, i likhet med abstrakta klassiker som schack och go, obarmhärtigt avslöjar skillnader i spelstyrka. Det visade sig en dag när jag hade förmånen att spela fyra (!) partier på en dag mot olika nybörjare. I tre av partierna vann jag med två majoriteter och i det fjärde partiet knep jag alla tre majoriteter, något som jag knappt trodde var möjligt. (I det sistnämnda fallet blev jag dock krossad i Alfapet efteråt så det jämnade väl ut sig.) Kommer Samurai att dela samma öde som schack och go och bara spelas mot datorer och/eller i tävlingssammanhang? Jag hoppas verkligen inte det.
Tikal (äger)
| Bakgrund: | Utforskning av Mayatempel |  |
| Spelare: | 2-4 (bäst för 3-4) | |
| Speltid: | 90 minuter | |
| Svårighetsgrad: | 30% |
Allmänt
Är det här det främsta skapelsen av Kramer & Kiesling? Spelet är förrädiskt enkelt - använd handlingspoäng för att flytta upptäckare, bygga tempel och ta skatter. Men det finns en logistisk utmaning i att bestämma när och var man ska placera upptäckare. Och det finns en konkurrensmässig utmaning i att bestämma vilka tempel man ska sikta på majoritet kring. Och det finns till och med en samarbetsutmaning i att bestämma vilka tempel som man ska utöka och vilka skatter man ska byta utan att ge bort fördelar till dina motståndare.
Jag gillar särskilt hur poängrundorna tillåter varje spelare att handla före poängberäkningen, något som gör egen positionering viktigare än tajming beroende på andra spelares handlingar. Några tycker att "Analysis Paralysis" kan vara ett problem men jag tycker att intuition för att förutse var de bästa poängmöjligheterna kommer att finnas är viktigare än rå optimering. Det modulära spelbrädet och det dynamiska spelet gör att varje nytt parti känns unikt.
Strategi
Strategi kommer när jag spelat mer.
Minnen
Minnen kommer när jag spelat mer.
Web of Power/China (äger)
| Bakgrund: | Maktkamp i det gamla Kina |  |
| Spelare: | 3-5 (bra oavsett antal) | |
| Speltid: | 45 minuter | |
| Svårighetsgrad: | 30% |
Allmänt
China är ett underbart områdeskontrollspel på tre nivåer: i regioner, längs vägar och över gränser. Korten begränsar dina handlingar och tvingar dig att planera framåt medan fortifikationerna är en engångsinvestering där du bara får en chans att hitta den mest värdefulla platsen. China kan spelas både under tystnad och med aggressiv diplomati där regionerna delas upp genom förhandlingar och förräderier. Allt detta kommer med enkla regler och kort speltid.
China - Going Beyond is as Bad as Falling Short (engelskspråkig recension för publicering på Boardgamegeek)
Introduction
China is a vicious game about warfare and diplomacy during the Warring States period of Ancient China... well, not really. China is an abstract area control game that could have been set anywhere at any time (and is in fact a reimplentation of Web of Power, which is set in the medieval Europe). I don't mind abstract games and I'm a fan of area control games but does China really stand out among the many similar games that fight for control of this crowded area (pun intended)?
Areas
To answer that question, let us first look at what constitues an "area" in China. Actually, the designer Michael Schacht did not settle with one or two but three different majorities.
Roads
First, we have "majorities" on roads or rather length of roads. Whoever has at least four connected houses will score a road bonus.
Regions
Second, we have majorities within regions. A region has room for four to eight houses and whoever has the most houses in a region holds the majority.
Ambassadors
Third, we have majorities between regions. A region can hold a number of ambassadors and whoever has the most ambassadors at both sides of a border between regions holds the majority.
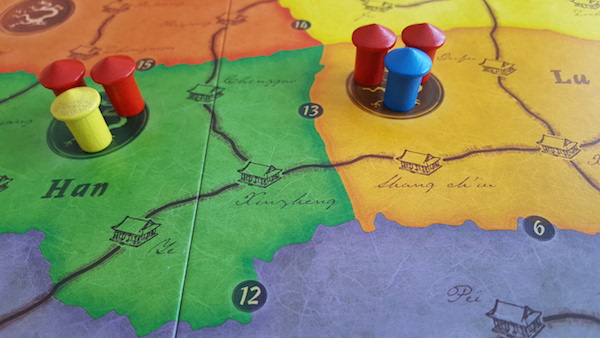
Scoring
But having three types of majorities instead of one is not enough to make a game stand out and China does indeed offer more in terms of the scoring. Whereas many area control games have a fixed majority scoring, the scoring in China is based on the majorities themselves.
Roads
The roads have a simple socring of one point per house. The more houses you manage to connect, the greater your score. This leads to interesting crossroad races and blocking placements.
Regions
The regions add an interesting twist to the scoring. The player with the most houses earns one point per house in the region. Similar to the road scoring, you can increase your score by placing more houses in a region. However, the player with the second most houses also scores and his or her points equals the number of houses of the first player. (And the third player earns points equal to the number of houses of the second player and so on.) That is, the more houses you place to increase your score, the more points does the next player get!
Ambassadors
The ambassadors have a similar scoring where the player with the most ambassadors earns one point per ambassador around the border. However and unlike regions, only the player with the most ambassadors earns points. So it is safe to place many ambassadors then? Yes and no. The number of ambassadors in a region is limited to the number of majority houses in the region. Placing additional houses in a region suddenly invites more ambassadors there as well, but will they be yours or will a competitor beat you?

Red would here score 5 points for Han, 4 points for Lu, 6 points for the border between the two, and 5 points for the road.
Placement
This intricate dependency between majorities and scoring is what really makes China stand out. Not only do you have to fight for control in three different aspects but you also have to take into account the placement and scoring opportunities that may open up for the other players. But Michael Schacht has one more thing up its sleeve.
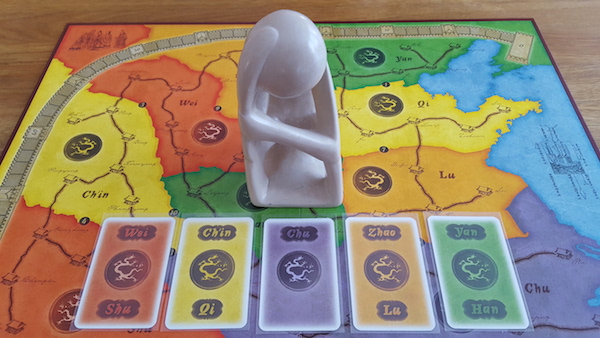
With free placement, China would be a thinky, almost solvable, game where either strong players check each other in a boring zugzwang game or where weaker players give away the game. China solves this through the common "healthy randomness" mechanic, whereby you draw cards that dictate where you may place. However, you retain some control through the ability to choose open cards (but reveal your plans to the other players) or through the option to play two similar cards as a wildcard.
Another elegant restriction to free placement is the so called 3-2-1 rule: you may play up to three cards to place up to two pieces in one region. As in many good games, you want to place everything everywhere but are forced to make agonizing choices and prioritizations.
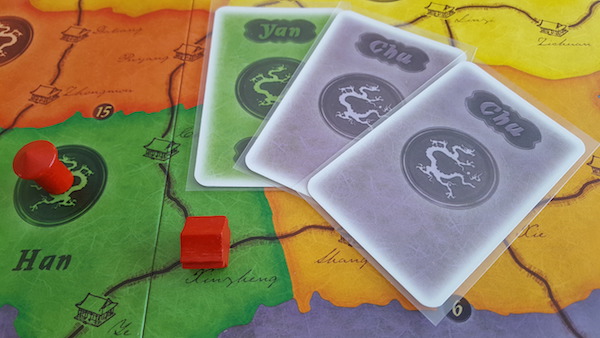
Elegance = Gameplay?
So does China's elegance provides a good gameplay or is the game so well balanced that there is little the player can do to affect the outcome? In my opinion, China does deliver. It is true that you must be attentive to short-term opportunities in China, such as placing a single house in a region that will earn several points or placing the last possible ambassador in a region that will guarantee the majority. But at the same time, you must have a long-term plan for your placements and manage your hand of cards to be able to fulfil both short-term and long-term goals.
I have outlined some tactical and strategical considerations that highlight the depth of China in A game of moderateness. The key message is that you need to optimize your placements by having just enough pieces in just enough places. In that respect, China is surprisingly thematic since it rewards the Far East virtues of patience and moderateness.
Summary
The way all those simple mechanics for majorities, scoring and restrictions intertwine and work together to create a bigger whole is to me the definition of elegance. The player who manages to navigate through this web and identify both short term and long term opportunities will be rewarded. I completely understand players who want more theme to their games but if you belong to the category of players who appreciates the beauty of games like chess and go, China has a lot to offer.
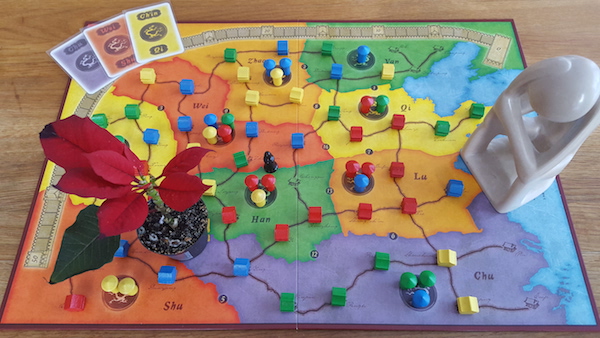
Strategi
För att vinna China måste du få flest poäng och poäng får du genom att ha majoritet - så långt skiljer det sig inte från många andra spel. Grovt räknat hinner du placer ut 10-15 pjäser per parti (räknat på 104 kort för 4 spelare och en användning av i genomsnitt 2 kort per spelare och tur). Du vill därför se till att varje pjäs du spelar ger så mycket poäng som möjligt.
Dock är de poäng du får beroende av hur dessa majoriteter ser ut. Poängen för en majoritet i en provins beror på hur du ligger till i förhållande till andra spelare i provinsen och poängen för en majoritet över en gräns beror på det totala antalet ambassadörer i de båda angränsande provinserna (som i sin tur begränsas av majoriteten i respective provins). Det är därför svårt att räkna på hur mycket en placerad pjäs är värd innan hela provinsen är fylld. Däremot kan du räkna på när det är värt att placera en pjäs eller inte utifrån det genomsnittliga värdet per hus.
Låt oss börja med att titta på hur mycket majoriteter i provinser är värda. Om vi utgår från en genomsnittlig provins med fem städer så är värdet enligt följande:
- 5 hus: 5 poäng / 1 poäng per hus
- 4 hus: 5 poäng / 1,25 poäng per hus
- 3 hus: 5 poäng / 1,67 poäng per hus
- 2 hus: 5 poäng / 2,5 poäng per hus (förutsatt att du har majoritet, annars 3 poäng / 1,5 poäng per hus)
- 1 hus: 2-3 poäng beroende på hur majoriteten ser ut
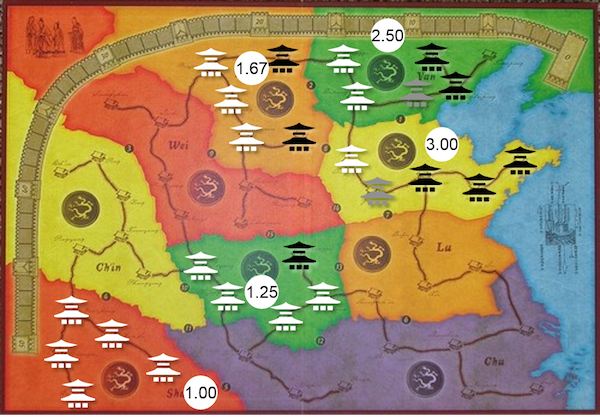
Redan med denna mycket enkla analys kan vi dra en mycket viktig slutsats: Flest hus i en provins är inte det mest effektiva sättet att få poäng i China. Extremfallet är när någon fyller en provins med fyra hus. Du kan då placera det femte huset i provinsen och kamma hem fyra poäng för ett enda hus. En första prinicip är därför att försöka få 2-3 poäng per hus du placerar. Mer konkret innebär detta följande delprinciper:
- 1a: Eftersträva delad majoritet med få hus då detta ger bäst avkastning (2,5 poäng per hus i exemplet ovan).
- 1b: Placera inte fler än hälften av husen i en provins då fler hus ger sämre avkastning (mindre än 1,5 poäng per hus i exemplet ovan).
- 1c: Undvik andraplatser i provinser då dessa ofta ger sämst avkastning (ger 1,5 poäng per hus i exemplet ovan).
- 1d: Var uppmärksam på möjligheter att placera ett hus i en provins, gärna i kombination med en ambassadör, mer om dem nedan (ger 2-3 poäng per hus i exemplet ovan).
Naturligtvis finns det undantag som vi kommer att se lite längre ner men låt oss först gå över till ambassadörer. Nu vet vi att vi vill få ut åtminstone 2 poäng per ambassador men hur värderar vi dem? Tja, om vi utgår från att provinser blir optimalt fyllda med 2-3 hus i majoritet så finns det 2 x 2,5 = 5 poäng per gräns att slåss om. Om en ambassadör kan bidra till att vinna fler gränser kan denne naturligtvis ge ännu mer avkastning.
I genomsnitt räcker det med 1,5 ambassadörer i varje provins för att få majoritet (1 ambassadör om provinsens husmajoritet är 2 och 2 ambassadörer om provinsens husmajoritet är 3). Detta ger följande avkastning, berorende på hur lång kedjan av ambassadörer är:
- 3 ambassadörer täcker 1 gräns: 5 poäng / 1,67 poäng per ambassadör
- 4,5 ambassadörer täcker 2 gränser: 10 poäng / 2,22 poäng per ambassadör
- 6 ambassadörer täcker 3 gränser: 15 poäng / 2,5 poäng per ambassadör
- 6 ambassadörer täcker 4 gränser: 20 poäng / 3,33 poäng per ambassadör
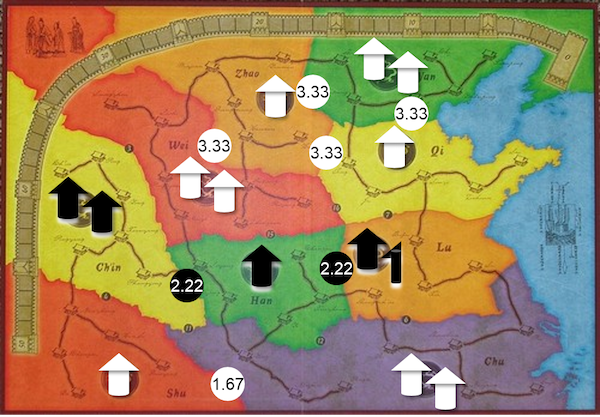
Vi ser alltså att majoritet över en enda gräns generellt sett är sämre majoritet i provinser men så fort dina ambassadörer börjar verka över fler gränser så stiger avkastningen dramatiskt, särskilt om alla kan verka över två gränser vardera som i det sista exemplet ovan. Tänk dock på att ambassadörer också har högre risk - de kan ge 0 poäng om du inte får majoritet medan hus alltid ger poäng.
Ambassadörernas stigande avkastning öppnar också för taktiska möjligheter som är värda att uppmärksamma. Anta att du har de enda två ambassadörerna i en provins som gränsar till tre andra av "dina" provinser. Även om din majoritet skulle vara ohotad så skulle det löna sig att placera en tredje ambassadör där, eftersom denna ger en avkastning på tre poäng.
Principen för ambassadörer är alltså att försöka få majoritet i de mest värdefulla provinserna eller mer konkret följande delprinciper:
- 2a. Placera alltid så många ambassadörer du kan om du är först i en provins.
- 2b. Om du inte är först in en provins, placera bara en ambassadör där om du kan placera två på en gång eller om provinsens husmajoritet bara är två.
- 2c. Placera inte en ambassadör i en provins om andra spelare kan placera fler.
- 2d. Prioritera provinser med många gränser intill provinser där du har/kan få majoritet.
Det tredje och sista sättet att få poäng på för sin längsta väg (sammanhängande hus). En sådan väg ökar värdet av varje hus med 1 poäng och är inte att förakta. Dock är det lätt för motståndarna att blockera sådana försök. Principerna för vägar är därför att i en valsituation placera hus i korsningar där vägen kan byggas vidare i olika riktningar (3a) samt att försöka bygga dem i den mån de uppfyller andra strategiska mål samtidigt (3b).
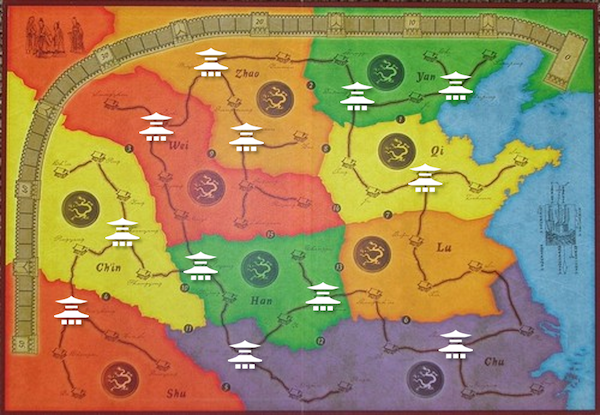
Givet dessa principer, låt oss övergå till frågan om just blockering. Lika viktigt som det är att maximera den egna poängen. lika viktigt är det att minimiera motståndarnas poäng. En utmaning i ett spel som China är dock att om en blockering som inte ger dig några poäng är ett förlorat drag som ger övriga spelare en fördel. I extrema fall kan det vara nödvändigt, till exempel om en ambassadör kan ge fem poäng eller mer för en motståndare. I enklare fall kan det handla om att placera ett hus i en provins du ändå tänkt placera i där det effektivast stoppar försök att få långa vägar. Generellt sett är det dock sällan bra att blockera om du inte själv får poäng på köpet.
Slutligen några tips om hur man effektivast får ut pjäser på brädet. I varje tur får du plaera upp till två pjäser och eftersom vi har sett att poängen per pjäs är viktig är det viktigt att få ut båda varje tur.
Ett tips är därför att alltid ha två kort av samma färg på hand. Du kan då antingen använda dem till placera pjäser i provinser av den färgen eller använda dem som en jokerfärg för att placera pjäser i färgen på ditt tredje kort. Tre kort av samma färg är dock sämre, eftersom det begränsar ditt val till endast provinsen av den färgen.
Ett annat tips är att i den mån det är möjligt inte vara först i en provins, eftersom du då bara får placera en pjäs. Detta är dock svårare att lyckas med och att konsekvent undvika det kan vara kontraproduktivt. Säg att du har tre hus i en röd provins med fem städer och att du har röda kort på hand. Att placera två hus till i provinsen ökar inte din poängsumma (om inte spelet är på väg att slut) och det är därför normalt bättre att låta de andra spelarna placera hus där. Ett enda hus i den andra röda provinsen kan däremot vara värt flera poäng beroende på hur majoriteten utfaller.
Om man ska sammanfatta strategin för China så gäller det att sträva efter "lagom" majoritet överallt för att använda dina pjäser så effektivt som möjligt. China är helt enkelt ett spel som belönar en kinesisk dygd som måttlighet så kanske är temat starkare än många tror.
Minnen
Minnen kommer när jag spelat mer.
Ra (äger)
| Bakgrund: | Civilisationsbyggande i det gamla Egypten |  |
| Spelare: | 2-5 (bäst för 3-4) | |
| Speltid: | 45 minuter | |
| Svårighetsgrad: | 30% |
Allmänt
Ett klassiskt auktionsspel som trots sin enkelhet har alla de beslutsmoment som andra spel måste uppfinna komplexa mekanismer för att åstadkomma. Initiera auktioner när potten är tillräckligt värdefull för dig (eller innan den blir för värdefull för dina motståndare) eller satsa på att passa i hopp om att den ökar mer. Erbjud budbrickor för att bygga kombinationer men ta också med i beräkningen vilken budbricka du får tillbaka eftersom detta ger dig en bättre eller sämre position i nästa epok. Så djupt och ändå smidigt och enkelt och ett utmärkt introduktionsspel till icke-spelare.
Ra - Is this Really an Auction Game? (engelskspråkig recension för publicering på Boardgamegeek)
The Auction Challenge
The auction mechanic is sometimes criticized for being a lazy mechanic, applied by designers who don't bother balancing the game components. Instead, it's up to the players to do the designer's job.
The course Game Balance Concepts provides a fictional game example where players bid for characters, with the result that strong characters will be balanced by having less money. As the author states, "there is a correct answer here, but instead of taking the trouble to figure it out, you instead shift that burden to the players and make them balance the game for you." Lazy is the word.
Also, as pointed out by iSlaytheDragon, auctions may increase the learning curve, since experienced players will have a better sense of the game components' value. In a game like Power Grid, inexperienced players often over- or undervalue the power plants up for bid. In the first case, they won't have enough money for resources to power their plants, and in the second case, they will miss out on the best power plants. Games with a fragile economy, such as Container, may even break down if the players don't know how to properly assign values to the goods bought and sold. (This doesn't mean that those games are bad, on the contrary they are both great and I hope to show why in future reviews.)
But even if players do know how to value the game components, an auction may often be a frustrating experience. Assuming that the players' average value equals the "true" market value, the winner will be the player with the highest estimate. This leaves the loser unhappy because he or she didn't get anything while the winner may suffer from "winner's curse" because he or she overpaid. How then can a game based on auction be fun? How could the "Good Doctor" Reiner Knizia design not only Ra but also several other successful games based on this mechanic? To answer this, we will look at the context of the auction: the why, what, how and when of the bidding.
The Why - Why are you bidding?
The goal of Ra is to collect sets of tiles during three rounds or epochs. However, the sets are not your normal Poker straights and flushes.
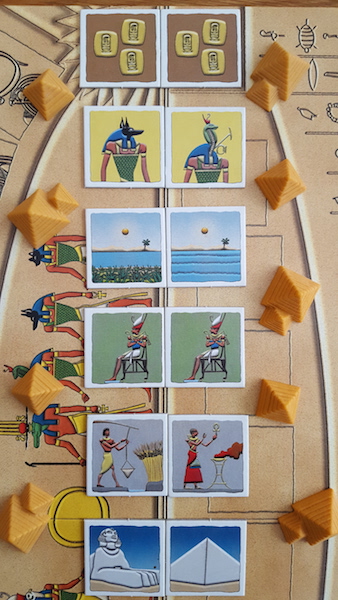 Gold simply earns you 3 VP each.
Gods earn you 2 VP each but also serve as wildcards that may be exchanged for other tiles.
Rivers earn you 1 VP each but only if at least one of them is a flood. Rivers are kept after each epoch except floods.
Pharaohs award 5 VP but only to the player or players with the most of them. The players or players with the least of them lose 2 VP. They are kept after each epoch.
Civilizations award 5 VP for 3 unique tiles, 10 VP for 4 unique tiles and 15 VP for 5 unique tiles. The players with none lose 5 VP.
Monuments award VP both for similar ones (5 VP for triplets, 10 VP for quadruplets and 15 VP for quintuplets) and for unique ones (1 VP each, 10 VP for 7 unique and 15 VP for 8 unique). They are kept after each epoch but score only in the last epoch.
To make the sets even more difficult to value, there are also "disaster tiles", which discard an ordinary tile (if available). A bid that may give you your missing monument may also cost you your precious flood.
So what's the average value of a tile? It depends on which sets you're collecting.
This seemingly simple mechanic creates an important condition for a successful auction game: the tiles quickly get different values for different players and mitigates the problem of unbalanced tiles and winner's curse. A tile that may be worthless to one player not needing it for his set may invaluable to another player desperately seeking to complete her set.
The What - What are you bidding for?
In Ra, set collection is not only your ends but also your means. Each turn, you have two choices: either start an auction ("call Ra") on the tiles currently up for grabs, in which case you must bid if nobody else does, or draw another tile to add to the loot. (Actually, you also have the third choice of playing a Gods tile but this is a rare one.) So basically you bid for sets of tiles to complete sets of tiles and it's you and your opponents that collectively decide how big those sets should be allowed to grow before you start the auction.
This adds many interesting decisions to the standard "how much should I bid" decision. A set with few tiles may still be valuable to you while a set with many tiles may contain mostly useless tiles. Drawing another tile may increase the value for you but what if it increases the value even more for another player and thus increases the competition for that set?
The average designer might have been happy with this "double set collection mechanic" and designed an ordinary "bid money for VP" mechanic around it. However, Knizia had much more up his sleeve.
The How - How are you bidding?
The currency of Ra is not money but sun disks. Each epoch you have three or four of them at your disposal and each sun disk has a unique value. Similar to how you have two choices in a turn, you have two choices in an auction: participate by playing one of your sun disks or abstain. If you win the auction, take all the tiles on the board and replace your sun disk with the sun disk currently on the board. (You may not use it until the next epoch.) That's it. No long bidding rounds, no granular bids, no complex tie-breakers.
Wait, what? Did Reiner Knizia first add decisions through double set collection only to remove them again through this discrete bidding? Yes, and this is an important part of Ra's brilliance. Imagine the analysis paralysis if you had played with money instead. You would have to calculate the VP value of each tile in the set in relations to the sets you already have and translate this into a monetary value. Imagine how much analysis paralysis this would result in and how long the bidding rounds would be. Instead, you "simply" decide whether you want the tiles and which of your sun disks you're prepared to commit.
The When - When are you bidding
We've already mentioned that the players themselves may trigger auctions. But given that all sun disks have unique values, doesn't this break the game by giving the owner of the highest sun disk the power to keep adding tiles, knowing that he or she will win the bid? No, there is a timing mechanic represented by the dreaded Ra tiles.
Depending on the player count, there is a track for the Ra tiles. Whenever a Ra tile is drawn, an auction is triggered automatically (and unlike the normal auction, no player is obliged to draw). This means that if you do have the highest sun disk, you have to decide whether to bid (and miss out on additional tiles) or pass (and risk that someone else grabs the tiles with a lower sun disk).
In addition, as soon as the Ra track is completely filled, the epoch ends immediately. No final auction, no end of round, nothing. If you didn't play all your sun disks, you have only yourself to blame.
Now, this sounds like a push your luck mechanic and I'm not normally a fan of it. However, the way it's implemented in Ra, it's actually push others' luck mechanic. Say that you have the lowest sun disk. Do you have to wait until all the higher sun disks have got what they want? No, challenge the other players by calling Ra prematurely. In the best case, they'll waste their precious sun disks on less tiles than expected, and in the worst case you'll get a fair amount of tiles for your "useless" sun disk. This challenge wouldn't be nearly as interesting with money.
So What's to Like?
What Reiner Knizia has accomplished in Ra a is a complex auction game distilled into only two decisions at the time. Before an auction, you either draw a new tile or call Ra to start an auction. During an auction, you either bid or pass. But although those decisions are seemingly simple, the values of the bids are hard to compare to the values of the sets you're collecting so the game doesn't really reward precise valuation.
Instead, Ra focuses on the interaction between the players, challenging each other to bid for tiles they don't want and pass for tiles they do want. One could liken Ra to a combination of Poker, where you also "collect sets", and Blackjack, where the players collectively ask to be hit (and can be hit really hard if an epoch ends earlier than expected). Ra has been a particular hit with non-gamers, that quickly recognize the familiar game mechanics and appreciate the innovative use of them. (I hesitate to admit this but in one recent three player game, one new player scored much more than the other experienced players together.)

... and What's not to Like?
Many players consider Knizia's games to be dry and unthematic. While I often disagree, Ra doesn't really make me feel like I "enrich civilization through art, religion, astronomy, writing, and agriculture; build monuments to greatness which will endure through the ages; implore the gods to bestow their favor upon you; immerse myself in the wonders of Ancient Egypt and the power of Ra" as the rules claim. Some (but certainly not all) seasoned gamers have lacked a purpose with the bidding in the game.
I respect this view, since I personally dislike games that are all about amassing victory points without any underlying goal. However, I do think that this view fails to understand that the bidding and the set collection mechanics are not the game but merely tools for the competition and interaction between the players. That said, Ra is certainly not a game for everbody (but is any game?).
So is Ra really an Auction Game?
Of course Ra is an auction game, you might think, but is it really? An auction participant should be rewarded for precise valuations. A collector should be rewarded for complete collections, free from redundant items. But a game designed on those principles would see players focusing only on their own collections so that each new item offered is likely to be most valuable to only one of them. It sounds dreadfully boring to me.
But what Knizia did was to remove player agency and reduce complex player decisions to simple boolean variables. Take it or leave it! Did this make Ra even more boring? No, quite the opposite! The seemingly blunt auction and set collection mechanics are merely tools for a "truth or dare" mechanic where the players constantly challenge each other. The individual parts of Ra are no more innovative than the individual nuts and bolts of a clock. However, put together they turned the game into an extremely well-oiled machine with high interaction and low downtime. If you like auction games, Ra offers a unique angle. If you don't like auction games, Ra offers a deep experience far below the auction surface. Take it or leave it!
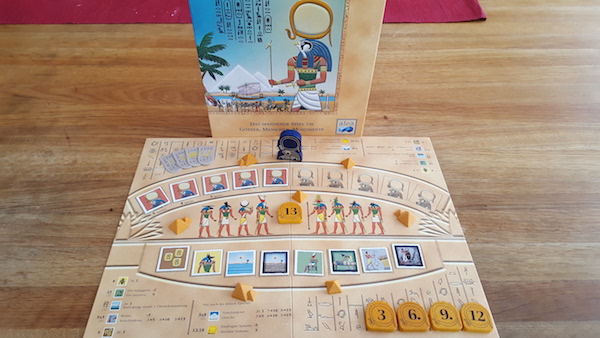
Strategi
Ra är ett auktionsspel och som i alla auktionsspel gäller det att bjuda tillräckligt lite för att tjäna på budgivningen och tillräckligt mycket för att vinna budgivningen. Enkelt, eller hur?
Skämt åsido, låt oss titta på lite grundläggande fakta först. Påsen innehåller 140 värdefulla brickor (pluspoäng), 10 katastrofbrickor (minuspoäng) och 30 Rabrickor (triggar auktion). Om du inte vill ge dig själv huvudvärk genom att memorera hur många av de olika värdefulla brickorna som kommit i spel så forsök åtminstone memorera Rabrickorna. I genomsnitt dras fyra till fem värdefulla brickor innan en Ra-bricka framtvingar en auktion. En pott som ger fler brickor är alltså normalt bra medan en pott som ger färre brickor normalt är dålig. Om många Ra-brickor dras tidigt kan du satsa på en större pott och om många Rabrickor dras sent kan det vara klokt att nöja sig med en mindre pott.
Men fyra till fem ströbrickor räcker ingenstans om du inte lyckas kombinera dem till värdefulla set. Vi måste därför titta på närmare på vad de olika värdefulla brickorna har för värde egentligen.
- Guld är enklast - värdet är alltid tre.
- Gudar är relativt enkla. Värdet är minst två poäng men brickan kan också användas för att byta till sig mer värdefulla brickor. Att byta en gud mot en guld är ofta bra men det kan också vara värt att hålla på guden ett tag om du tror att du kan få en ännu bättre bricka.
- Faraoner är mer knepiga. Om du har en majoritet i faraoner får du fem poäng varje epok men ju fler faraoner som krävs för det, desto lägre är deras genomsnittliga värde. Om du kan knipa majoriteten med två faraoner per epok så är deras värde två och en halv, vilket är ganska bra. Om det krävs fler är det mer tveksamt om det är värt att ta fler faraoner. Känn inte att du måste försvara en majoritet från en epok till en annan. Om två faraoner gav dig majoritet i första epoken och ytterligare fyra verkar krävas i andra epoken så kanske du ska nöja dig med det höga genomsnitt du fick i första epoken. Tyvärr är sånt svårt att förutse.
- Civilisationer är värda fem poäng för den första (för att undvika minuspoäng), två och en halv poäng för den andra och tredje (om du lyckas få tre olika civilisationer) och därefter fem poäng igen (om du lyckas få fler olika civilisationer). Minst en civilisationsbricka bör du därför sikta på. Ytterligare civilisationsbrickor blir en chansning och något du bör undvika sent om du redan använt en eller två av dina budbrickor.
- Floder är värda en till tre poäng beroende på hur tidigt du får dem men bara om minst en av dem är en översvämningsbricka. Floder är därför ofta bra första epoken, hyfsade andra epoken och mindre bra tredje epoken. Om du har floder kan det vara bra att ha en gud tillgänglig för att kunna byta den mot en översvämning vid behov.
- Monument är värda ett till tre poäng beroende på hur många du lyckas samla ihop till tredje epoken. Enstaka unika monument är bara värda en poäng styck men likadana monument i ett tretal är värda två poäng styck (fem för tretalet och en för det unika monumentet), i ett fyrtal knappt tre poäng styck (tio för tfyrtalet och en för det unika monumentet) och i ett femtal drygt tre poäng styck (femton för femtalet och en för det unika monumentet). Precis som med floder är det alltså bra att börja samla på dem tidigt men mindre bra att göra det sent, då du riskerar att bli sittande med nästan värdelösa par värda en halv poäng per bricka.
Själva solbrickorna har också ett värde att beakta i sista epoken. Om du tror att en pott kommer att ge dig lägsta totalvärdet måste du räkna bort fem poäng från pottens värde och om du tror att en pott kommer att ge dig högsta totalvärdet måste du lägga till fem poäng till pottens värde.
Nu när vi vet hur mycket de olika brickorna är värda så vet vi också hur mycket vi ska bjuda med våra solbrickor, eller hur? Nej, riktigt så enkelt är det inte. Ra är inte ett auktionsspel där du kan jämföra värdet på budet med värdet på potten, utan snarare ett "pajspel", där spelarna beslutar om de olika pajbitarnas storlekar innan de väljer sina bitar. En vinnande strategi handlar därför inte bara om att få så stora potter för dina solbrickor utan också om att de andra spelarna ska få små potter som möjligt.
Det här beslutet fattas genom valet att åkalla Ra. Som BGG-användare sitnaltax klokt påpekar så bör du alltid åkalla Ra om det inte finns skäl däremot (When Not To Invoke). Det tvingar nämligen de andra spelarna att bjuda först och du kan sedan välja mellan att ta potten med en relativt låg solbricka eller låta någon av dem få potten med en relativt hög solbricka. Vad du måste se upp med är risken för att alla passer så att du tvingas ta potten.
Här är de fall där man INTE bör åkalla Ra enligt sitnaltax.
- Potten är för liten för att någon ska vilja bjuda.
- Du har den högsta solbrickan och vill öka pottens värde.
- Potten är medelstor och du vill bjuda på den med en låg solbricka (eller tvinga ut en annan spelares höga solbricka).
- Potten är liten och du vill öka den till medelstor innan du bjuder enligt ovan.
- Potten är värdefull för en spelare utan höga solbrickor och du vill öka värdet så att en annan spelare som den är mindre värd för ska lockas bjuda över. (Om spelaren i fråga däremot har höga solbrickor är det bättre att åkalla Ra än att öka pottens värde för denne.)
- Potten innehåller en värdefull bricka som du inte kan vinna men du har en gudbricka att spela och ta brickan för.
- Du har den nästhögsta solbrickan kvar och spelaren efter dig har den högsta. Att öka pottens värde skulle bara öka värdet för spelaren efter dig.
- Du har bara låga solbrickor kvar och epoken är bara några få Rabrickor från att ta slut. Det är då bättre att försöka avsluta epoken än att riskera att ensam bli kvar med solbrickor när epoken tar slut.
Detta ger oss tre fall där man bör åkalla Ra:
- Potten är stor och du har bara låga solbrickor.
- Potten är stor nog för din lägsta solbricka men fortfarande långt ifrån stor nog för din högsta solbricka.
- Potten är värdelös för dig men värdefull för andra spelare.
Ra förblir ett spel där du måste utmana din tur men genom att följa dessa enkla strategiska tips kan du hjälpa turen att ge dig de största pajbitarna.
Minnen
Minnen kommer när jag spelat mer.
Through the Desert (äger)
| Bakgrund: | Kamp om oaser i öknen |  |
| Spelare: | 2-5 (bäst för 3-4) | |
| Speltid: | 45 minuter | |
| Svårighetsgrad: | 30% |
Allmänt
En sann Knizia-klassiker! Placera kameler för att koppla samman poänggivande oaser samtidigt som du blockerar motståndarna från att göra detsamma. Väl placerade kameler kan kontrollera och så småningom ringa in ett område och ge höga poäng (men gör det innan du får slut på kameler!). Kaotiskt men roligt!
Through the Desert - Through the not so Deserted Desert (engelskspråkig recension för publicering på Boardgamegeek)
The Tile-Laying Trilogy
Through the Desert is the third game in Reiner Knizia's Tile-Laying Trilogy after Tigris & Euphrates and Samurai. All those games are unique but Through the Desert may very well be the most unique.
The Differences
First of all, you do not place tiles but colorful camels. Functionally there is no difference compared to tiles but the camels do stand out on the board, for better or worse. Some players shudder at the very thought of playing with pink plastic camels while color-blind players find it difficult to tell the camels apart. If you belong to either category, Through the Desert is not for you. Otherwise, please read on.
Second, the placement of the tiles is restricted to hexes adjacent to previously placed camels. (After all, camels like caravans, don't they?) This makes placement much more restricted than in the other games of the Tile-Laying Trilogy.
Third, the area control is not exercised through placement in areas but rather around areas created by the players themselves. Wait, haven't we seen this before? Yes, Go came up with this idea some 2 500 years ago (without the camels though).
So can an ancient game really be renewed with a straightjacket and some plastics? As a matter of fact, yes. Let us learn more about what is on the mind of those creatures.
How do I Go?
As mentioned above, camels stick to each other. At the start of the game, you place one camel of each of the five different colors on the board and identify each of them with a rider of your color. All following camels must be placed next to a camel of its own player and own color. Thus, each player will manage five caravans.
This is indeed more restrictive than Go, where you can place a stone anywhere on the board. On the other hand, it is generally preferable to have few but meaningful decisions in a casual game. While it is difficult to assess whether a placed stone in go is good or not, new camels in a caravan are often good. The tricky part is to choose the right direction and the right caravan, questions that give you enough decisions to consider.
Where do I Go?
Since you are in a desert, you go to the water. Duh! The two most obvious ways to score is to place your camels on water hole tiles (which earns you 1-3 victory points as printed on the tile) or next to a palm tree (which earns you 5 victory points). That may sound easy but remember that you cannot go there by yourself, you have to build a caravan all the way there. Also remember that there are other camels in the desert that will do all they can to beat you to the valuable spots.

With Whom do I Go?
With whoever is closest to the valuable spots? No, there is more to this decision. Did you wonder why it was necessary with five different colors of camels? One reason is that opponent camels of the same color can not be placed next to each other. This is not only because it would be difficult to tell them apart but also because it can be used to block opponent caravans and cut them off from valuable areas. Another important reason is the third way to score: the longest caravan of each color scores 10 victory points.
So should you reach out for a water hole for 1 victory point or extend another caravan for potentially 10 victory points? Well, if you think that is a difficult question, wait till you learn about the fourth way to score.
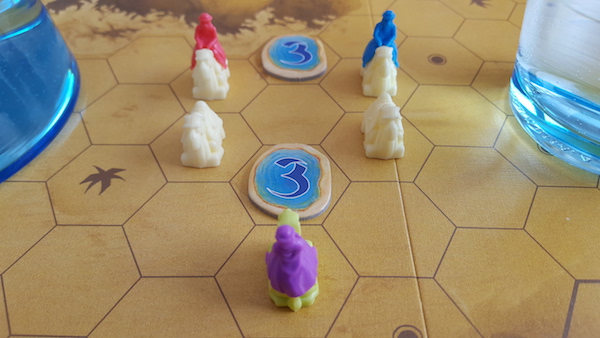
"The camel corridor". Neither Red nor Blue can claim the precious water holes since they are both riding white camels. Purple can simply ride between them and claim all the water.
When do I Go Home?
Through the Desert would not be similar to Go without offering benefits for enclosing areas. It is actually enough to surround a water hole or a palm tree to score for it, using the edge of the board or the central hill as a border if necessary, provided that there are no other camels in the area.
But this is not the only reward. Each enclosed hex scores 1 victory point, something that can amount up to 20 victory points or more if you are successful. Hence, Through the Desert is not a race game for points, it is also a blocking game to prevent opponent points.
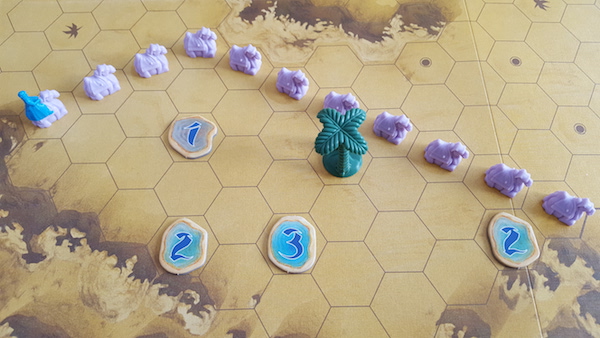
"Get off my lawn". Purple scores 5 VP for the palm tree, 8 VP for the water holes and 26 VP for the enclosed hexes.
When am I Done?
The game end is in the hands of the players. As soon as a color runs out of camels, the game is over. This is another factor to take into account when placing your camels. Will you have time to enclose that big area? Will there be enough camels to make your caravan longer than that of your opponent? Or should you simply rush the game yourself to thwart your opponents' plans?
The Camel between the Haystacks
The four different ways of scoring are often difficult to combine. You can have both a water hole and a palm tree within reach but will you be the first to both? You can extend all your caravans to score all over the board but will that not give up the longest caravan bonus to your opponents? You can give up the tempting points on the board and try to enclose an area instead but will you have enough time? To win Through the Desert, you need to balance carefully between finding the scoring opportunities for yourself while also denying your opponents from scoring.
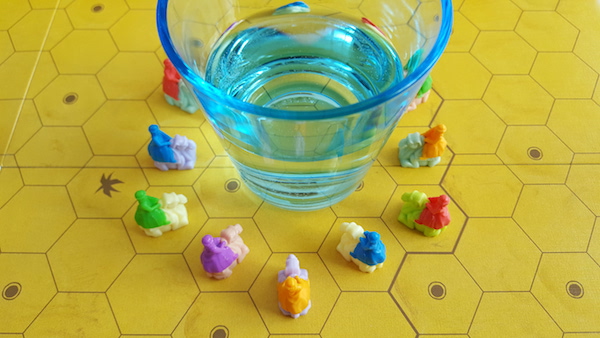
Is Through the Desert for Everybody?
Through the Desert is a good gateway for new players. Not only are the camels likeable among children (but not too young children - those camels look very much like to candy) but the rules are easy and there are always points to grab. The more seasoned player will find challenges in the balancing act of scoring and blocking. However, there are two potential issues with Through the Desert.
One is that the initial placement can be quite important. This can be particularly critical if a player gets a corner for himself or herself to enclose or if two similar colors end up so close to each other that none will score very much. However, my experience is that as long as you spread out, you will avoid those issues. You should not worry too much about camels that never start any caravan - it is quite common that you focus on just two or three of your colors.
A more critical issue is that players may be faced with the decision to give up points to block an opponent or focus on own points, leaving it to the other players to do the blocking. There may be scenarios where players inadvertently get the role of kingmaker but those scenarios are rare if all players are skilled and go for victory.
Personally, I still prefer Tigris & Euphrates and Samurai but Through the Desert is a worthy member of Reiner Kinizia's Tile-Laying Trilogy.
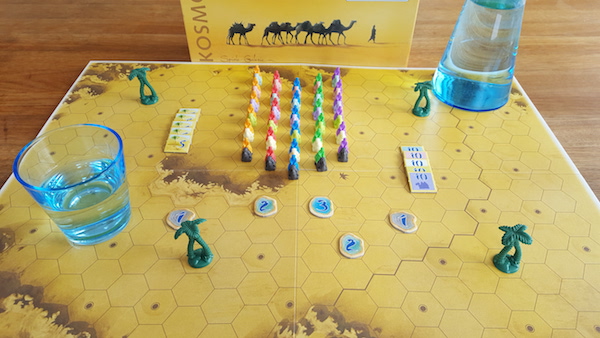
Strategi
Strategi kommer när jag spelat mer.
Minnen
Minnen kommer när jag spelat mer.
Carolus Magnus (äger)
| Bakgrund: | Kamp om inflytande i Karl den Stores rike |  |
| Spelare: | 2-4 (bäst för 2-3) | |
| Speltid: | 45 minuter | |
| Svårighetsgrad: | 30% |
Allmänt
Carolus Magnus är sannerligen El Grande minimerat till perfektion! Besluten är få men vart och ett kritiskt för framgång. Väljer du en låg turordning för att få flytta kejsaren först eller en hög turordning för större flexibilitet? Stärker du din majoritet i en färg eller utmanar du en annan spelares majoritet? Och när är tiden inne för att börja slåss om majoriteten i provinserna? Ett parti Carolus Magnus startar till synes lugnt och exploderar plötsligt i en hård kamp där tajming är nyckeln till framgång. Det här är mycket strategi förpackad i ett snabbt och lätt spel.
Carolus Magnus - Area Control in the Right Place at the right Time (engelskspråkig recension för publicering på Boardgamegeek)
The most possible depth with the least rules
Leo Colovini summarizes his design style as "the most possible depth with the least rules". He may not be among the highest ranked game designers in the community but one can usually trust his games to be unique. Whereas a designer like Reiner Knizia manages to find innovative angles of known mechanics, this clever Italian often comes up with mechanics seldom seen in other games. Granted, this may be because some of those mechanics aren't appealing enough to be copied and his games are indeed often perceived to be too abstract and thinky. One of his very first designs (second only to Inkognito and Cartagena), Carolus Magnus, is certainly no exception.
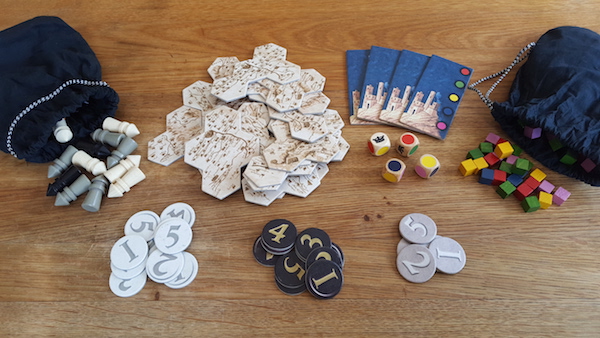
Do you expect me to control the Franks with this?
The core of Carolus Magnus is an area control game, similar to the earlier groundbreaking game El Grande. However, Leo Colovini took this idea one step further and added a double level of control. Similar to El Grande, the players move paladins (cabelleros) from a reserve to a court or to territories (regions) to take control. (The paladins of Carolus Magnus move directly from the reserve to the territories while the caballeros of El Grande stop at the court on their way but the basic idea is the same.) But unlike El Grande, the players of Carolous Magnus don't have specific colors. Instead, they may take control of any of the five colors, which in turn may take control of territories on behalf of the controlling player.
To understand how this works, we need to look at five key moments of the game.
- Acquiring controllers
- Defining control
- Resolving control
- Benefitting from control
- Merging control
Acquiring controllers
Each player starts with a number of paladins (controllers) in the reserve and replenishes them at the end of the turn. The exact numbers depend on the player count. The colors of the paladins are actually randomly determined by dice, although some die rolls serve as jokers and let the players choose color. It may seem odd in a game about controlling the controllers that you don't get to choose their colors. However, the die rolls only determine your means, what you do with them in the following moments is entirely in your hands.
Would it have been better to skip the dice and let the players choose which controllers to acquire? I thought so first but this would probably lead to a game where the players focus on a primary and a secondary color and ignore the rest. Instead of "color fights" involving many colors and many players, we would get occasional color duels between players wrestling for each others' secondary colors. Perhaps the game would be more "fair" but I doubt it would be more fun. Such a rule would also increase the risk of analysis paralysis, since you would have to decide in the end of your turn which colors you'll need in your next turn. This is an example where a "healthy dose of randomness" is good for the game and this comes from someone whose vast majority of games are free from dice.
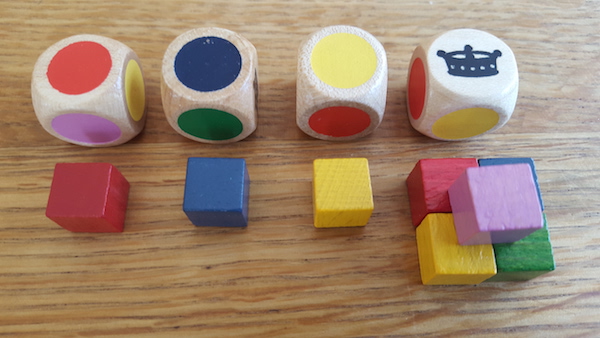
The colorful paladins of the Franks are ready to serve you.
Defining control
Control of a color is determined by the number of paladins at a player's court and control of a territory is determined by the number of a paladins in it. This means that in order to take control of a territory, you need to take control of the color or colors that have a majority of the paladins in it. Ties don't change the current status and there are no rewards for the runner-up.
In your turn, you simply move a number of paladins (again, the exact number depends on the player count) from your reserve either to your court or to a territory. If you end up with the most paladins of a color, you control the color and claim the corresponding clan marker. If "your" paladins are more than those of any other player in the territory, you may control the territory. Note the word may, the actual resolution takes place in a later moment discussed below. However, beware that paladins moved to a territory are only loyal to you as long as you control their color. If another player takes over the control, all paladins of that color switch side no matter who placed them there. There's no gratitude in the world, right?
But wait, how am I supposed to have my paladins taking control of territories for me if I need them at my court to maintain control of them? That is actually one of the big challenges of Carolus Magnus. Ideally, you will want to move paladins to your court only, and this is also how the initial turns usually play. But as colors and territories get claimed, it may be necessary to add a loyal paladin to a territory to change the balance in your favor when the control is resolved. Just make sure that you still have the paladin's loyalty the next time the control is resolved.
So when is the control resolved? That's the next key moment, to which we will proceed now.
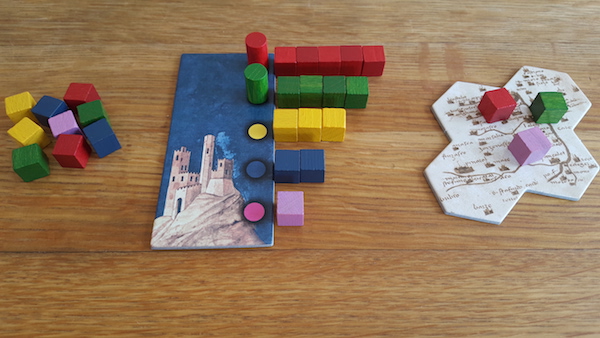
The two controlled red and green paladins outnumber the uncontrolled purple one.
Resolving control
Control is not resolved immediately, nor is it resolved at certain scoring rounds. Instead, the resolution is triggered by the players through an interesting mini game linked to the turn order. Each player has turn order discs numbered 1 to 5, of which one is chosen every round. Then they take turns in the order given by the discs. However, the number also tells the maximum number of territories which the Emperor may move through. The territories are organized in a circle and wherever the Emperor stops, the control will be resolved. (Thus, he's more active than the King of El Grande, who merely blocks actions in the region he resides in.)
Do you want to take control of a territory close to the Emperor? Then pick a low turn order, move paladins to take the necessary control, and move the Emperor in there. But beware that the limited movement gives you fewer territories to choose from. Do you want to take control of a territory far from the Emperor? Then pick a higher turn order to be able to reach that far. But beware that by the time the turn comes to you, the other players may have taken control of the colors you expected to control the territory with. Well played, this mini game can not only be used to resolve the "right" territories for you but also force other players to resolve the "right" ones in their turns.
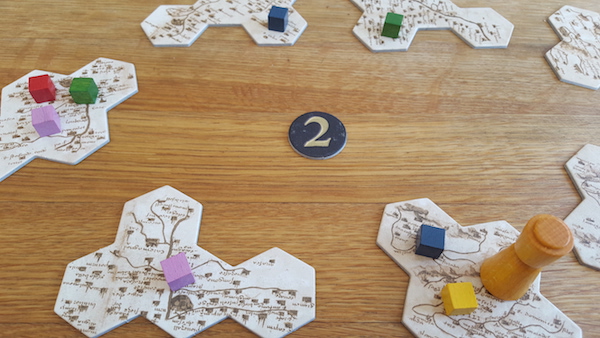
Everything is ready for the Emperor's visit and he's only two territories away.
Benefitting from control
So now you have gathered some paladins at your court and sent others to the territories just in time for the Emperor's visit. How will good old Carolus Magnus reward you for your control? Resources or victory points? No, something inbetween. Control lets you place a castle, which serves both as a resource (a paladin) and a victory point (first to build a certain number of castles wins).
This means that the next time the Emperor visit the territory, your caste is also counted when resolving control. This may come very handy if some of the paladins in the territory have shifted loyalty since the last visit. However, your castle is not permanent. If your castle isn't enough to prevent another player from taking control, it'll be replaced, leaving you with neither territory nor castle! Unfair? Carolus Magnus isn't fair, get used to it.
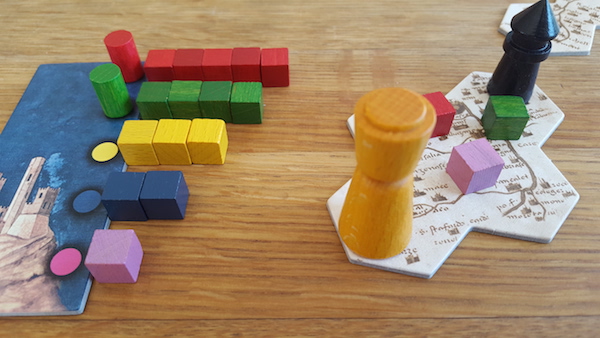
Black has been rewarded with a castle that will stand forever - or until the Emperor's next visit.
Merging control
The designer himself motivates the merging mechanic with the necessity of an element of irreversibility. Merged territories can never break apart again, thus shrinking the game board and potentially triggering an end game condition (less than four territories left). Leo Colovini has used this idea of shrinking game boards in games like The Bridges of Shangri-La (where breaking bridges give less movement options) and Clans (where tribes in completed villages can no longer move).
Personally, I think the mergers are more than that, they are what makes Carolus Magnus stand out from the crowd. The later double area control game King of Siam / The King is Dead permanently locks an area once it's resolved but areas in Carolus Magnus are never locked.
Instead, they can be strengthened through mergers. How it works is that if a territory resolved in your favor is adjacent to other territories under your control, they are merged into one bigger territory. All castles and paladins become part of this territory, thus making it more difficult to take over.
This gives Carolus Magnus a touch of Tigris & Euphrates, where a well executed merger may completely shift the balance. But just in Reiner Knizia's masterpiece, the strength of a merged territory may be greater but so is the reward for taking it over so be sure to protect it!
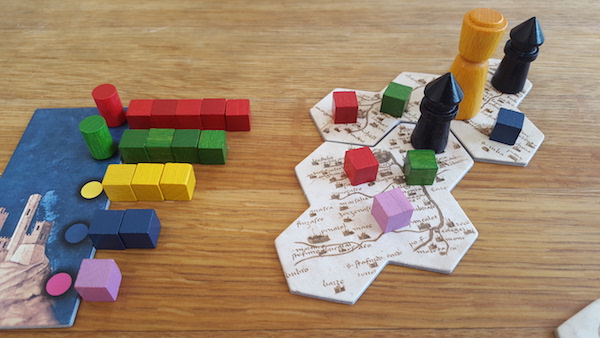
You're doing such a great job that the Emperor rewards you with a bigger territory to control. But if you fail him you'll lose it all...
So what's in it for the player?
The five key moments we've gone through makes Carolus Magnus an interesting game but does it make the playing experience interesting? This depends on how intertwined those moments are. A collection of mini games is seldom better than the sum of its parts. However, the "mini games" of Carolus Magnus are so closely intertwined that you can't make a decision in just one of them. To build a castle you must take into account which territory to take control of, which colors to take control of, which turn to resolve the control, which turn order to aim for, the risk that you subsequently lose the control and the prospects of merging controlled territories. And when you're done assessing your own position, repeat for every other player in the game!
Let's illustrate this with an endgame example. In a three player game, me and one of my opponents were just one castle short of victory. Some territories were merged and strong but some single territories remained and it was clear that the game would be determined in one of those. My main opponent had just picked order number 3, which put him just in reach of the first of those (territory 15 in the Yucata screenshot below with only 1 brown paladin at the time).
Screenshot from Yucata.de after the last turn of a round (played by White).
What could I do? Picking a higher number and put me in reach of the second of the weak territories would be too late. Picking a lower number would not put me in reach of any weak territory. However, by picking order number 2, I could not only strengthen the first weak territory enough to prevent a take-over (adding 1 blue and 1 green paladin to territory 15 in the image) but also be the first to pick an order number the next round. Thus, the round passed without a game end and by picking order number 1 the next round, I could first take control of the necessary colors and then move the Emperor another weak territory and claim the victory.
The example summarizes the interesting decisions of Carolus Magnus. The game is too tight to focus on colors for majority alone. Equally important is to choose the right turn order to get to use the majority at the right time and place while also preventing your opponents from doing the same. Tight, meaningful and intertwined decisions - what else could you ask of an area majority game, or of any other game for that matter?
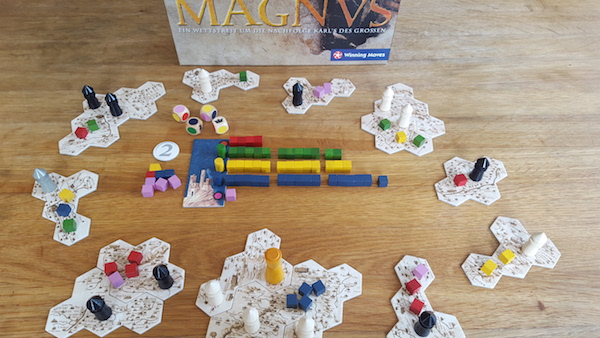
The same endgame with real components.
Strategi
Strategi kommer när jag spelat mer.
Minnen
Minnen kommer när jag spelat mer.
The King is Dead (äger)
| Bakgrund: | Maktkamp efter kung Arthurs död |  |
| Spelare: | 2-4 (bra oavsett antal) | |
| Speltid: | 30 minuter | |
| Svårighetsgrad: | 30% |
Allmänt
Den dubbla majoritetskampen i The King is Dead, där du behöver majoritet i majoritetsfraktioner, påminner om Carolus Magnus. Medan Carolus Magnus har ett krympande spelbräde, The King is Dead har ett krympande antal tillgängliga handlingskort, och spelarna måste ständigt väga handlingar nu mot framtida handlingar. Dessutom är segervillkoren beroende av hur spelet går så spelarna måste ständigt avgöra om de ska fokusera enbart en fraktion (om den ser ut att få majoritet) eller på alla fraktioner (om ingen ser ut att få majoritet). Ett överraskande djupt spel trots "endast" åtta handlingar.
The King is Dead - How to Break a Tie to Unite a Land (engelskspråkig recension för publicering på Boardgamegeek)
A Minimalistic Design
The King is Dead appears to have been designed with a minimalist approach, as if the designer had decided to give the players as little wriggle room as possible. The result is an extremely tense game that often lead to ties and tiebreakers. Is this a broken game then? No, this IS the game.
Let's start by going through the three main mechanics of the game: area control, stock holding and hand management.
The Area Control
The game is about the control of Britan after the dead of King Arthur. Britain is divided into 8 regions and there are 3 factions struggling for the control: Romano-British (yellow), Scots (blue) and Welsh (red). The game is played over 8 rounds or power struggles, one for each region, during which the players manipulate the factions' followers (represented by cubes) in the regions. Once a power struggle has ended, the specific region is locked for further manipulations and whichever faction has the most followers there takes control. There are no rewards for second place - the winner takes it all. The faction which controls the most regions at the end of the game wins!
So far, nothing new under the sun. As in most area control games, you'll want to claim the region majority with as few followers as possible so that you don't "waste" followers that could have fought for the majority elsewhere. But wait, which faction is yours? This is where the stock holding comes into play.
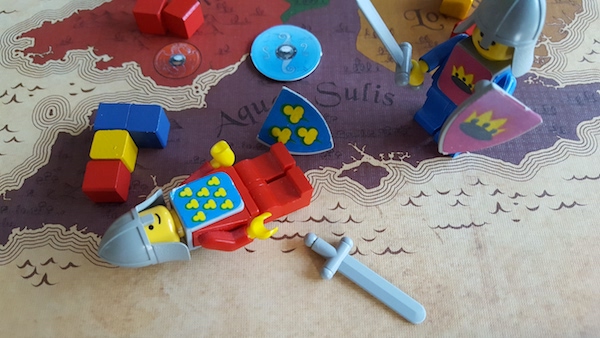
Scots (blue) have taken control of Aqua Sulis
The Stock Holding
The fight for the majority does not only take place in the regions but also in the factions. A player may take actions with followers of any faction and ends the action by taking 1 follower to his or her hand or court. (Each player also starts the game with 2 random followers.) The player with the most followers of a faction at the end of the game controls that faction and if that faction controls the most regions in Britan that player wins!
So what we see here is a double area control game where you have to control not only regions but also factions. There is anoter catch as well: the follower you take to your court to increase your control of that faction is taken from the board, thus decreasing that faction's ability to take control of regions. How do you deal with that dilemma? Similar to region control, you'll want to claim faction control with as few followers as possible so that you don't waste followers that could have fought for the majority elsewhere.
Do you begin to understand how limited your wriggle room is? Then it's time for the third and most agonizing mechanic.
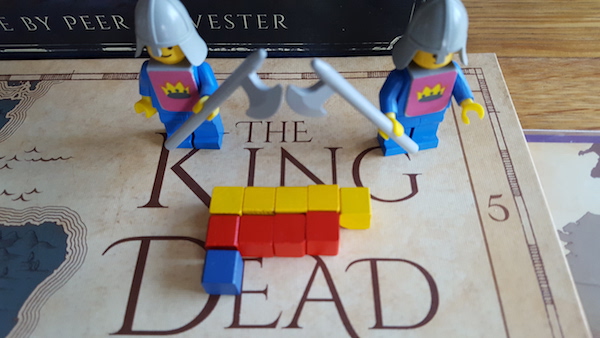
Strong control of Romano-British (yellow) and Welsh (red), less so of Scots (blue)
The Hand Management
We've hinted about actions for manipulating the followers in the regions. The actions themselves are not that spectacular. The actions are executed through action cards and there are cards for adding followers, moving followers and changing the order of power struggles, 8 in total. So you take 8 actions in each power struggle? No, you take 8 actions in total. But aren't there 8 regions to act in? Yes, so if you use more than 1 action card in one region, you'll have to skip actions in another region!
This is fine example of how a designer may add tension in a game by simply removing options. Not only does a player have to household his or her actions but he or she must also carefully monitor which action cards the other players play or save. Are you trying to wear down one opponent by playing many cards while the third opponent saves cards for future power struggles? Probably a bad idea, since you'll be left without actions to respond. Or are you trying to save your cards for a final push in the last power struggles? Perhaps an even worse idea, if regions get locked in a way that makes most of your actions useless. When playing the King is Dead, you must look at the other players' cards as much as at your own cards.
OK, but with all those limitations the game is bound to end in a tie, isn't it? Indeed, and that's why you must play with a tiebreaker in mind so let's look at them next.
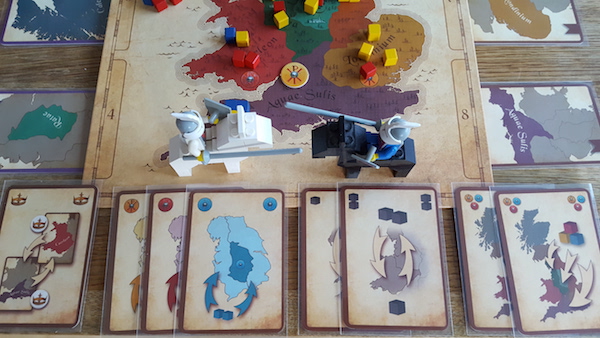
From left to right: actions for the order of power struggles, adding followers of a specific faction, moving followers, and adding followers of any faction
The tiebreakers
As you may expect, there are several tiebreakers. However, those tiebreakers are also contradicting, meaning that something that may give you the victory in one case may deny you the victory in another case.
The Power Struggle Tie
If, after a power struggle, no faction has a majority in the region, the control goes to the invading Saxons instead. Initially, this only results in fewer regions to fight for. However, if 4 regions fall to the Saxons, the game ends immediately. Does the player controlling the strongest faction still win then? No, in this case the player having the most complete sets of followers wins!
This tiebreaker means that if the game ends with a faction controlling Britain, your strategy should be to ignore the followers of the other factions, but if the game ends with the Saxons controlling Britain, your strategy should be not to ignore any followers. But how can you choose if you don't know the winning strategy until the game ends? Well, you'd better play with both strategies in mind!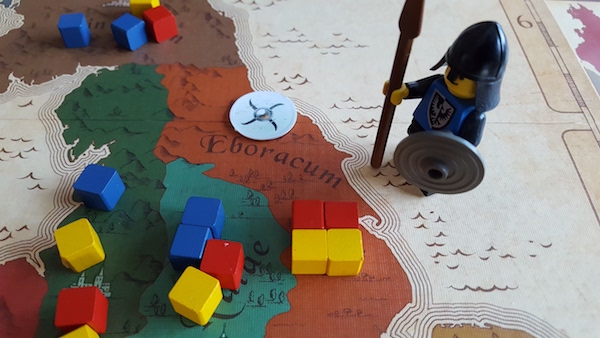
Et partitus regula - no faction has the majority so the Saxons invade
The Region Tie
If, after the eight power struggles, no faction has a majority in Britain, the faction which last won a power struggle wins. This is a sound design priniciple, since it allows trailing factions to catch up and often keeps games open until the very last round. In addition, it gives trailing players two options. Either you play for follower majority in the winning faction or you play for region majority for another faction.
The Faction Tie
If, after the eight power struggles, no player has a majority in the strongest faction, the majority in the second strongest faction counts for victory.
This tiebreaker goes against both the "British strategy" (focus on one faction) and the "Saxon strategy" (focus on all three factions) because it rewards a strategy of focusing on two factions. Again, you don't know which strategy to choose until the game ends.
The Action Card Tie
Have you had enough of tiebreakers yet? Bear with me because there is one left. If a British victory leaves the players tied, the tied player who last played an action card loses. However, if a Saxon victory leaves the players tied, the tied player who last played an action card wins.
This tiebreaker means that you should play your action cards early in case of a British victory and late in case of a Saxon victory. What did we say about wriggle room?
The Mordred Variant
For the players wishing even more tension, there is also a Mordred variant that adds loyalists (black cubes) to the board each power struggle. If they ever get a majority, the game ends immediately with the normal winning conditions. (In the case of lack of power struggles, the most followers breaks the ties.)
This variant adds an interesting tension between players who play action cards early and thus want the game to end prematurely and players who play actions cards late and thus want to prolong the game.
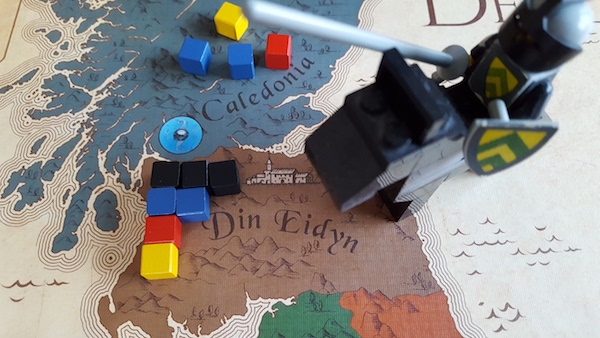
Sudden death as Mordred's loyalists claim Din Eidyn
The 4 Player Variant
For 4 players, there is a team variant with - you guessed it - contradicting victory conditions. In case of a British victory, the team with the "best player" (the player winning according to the normal victory conditions) wins but in case of a Saxon victory, the players in the team count all their followers.
Strategywise, this means that in the case of a British victory, one player should promote the other player, while in the case of a Saxon victory, the players should try to collectively acquire as many sets of followers as possible. An additional challenge is that the team members are not allowed to discuss tactics.

The Critics
The King is Dead is certainly not a game for everybody. Some complain about the unpredictability (the different victory conditions aggravate strategies) while others complain about the lack of options (only eight action cards). It's telling for the game that those complaints are contradiciting - fewer victory conditions would make the game almost solvable while more action cards would make the game even more unpredictable.
Others complain about the rule that, in the 3 player game, you're not allowed to play the last action card of the game if it won't win you the game. However, given that you have to play with the tiebreakers in mind, the lack of such a rule would quickly cause the game to break down through kingmaker issues.
A more valid argument concerns the theme. I don't agree that the idea of controlling the controller is unthematic but I do agree that the setting of post-Arthurian Britain is strange. Not even King Arthur (or whoever the man behind the myth was) managed to unite Romano-British, Picts and Welsh so why would his successor manage that? Uniting Anglo-Saxon kings against the Vikings would have made more sense, as of course the original setting of King of Siam, but I guess King Arthur has more market value.
Conclusion
The King is Dead builds on the mechanics of area control, stock holding and hand management to create a highly restricted game. The few and limited actions must be considered carefully and a strategy must take into account the many and often contradicting tiebreakers in mind.
To enjoy The King is Dead, you should enjoy tense games where you must be constantly on your guard, monitoring your opponent's actions and being prepared to react to the ever changing conditions. If you want more opportunities to wage war on your opponents or prefer being at peace building your engine, The King is Dead is not for you. Otherwise, The King is Dead, or its predecessor King of Siam, is a brilliant design that should be tried by every gamer and part of every area control fan's collection.
Strategi
Strategi kommer när jag spelat mer.
Minnen
Minnen kommer när jag spelat mer.
Taluva (äger)
| Bakgrund: | Expandera bosättningar på föränderlig ö |  |
| Spelare: | 2-4 (bra oavsett antal) | |
| Speltid: | 45 minuter | |
| Svårighetsgrad: | 20% |
Allmänt
Taluva påminner lite om spel som Java, Carcassonne and Torres men med mycket renare och elegantare mekanismer. Du spelar på en ö som förändras genom att brickor läggs ut, intill tidigare brickor eller på dem så att eventuella tidigare bosättningar delvis tas bort. På denna ö gäller det att få ut sina tre typer av bosättningar: vanliga hyddor, tempel som kräver bosättningar om minst tre områden och torn som kräver höjder om minst tre brickor. Brickorna kan inte bara användas för att blockera eller skada andra spelare utan också för att öppna nya områden eller till och med splittra egna bosättningar och tillåta bygget av fler tempel och torn. Strategi och taktik i många olika dimensioner med andra ord!
Strategi
Strategi kommer när jag spelat mer.
Minnen
Minnen kommer när jag spelat mer.
Clans (äger)
| Bakgrund: | Folkvandringar på stenålderstid |  |
| Spelare: | 2-4 (bäst på 3) | |
| Speltid: | 30 minuter | |
| Svårighetsgrad: | 20% |
Allmänt
Områdeskontrollmekanismen påminner mig om mitt eget spel Iconoclasm, där det är "summan" av alla spelares handlingar som räknas och jag såg fram emot att testa hur Clans förverkligade detta. Jag älskade Clans efter första partiet! Flytta klaner för att förbereda högpoängsbyar för din egen färg utan att avslöja den. De dolda målen kan avskräcka vissa spelare men det håller spelet spännande och öppet ända in i slutet.
Simply Brilliant (engelskspråkig recension för publicering på Boardgamegeek)
The more games you play, the more does it take to impress you, and you often find yourself wondering whether there is anything new under the sun left to discover. But the greater is the pleasure when you actually do find an impressive game that rises above the general mediocrity. This happened to me last weekend when I got to play Clans for the first time.
Clans had been on my radar for a while. Interestingly enough, I first learnt about it through a negative comment by Alex Harkey regarding its game-defining concepts. The idea of playing all colors at the same time but secretly supporting only one intrigued me and I had already, unknowingly of this gem, used a similar mechanism in my own game Iconoclasm. But Clans is not easy to find nowadays so when I saw it at a game event, I immediately proposed a play and convinced two other players to join me.
The box was opened and the more we saw and heard, the more eager we got. The game board with its different territories is colorful and spatious. The colored huts you play with are sturdy and pleasing to the eye. Preparing the game is quick - simply assign each region one of each hut and then randomly place one hut in each area.
The rules are even simpler. Move all huts in any area to any adjacent non-empty area. Once a group of huts cannot move any further (i.e. all adjacent areas are empty), a village is formed and each participating color scores equal to the number of all huts in the village. This rule alone would be enough for an interesting game with several strategic and tactical options. Bringing your color to big villages and opponent colors to small villages will benefit you. Bringing more than one opponent color to "your" village will also benefit you, as it is colors and not huts that score. The redundant hut will thus increase the score for all colors in the village while missing the opportunity to score elsewhere. But there was more to come.
While bringing many huts to a village increases the overall score, bringing all colors to a score achieves the opposite. With all colors present in a village, a strife erupts that eliminates all single huts in the village. This gives a very interesting take that mechanism where you can deny opponent colors points. But which are the opponent colors?
As I have touched upon already, the colors are secret. You do not know which colors the other players have, nor do they know which you have. As the huts are moved around, you must deduce which colors the others play to identify which colors to block and which colors to let go. (You do not have to have the highest score to win, only a score higher than any other player's score.) This keeps all players engaged in the movements and reduces the perceived downtime significantly.
So far we loved the game but the wizard Colovini had even more up his sleeve. There is a terrain dimension and a time dimension as well. An epoch track in the game not only serves as an end game timer (the game ends after the 12th village) but also gives terrain and time bonuses. Depending on the epoch, some terrains score extra while other terrains do not score at all. Furthermore, the later a village is formed, the higher does it score. This is also something you must take into account when planning and playing Clans. So few and simple rules, so much brilliant gameplay!
So how does it feel to play Clans? The first few rounds you may really feel like a wandering tribe: lost. Should you start with your color or another color? Should you form many small villages to claim the village bonus (worth 1 extra point) or prepare large villages where your color is present? So many questions that only show the immense depth of the game. But you quickly get into the game and starts seeing patterns and opportunities. Villages are formed and scored and the colors take turns to be in the top of the score track. The secret colors and the escalating scoring keeps the game open to the very end when the colors are finally revealed. A truly magical experience comparable to classic games like Tigris & Euphrates.
So who would not like Clans? Well, if you prefer thematic games you may better look elsewhere. There is a theme in Clans for those who appreciate the symbolic language: roaming clans that slowly gather together, uniting against "the others" that are not part of the village (or fighting internally if there is no external enemy to unite against). Why mountains would be better than fields in some epochs is less clear, as is why younger villages would be worth more than older villages, that should have had time to grow bigger. This does not concern me a bit but I mention it for those who feel that an immersive theme is more important than an immersive game.
How about Alex Harkey's criticism that I referred to in the beginning of the review and that led me to Clans? He claims that you do not get a benefit from identifying an opponent color. I respect his gaming knowledge and experience but my own experience, although limited, tells another story. Thanks to having deduced the opponent colors, I managed to exclude those colors from the final village on behalf of the non-player color and claim the victory. However, this was a 3 player game and I do agree that Clans may not scale well with 4 players. Perhaps a 6th color would help?
Nevertheless, Clans is a stunning example of how few and simple rules can create a deep and and immersive game and I can only regret that this gem does not have a higher rating at BGG.
Strategi
Strategi kommer när jag spelat mer.
Minnen
Minnen kommer när jag spelat mer.
Alchemist (äger)
| Bakgrund: | Tävling mellan alkemister |  |
| Spelare: | 2-5 (bäst på 3-4) | |
| Speltid: | 45 minuter | |
| Svårighetsgrad: | 30% |
Allmänt
Alchemist är sannerligen underskattat - vilket annat spel låter dig bestämma hur mycket poäng du ska få och samtidigt öppna en väg för de andra spelarna att få poäng?
Besluten är till synes enkla - skapa en brygd av ingredienser för att få poäng (och tillåt andra spelare att få poäng fler gånger än du), kopiera en annan spelares poäng (och ge den spelaren ingredienser) eller ta nya ingredienser. Men som framgår av beskrivningen så måste varje beslut vägas mot effekten på andra spelare. Lägg till detta en hemlig ingrediens för varje spelare som ger den spelaren fler poäng om ingrediensen är den mest använda. Resultatet av denna brygd är ett spännande spel som med enkla mekanismer ger känslan de gamla alkemisterna måste ha känt.
Think like an Alchemist (engelskspråkig recension för publicering på Boardgamegeek)
"So what's the game about?"
"You play an alchemist creating potions."
"Cool, what do I need to create a potion?"
"You decide which ingredients to use."
"Er... OK, what do I get from creating a potion?"
"You decide how many victory points you get."
"Right. Did you bring any other games?"
Are dialogues like this to blame for the low rating of Alchemist? Perhaps, because just like the real alchemists had no recipes to follow, there is no scripted gameplay that the players of Alchemist can follow. Yet, the entire game is a well-oiled machine where ingredients seamlessly flow between players and potions while everybody desperately tries to extract as many victory points as possible. But let's start from the beginning.
Alchemist is a sadly underrated game by the relatively unknown designer Carlo A. Rossi. It's likely to fall out of the top 2000 at BGG soon together with games like Star Munchkin. Yet Alchemist was awarded a Spiel des Jahres recommendation in 2007. So why don't people like it?
Reading comments about Alchemist, some gamers praise the solid and interesting mechanisms while even more claim that it's broken (did they play it right?), free of meaningful decisions (except that the players decide everything?) and too long (45 minutes?). Yet of the many games I brought to a game weekend recently, this was the game that everybody wanted to play over and over again. Alchemist is really that good and addictive. It's my sincere hope that this humble review will tell why and help finding new fans to this unknown gem.
The rules are very simple. There are five different ingredient colors that can be used to create up to ten potions. Each potion generates exactly two ingredients of pre-determined colors but it's up to the player creating the potion to determine the number and colors of ingredients to use and how much victory points to get for creating it. The catch is that while you only get the victory points once, each other player can copy your recipe by using the similar ingredients over and over again.
Ingredients used in this way are dicarded with the exception of one that is given to the creator of the potion. This will gradually decrease the number of available ingredients and once three or more colors are depleted, the game ends.
As an extra challenge, each player has a secret color and the more the ingredients of your color that have been used in the game, the greater is your end game bonus.
This gameplay creates many interesting decisions.
- Should you create a "cheap" potion that the other players will want to copy over and over again so that you get more ingredients?
- Should you create an "expensive" potion to deny the other players the victory points from copying it?
- Should you use your secret color as ingoing ingredient, so that it's more likely to be discarded, or as outgoing ingredient, so that it's more likely to be used by the other players?
- Which of the other players' potions should you copy and in which order to ensure that you always have the ingredients you need?
- Which secret colors do the other players have and how do you ensure that they stay in the game?
- When is the right time to deplete a color and end the game?
The game board with its ten potions may seem limited but the huge number of possible ingredient combinations creates a unique "ingredient economy" in each game. Some games may see cheap potions that reward copying players while other games may see expensive potions that reward creating players. Certain colors may be abundant while others may be scarce.
Understanding the current game's balance is crucial to play for victory but gaining this understanding before the game comes to an end is very difficult. Gamers may feel that they are too dependent on other players' choices to form a strategy but personally I like this high degree of interaction. Perhaps Alchemist in this respect is similar to games like Container (a game I really want to play but that's hard to find), where the game conditions are completely in the hands of the players.
In my own sessions, I have been very successful in getting my secret color out of the game but there is no single strategy that can achieve this, only careful observation of how colors flow through the game and adapting your strategy to that.
A completed game of Alchemist also invites to retrospective discussions. The board is open to everybody and everybody can follow how the players have mixed their potions. Why did you value your potion like that? How did you manage to constantly get the ingredients you needed? Was that your secret color all the time? Alchemist leaves no player unengaged.
The only thing I can find to criticize is the weird choice of colors: yellow cubes are used for orange ingredients and orange cubes for red ingredients. Get used to it and get on with it.
Others may also find the game too abstract and the theme pasted on and I agree that I never feel like I'm mixing troll eyes and bird legs. However, I really enjoy pushing in cubes of some colors and getting out cubes of other colors while planning which ones I need the next few turns and which ones I want out of the game. I may not feel like an Alchemist but I certainly think like an Alchemist!
Strategi
Strategi kommer när jag spelat mer.
Minnen
Minnen kommer när jag spelat mer.
Inca Empire (äger)
| Bakgrund: | Inkaimperiets expansion |  |
| Spelare: | 3-4 (bäst på 4) | |
| Speltid: | 3 timmar | |
| Svårighetsgrad: | 40% |
Allmänt
Jag gillar ofta spel där spelarna interagerar genom att agera utifrån andras handlingar snarare än simpel "take that". Inca Empire åstadkommer detta genom att spelarna bygger vägar till områden och belönas för erövringar (omedelbara poäng och arbetare varje runda till erövraren) och utvecklingar (omedelbara poäng till utvecklaren och poäng varje runda för alla spelare med vägkoppling.
Detta ger inte bara den typiska "när växlar jag från resurser till poäng"-utmaningen utan också utmaningen i att välja mellan samarbete och konkurrens. En spelare som isolerar sig själv från de andra kommer att behöva kämpa med att både erövra och utveckla på egen hand medan en spelare som välkomnar andra spelare kanske upptäcker att dessa tjänar mest på samarbetet, t ex genom att du erövrar och de utvecklar. I det är avseendet liknar Inca Empire Northwest Passage, där du också behöver lita på att motståndarna gör lite av ditt arbete, något som kan avskräcka spelare som önskar mer kontroll.
Jag var lite orolig över att idén att spela kort som påverkar andra spelare skulle kännas lite för mycket som "take that" men eftersom varje kort alltid påverkar två spelare så passar de samarbete/konkurrens-temat ganska bra. Tur med korten kan påverka spelet men inte avgöra det. Det ovanliga temat och mina positiva minnen av ett Perubesök är ett extra plus i kanten för mig.
The Road Goes Ever On (engelskspråkig recension för publicering på Boardgamegeek)
The Qhapaq Ñan
The Inca road system, known as Qhapaq Ñan meaning 'royal road' in Quechua, was the most extensive and advanced transportation system in pre-Columbian South America" according to Wikipedia. I've also been fortunate to experience some of those roads personally during a memorable visit to Peru (although my feet may not think it was so fortunate). The road network is also the theme of the game Inca Empire.
Among the many route-building games, Inca Empire has managed to find its own niche. This game is not only about building routes for your own benefits but perhaps even more about building routes to parasitize your opponents. Or should you look upon them as (temporary) partners? Let’s take it from the beginning.
Game overview
In Inca Empire, you play an ”Apu”, a religious leader in the Inca Empire. Your duty is to expand and improve the empire and your tools are roads (to connect areas), workers (to conquer areas), and buildings (to develop conquered areas).
Workers are earned for conquered areas at regular income phases. Victory points are awarded both immediately for conquests and builds as well as at regular scoring phases for CONNECTED buildings. This is an important distinction: the immediate victory points are awarded to the building player only but the regular victory points are awarded to ALL CONNECTED players, thus the parasite gameplay.
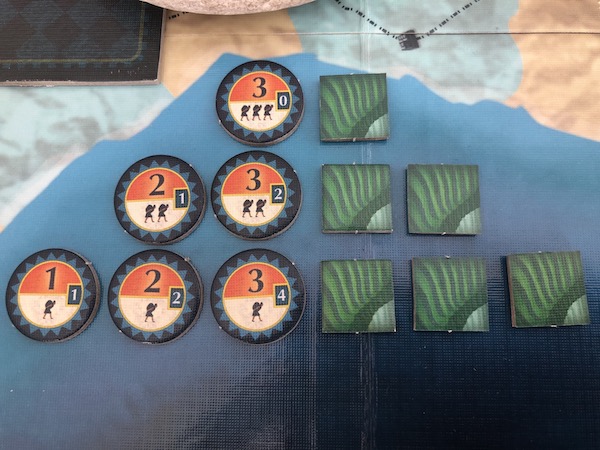
To the left, conquered territory markers, showing worker cost to conquer, regular worker income, and immediate victory points. To the right, built terrace markers, which earn regular workers and victory points.
An additional challenge is that the game conditions constantly change due to event cards played by the players themselves.
The player with the most victory points wins (although there is no winner thematically, since the game ends with the arrival of Pizarro and the end of the Inca Empire).
So what does this mean for the player experience in a game of Inca Empire?
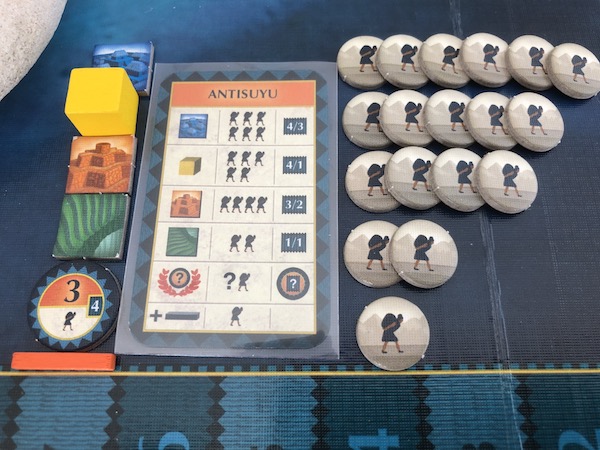
The many things in Inca Empire that require workers: cities, temples, garrisons, terraces, conquests and extra roads.
The economic challenge: The worker-victory points balance
Euro games often have a money-VP ”switch” - the moment when a player should stop focusing on money and start focusing on victory points. In Inca Empire, this is defined by the moment when you have enough workers (i.e. conquered regions) to start earning victory points (i.e. build buildings). It sounds simple, since each conquered region has a fixed worker income and each building has a fixed worker cost.
However, there is one more aspect to take into account. The game is divided into four eras with an increasing number of building phases. This means that a worker force that is sufficient for one era may have to be expanded the next.
The four eras of the Inca Empire with Inca phases (income), Sun phases (events), People phases (builds) and Sapa Inca phases (scoring).
The spatial challenge: The optimal network
The network building mechanic can be characterized as a specialized kind of set collection where the goal is to place ties to connect nodes. In Inca Empire, this is translated into roads and regions. Here we have two interesting challenges compared to many other games.
First, the value of the regions is determined by the buildings in them, which in turn are determined by the player actions. Thus, the players must constantly monitor each others’ actions and intentions to be present at the right place at the right time.
Second, there are several criteria that must be fulfilled before a region can generate victory points:
- A road must be built to the region.
- The region must be conquered.
- A building must be built in the region.
Doing all this by yourself is not efficient. By the time you have finished, the other players are sure to go there and parasitize your effort. But waiting for others to do all the work isn’t efficient either because the less attractive a part of the map is, the less inclined are the other players to waste their precious actions there. Whether the players want it or not, their fates are linked and they have to work together to develop areas. Thus, the players must constantly decide when to cooperate and when to compete.

Orange has connected to Ranchilos and built a city and a temple there - but from the East a brown road is sneaking closer...
The card challenge: The changing conditions
The event cards of Inca Empire are more than simple random events or cheap take that measures.
- They are chosen by the players from a hand of three cards, thus mitigating the randomness.
- The events can have both positive and negative effects.
- They are played into certain areas, affecting exactly two other players.
- They are played in turn order where each played card blocks other cards from being played there, making turn order very important.
- They are played during certain phases - the later the era, the more the phases - and their effects are cumulative throughout the era, thus giving the players powerful tools to modify the game conditions in their favors.
Some of the events of the Inca Empire; ability to build "wilderness roads" outside normal routes, roads destroyed through "rural unrest", ability to build temples on garrisons and ability to perform an extra conquest.
The turn order challenge: When to trail and when to rush
Similar to the events, the turn order is in the hands of the players. Simply put, the player with the least victory points goes first and going first gives you many advantages.
One is that the last player in turn (=the player with the most victory points) must give a worker to the first player in turn. Given that the need for workers keep increasing throughout the game, this extra worker is often welcome.
Another advantage is that the first player in turn has a better chance of conquering ”worker regions” - regions that give you workers regularly - instead of ”victory point regions” - regions that give you one-time victory points. Incidentally, this helps keeping you behind in victory points and thus first in turn order.
But perhaps the most important one is the the above mentioned benefit of playing event cards first. This lets you choose between playing positive cards to your slots, negative cards to opponents’ slots or simply save powerful cards and play a neutral card to block slots. In a tight game, which a game of Inca Empire usually is, the right cards in the right slots at the right time can be decisive.Note, however, that the turn order advantage isn’t that clear-cut. There are instances where you may want to go last to have time to react to the opponents’ actions. If a nearby region is conquered, you can reap the fruits of your opponent’s labor and build a city or a garrison there. If a city or a garrison is built in a nearby region, you can build roads to it and ”leech” victory points. The game of turn order is a very intricate one but whoever wins that game is likely to win the entire game.
The Inca Empire scoring track; Orange has the most VP and is thus last in turn order. Green reached the 4 VP square first, as shown by the score marker's inner postion, and is thus second to last in turn order.
So what’s not to like?
Inca Empire is certainly not a game for everybody. The idea of having to pay workers to players with less victory points or seeing them leeching victory points from your efforts may put off many players. The high degree of balance and interaction may also make the game frail as a weak player may become a kingmaker by inadvertently helping or blockig an opponent. Inca Empire needs dedicated and equally skilled players to shine.
There are also some practical issues. The victory point calculation may become a bit tedious as the number of buildings on the map increases and the road networks start stretching out and crossing each other. The game is also prone to analysis paralysis as players constantly assess the game state to find out exactly how many workers and victory points they aim for in an era. It may help to keep a running tally of the victory point levels per player but since roads keep getting added and removed, you’ll still have to re-count every scoring phase to be sure.
More serious flaws are some rule ambiguities. It’s not clear if and how turn order changes if players stay at 0 victory points after the first rounds. The map, although pretty, is just plain wrong since no sites are located at the coast, making it impossible to follow the rule that so called wilderness roads ”must not run between the sea and a site”. A detailed discussion is available at Boardgamegeek but in short, you may either refer to the designer Alan D. Ernstein's map or use a simplified rule, such as BGG user clearclaw’s suggestion to require wilderness roads to be entirely surrounded by dotted lines on all sides.
But if that doesn’t deter you…
... then Inca Empire offers you a an exciting game on razor’s edge. You need to find a strategy that gives you the workers you need without falling behind too much in victory points over time while still letting you react tactically to map and event changes. The game starts with an empty map that it’s up to you and your opponents to fill with roads and buildings. Each new round sees new conditions, ensuring a unique experience every time, and when you’re done the map will be covered by sprawling networks in all directions. The winner is often the one who has managed to connect to the most buildings in the end but to do so is easier said than done.
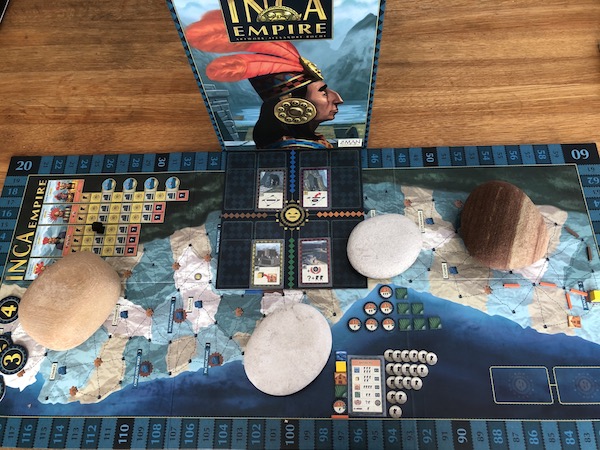
Strategi
Strategi kommer när jag spelat mer.
Minnen
Minnen kommer när jag spelat mer.
Age of Steam (äger)
| Bakgrund: | Bygg järnvägar och leverera varor |  |
| Spelare: | 1-6 (bäst på 4-6) | |
| Speltid: | 2 timmar | |
| Svårighetsgrad: | 40% |
Allmänt
Age of Steam kan mycket väl vara den bästa implementeringen av det enkla men djupa spel som levereras av spel som Railways of the World och Steam.
De grundläggande handlingarna att lägga ut räls och leverera kuber längs dessa länkar är lika men där Railways of the World tvingar spelarna att välja mellan de två så låter Age of Steam spelarna utföra båda handlingarna i sin tur (eller byta ut leveranshandlingen mot uppgraderingshandlingen för att kunna leverera längs fler länkar).
En annan skillnad är att korten med särskilda förmågor har ersatts av roller med särskilda förmågor som välj under turordningsauktionen.
Avslutningsvis så är lånemekaniken än mer elak på så vis att lån bara får tas i början av turen, innan spelaren vet hur mycket pengar han eller hon behöver under turen.
Personligen tycker jag att att de elakare aspekterna av Age of Steam väger över till spelets fördel jämfört med liknande spel.
Strategi
Strategi kommer när jag spelat mer.
Minnen
Minnen kommer när jag spelat mer.
Stephenson's Rocket (äger)
| Bakgrund: | Bygg järnvägar och förvärva aktier |  |
| Spelare: | 2-4 (bäst på 3-4) | |
| Speltid: | 60 minuter | |
| Svårighetsgrad: | 30% |
Allmänt
Det är svårt att utvärdera Stephenson's Rocket efter bara några få partier. Till det yttre är det ett spel om att placera järnvägar för att ansluta städer och tjäna poäng. Men poängen kommer från flera olika källor och både under och eftetr spelet so det är inte lätt för ett oerfaret öga att bedöma vem som leder.
Det finns tre grundläggande handlingar att välja bland. Placera järnvägar ger aktier i järnvägsbolaget. Aktier ger poäng när järnvägen ansluter till en annan järnväg eller vid spelets slut. Placera stationer ger poäng när en järnväg ansluter till en järnvägsstad eller vid spelets slut. Placera kuber i en stad ger poäng när en järnväg ansluter till staden eller vid spelets slut. Poäng delas ut beroende på antalet städer anslutna till järnvägen och till den största och näststörsta majoriteten. Det finns inga som helst slumpmoment i spelet.
Detta betyder att den potentiella intäkten ökar i takt med att järnvägarna växer men om du är utanför de stora nätverken så blir dina placeringar värdelösa. Lägg till detta den elaka regeln om veto, där du kan bjuda aktier för att ändra riktningen på en järnväg, och du har ett spel med stor potential för att ställa till det för varandra.
På det hela taget är Stephenson's Rocket ett spel som belönar en bra strategi som snabbt kan anpassas till de ständigt förändrade villkoren på brädet och som engagerar spelarna ända till slutet.
Strategi
Strategi kommer när jag spelat mer.
Minnen
Minnen kommer när jag spelat mer.
Lisboa (äger)
| Bakgrund: | Lissabons återuppbyggnad efter jordbävningen |  |
| Spelare: | 3-4 (bra oavsett antal) | |
| Speltid: | 1-2 timmar | |
| Svårighetsgrad: | 70% |
Allmänt
Speltestare, se recension nedan.
Preview: The Rise of a Beautiful City and a Beautiful Game (engelskspråkig recension för publicering på Boardgamegeek som också användes i den framgångsrika Kickstarter-kampanjen).
Last week I was given the opportunity to play test Vital Lacerda’s next game Lisboa on Tabletopia (”Table 35”). My understanding is that Lisboa is near completion but that minor adjustments may still take place in the final version of the game. Hence, this preview will not focus on details but rather attempt to capture the gameplay and what it feels like to play Lisboa.
Tabletopia Table 35: The yellow newbie (me) has just won thanks to strategic building majorities in the city center (or perhaps I was just lucky).
Overview
Lisboa is set in the reconstruction of the Portuguese capital after the great earthquake of 1755. The game literally starts with the earthquake, simulated by covering the city map with cubes (”rubble”). The players take the roles of nobles using their influence to contribute to the reconstruction. They do this by playing event cards to trigger actions that let them manage money, influence and goods and to engage in politics, trade and building. Lisboa ends when the remnants of the old city center has been cleared away and the new one has risen.
The Mechanisms
The first that came to my mind was how well the mechanisms and the theme go hand in hand. As a euro gamer, I’m usually more interested in inventive and elegant mechanisms than elaborated background stories. Nevertheless, a game where the mechanisms makes me feel like I’m part of the history by letting me face the decisions of the real men and women of the time always score high in my books. What Lisboa does is to capture economic considerations (how do I finance the buildings?) as well as political considerations (how do I get support from the government?).
The Decisions
Let us look closer at those decisions. Basically, my success is measured in victory points (wigs). To succeed, I need money and influence to build the buildings. To get money and influence, I need goods, and to get goods I need… buildings. This is a challenge that puts Lisboa apart from many standard euros, where you typically build an engine and follow the route money->investment->more money->switch to victory points. Instead, you have to juggle many different resources (money, influence, goods, officials etc.) and understand how they all relate to each other. Typical questions you ask yourself during the game is not only how to get a resource but also how to use it once you get it.
The city scoring mechanism deserves a paragraph of its own but I must admit I haven't fully understood how you best use this "multidimensional multistep rocket" to your advantage. Do you play tactically for the best rewards, the cheapest land or the most expensive goods? Or do you play strategically for the most victory points and if so, do you play for majorities in colors or to dominate rows or columns? Do you open the public buildings yourself or do you "tailgate" on other players' rows and columns and wait for them to open public buildings that earn you victory points? This is a game in the game that still blends very well with the other mechanisms.
The depth of the decisions gives newbies the challenge of too many decisions and it probably takes some games to fully understand this intricate web of interdependencies. Nevertheless, the game never comes to a full stop; you always have things to do and you cannot ”break your own game” and leave yourself with no possibilities to act.
The Actions
Let us move on to the actions or the execution of the decisions. It's deceivingly simple: you manage a hand of noble cards and treasury cards and play one each turn. But each card has several branches. Do you play it to your portfolio, to get long term benefits, or do you play it to the court, to get powerful actions? Which of the actions do you choose and which of the action benefits do you choose? You must also plan your actions so that you have the resources you need now and get the resources you need later. And of course, the actions are all linked to historical persons and events.
This does not mean that you are dependent on lucky draws. The cards available for replenishment are open. The cards held by your opponents are open. There is a small randomness in which cards get available but the control remains with you.
The Interaction
This leads us to the interaction. Lisboa is not a solitaire puzzle. Yes, you can plan your actions but the cost and gain of them are affected by the other players' actions. Do they produce goods? Then the prices fall. Are they present at the court? Then it costs more influence to get there. Have they started to clear a street? Then it is cheaper to build there but you will increase the value of their buildings as well. But since all the players' cards are open, you can predict what they are up too (and since you can do so much with them, it's not about knowing many cards, it's about guessing what they will do with the few they have).
The Tension
Finally, let us assess the tension throughout the game. Resources are scarce in the beginning but do they continue to be so? It is true that you get more goods throughout the game but the goods prices go down, the ship prices go up and you need to recruit more officials to open buildings so you never have enough goods. As influence and money are concerned, I felt that they became less scarce, since cards and tile abilities increase influence and decrease costs while land gets cheaper the more rubble that gets cleared away. However, this is something that the developers were aware of and look into and I am confident that the final version will have adjusted the balance to perfection.
Final Words
We have covered more than enough for a game and not even mentioned mechanisms like follow other players' actions, selling to other players' ships, unlocking abilities and competing for majorities in the city. Yet, Lisboa never feels overloaded as all of them are part of the same web and well integrated with the theme. This allows the players to set up and follow a strategy while staying attentive to tactical opportunities on the way.
Last but certainly mot least a few words about the art. There are a lot of spaces on the board but thanks to the clear symbols (of which, I understand, most were finalized at the time of the play test) it never feels cluttered. The symbols are also large enough to be distinguished across the table, on the other players’ player mats. Some specific symbols, particularly the ones illustrating the clergy tile benefits, were a bit hard to interpret so perhaps a symbol list on the player aides would help in the first few games (after which I expect you will have learned them by heart). I also like how the modern art of the nobles helps conveying the message of a city rising from the disaster by leaving its past behind and entering the modern age.
It has been a privilege to play test Lisboa and I look forward to see the game come true.
Strategi
Strategi kommer när jag spelat mer.
Minnen
Mitt bästa minne av Lisboa är förstås förmånen att få speltesta det tillsammans med Vital Lacerda - och vinna! Min recension användes sedan i Kickstarterkampanjen för spelet och som ersättning fick jag en lyxutgåva. Det blev också mitt första spel av denne för sina tunga och komplicerade mekanismer kände designer. Jag hade tidigare haft vissa reservationer inför spel som CO2 och The Gallerist men i Lisboa klickade allt och öppnade mina ögon för andra spel av denne kreative portugis.
On Mars (äger)
| Bakgrund: | Kolonisering av Mars |  |
| Spelare: | 3-4 | |
| Speltid: | 2-3 timmar | |
| Svårighetsgrad: | 70% |
Allmänt
Jag tvekade länge inför att köpa On Mars eftersom Lacerda ibland designar onödigt komplexa spel men jag ångrar det inte.
On Mars har många intressanta mekaniker som skiljer det från andra spel i min samling. Skyttelns färd mellan omloppsbana och Mars ger en tidsmässig dimension ("var behöver jag vara kommande ronder?"), robotförflyttningarna på Mars ger en rumsmässig dimension ("var ska jag samla resurser och var ska jag bygga byggnader?") och de spelardrivna nivåförändringarna av kolonin tvingar spelarna att ständigt anpassa sina strategier ("vad efterfrågar kolonin nu och hur kan jag erbjuda det?").
Men vad som verkligen får On Mars att sticka ut är hur spelarnas handlingar går in i varandra. Allt du gör öppnar upp möjligheter för andra spelare. Teknologi tillåter fler byggnader att kopplas samman. Byggnader tillåter avancerade byggnader att placeras ovanpå dem. Avancerade byggnader kan användas av vetenskapsmän för att få kraftfullare exekutiva handlingar och så vidare. Jag fascineras också av det cirkulära ekonomiska systemet, där en resurs krävs för att producera nästa resurs i ordningen.
Min enda anmärkning är att jag hade föredragit en knappare ekonomi, där resurser måste produceras genom spelarnas möda snarare än samlas in gratis. Å andra sidan har jag en känsla av att egen produktion av resurser är det mest effektiva utnyttjandet av den verkligt knappa resursen i spelet: dina handlingar.
Huruvida On Mars kommer att gå om Lacerdas mästerverk Lisboa återstår att se men jag ser fram emot att ta reda på det genom många fler partier.
Strategi
Strategi kommer när jag spelat mer.
Minnen
Minnen kommer när jag spelat mer.
Alchemists: The King's Golem (äger)
| Bakgrund: | Akademisk kamp mellan alkemister |  |
| Spelare: | 2-4 (bäst på 3-4) | |
| Speltid: | 2 timmar | |
| Svårighetsgrad: | 70% |
Allmänt
Jag är ingen anhängare av expansioner eftersom de ofta bara ger mer av samma sak och distraherar från spelets kärna. The King's Golem lyckas dock tillföra nya dimensioner till ett redan bra spel. Medan slutledningarna i Alchemists var tämligen enkelspåriga - blanda ingredienser, granska resultatet, publicera när du vet tillräckligt - så har du nu fler informationskällor att basera dina slutledningar på (bibliotek, golemtester) och fler alternativ för att kapitalisera på dina kunskaper (encyklopedi, golemanimering). De variabla villkoren för start och rundor må inte tillföra något till spelets kärna men de ger lite hanterbart kaos till momentet med arbetarplacering.
De många detaljerna i King's Golem gör det svårt att lära ut till nya spelare och det metodiska arbetet med att dra rätt slutsatser kan upplevas som arbete av många spelare. Men om du inte har något emot logiska utmaningar och uppskattar den humoristiska akademi-/fantasymiljön så garanterar The King's Golem en fantastisk och mycket annorlunda upplevelse.
Strategi
Strategi kommer när jag spelat mer.
Minnen
Minnen kommer när jag spelat mer.
Diplomacy (äger)
| Bakgrund: | Fiktivt krig mellan Europas stormakter 1901 och framåt |  |
| Spelare: | 2-7 (bäst på 7) | |
| Speltid: | 8-12 timmar | |
| Svårighetsgrad: | 30% |
Allmänt
Diplomacy är utan tvekan kungen bland konfliktspel. Det är ett rent skicklighetsspel där förhandlingar snarare än slumpen avgör den internationella politiken. Stridssystemet är mycket enkelt: den som är starkast vinner. Men för att bli starkast måste man ha medspelares stöd och det enda som kan vinna detta stöd är diplomati. En efter en kommer spelare falla offer för varandras ränker tills bara den bäste diplomaten återstår. Ett spel som verkligen tar fram det bästa (eller värsta!) hos spelarna!
Diplomacy - The Art of Developing Trust to get what you Want and Destroying Trust when you got what you Want (engelskspråkig recension för publicering på Boardgamegeek)
Introduction
One does not simply review Diplomacy. Diplomacy is so much more than a game, it's an institution. It revolutionzed boardgaming when it was released in 1959 and 60 years later its impact is still strong. Yet, Diplomacy was rejected by major publishers then and would perhaps have been rejected today, since many of its mechanics are shunned by modern boardgames. So why has Diplomacy become a classic that is likely to remain long after all the current top 100 games have crumbled to dust? This is the question that this review humbly seeks to understand. Let's start with the background.
How it all began
Diplomacy was invented by Allan B. Calhamer in 1954 and self-published in 1959. According to Wikipedia, his inspiration originated from reading an article about the Congress of Vienna at the age of 13 and was reinforced by the book The Origins of the World War 8 years later. This is reflected in the game by the fact that although it looks like a game about the first World War, it's really about the diplomacy behind the scenes. Let's proceed by looking closer at how Diplomacy is played.
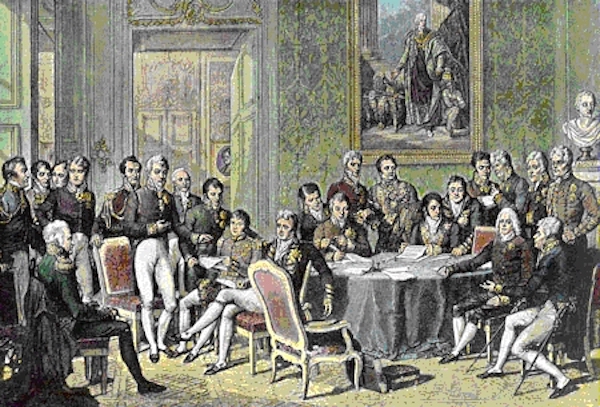
Early Diplomacy players at the Vienna Congress
How the game is played
The rules of Diplomacy are simple, almost banal. Diplomacy is played by up to 7 players on a simplified map depicting Europe in 1900. The map is territory-based with only two types of territories; 57 land provinces, 34 of which are so called supply centers, and 19 sea provinces.
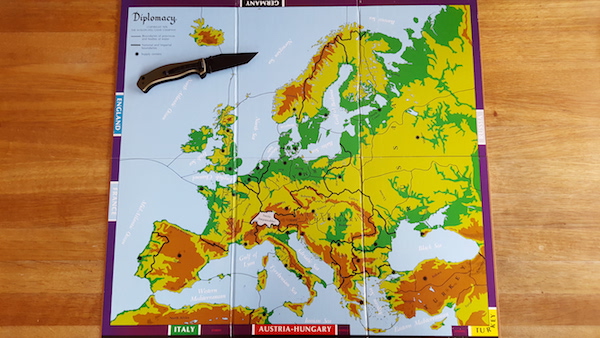
The peaceful Europe before the storm
The number of unit types is also two; land units (armies) and sea units (fleets). A unit may only move one territory at the time, land units on land provinces and sea units on sea provinces and coastal provinces (land provinces adjacent to sea). There is also a convoy rule, which allows fleets to act as "bridges" for one land unit, which may then move across several sea provinces (but they must still end the move in a land province).
Each unit has a combat value of 1. If an attacking unit has more total combat value than a defending unit, the latter must retreat. However, each province may only hold 1 unit so to increase the combat value beyond 1, adjacent units must give a support order rather than a move order.
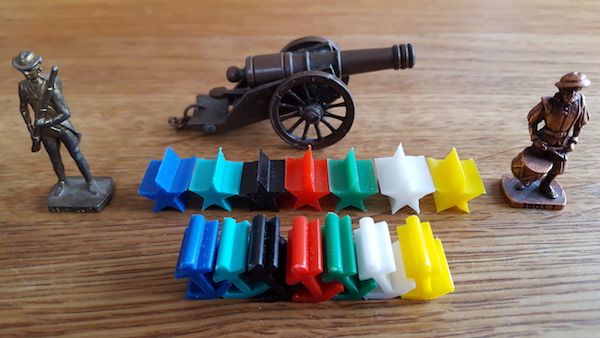
The colorful uniforms of the European powers (England blue, France teal, Germany black, Austria red, Italy green, Russia white, Turkey yellow)
The three types of orders in the game (move, convoy or supply) are issued secretly and simultaneously, meaning that each player writes down orders for each unit, after which they are revealed and resolved at the same time.
The cryptic orders of Diplomacy - A Liv-Yor means Army Liverpool to York etc.
Each player starts with 3 units (or 4 units in the case of Russia). Every second round ("Fall"), each player's number of units are checked against the number of supply centers and units are added or discarded accordingly. A player wins by taking control of more than half of the supply centers.
Germany mobilized for a game of Diplomacy with 2 armies and 1 fleet
That's basically it. There are some special rules concering the disruption of support that won't be covered here. (Supporting units have their support cut if attacked but if the support targets the attacked unit, the support is not cut, but if the attacked unit forces the supporting unit to retreat, the support is cut and so on.)
A Turkisk attack from Serbia to Budapest won't cut the Budapest army from supporting Trieste to Serbia BUT if Russia supports the Turkish attack, the Budapest army is forced to retreat and the support is cut
Now one might wonder how military can win you a game of Diplomacy when you're outnumbered 1 to 6 at the start. The simple answer is you can't. You have to win with diplomacy in the metagame that Diplomacy really is.
How the metagame is played
The act of writing and resolving orders each round is a minor part of a game of Diplomacy. Instead, it's the talk between rounds that's important. Although the players issue move orders to their own units, they may support or convoy other players' units. Thus, to make military progress, you will need diplomatic skills.
But say that you play England and want France's support for an attack against Germany, which resources do you have at your disposal? Money? Arms? Formal agreements? No, you have nothing but your word. There are no limits as to what you may promise but there are also no requirements to fulfil your promises. As a matter of fact, the key to winning Diplomacy is to know when to break a promise (or, using the Diplomacy expression, when to stab).
Some typical agreements in Diplomacy include a demilitarized zone in a sensitive border province, an allocation of neutral territories into spheres of interest, and an alliance to bring down a third party and divide the spoils afterwards. Does it sound familiar? If so, you may agree that Diplomacy very well simulates world politics. It's probably no surprise that politicians like John F. Kennedy and Henry Kissinger are said to have been fans of Diplomacy.
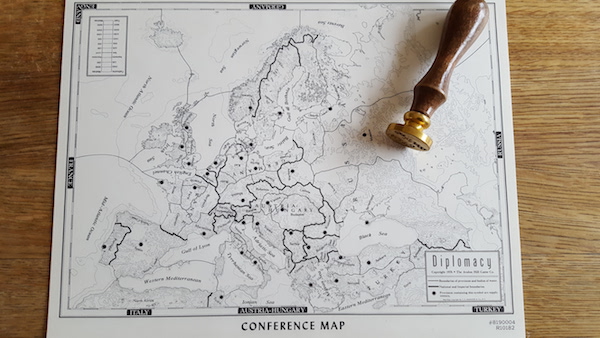
Where the real actions take place - the conference maps used at negotiations away from board
Now that we know how Diplomacy is played, let's see how it's played well.
The tactical game
As we've seen, Diplomacy differs from the ordinary war game in many respects. The units are generic with no particular combat values or abilities, as is the terrain with no impact on combat. The combat resolution is deterministic with no randomness and the unit positions are known to everybody without any fog of war.
In fact, the tactical Diplomacy has more in common with abstract games like Chess than war games. As a military commander, your mind isn't occupied with questions as which kind of units to put up against particular enemy units or how to best make use of a particular terrain. Instead, it's a pure mathematical affair where you assess which parts of the frontier that are critical and count how much strength you need to defend or break through there. The simultaneous combat resolution means that you'll also have to predict your opponent's actions in a rock-paper-scissors way.
This game is not without its merits. There are many tactical tricks to learn, such as the "self-bouncing" to defend three areas with only two units, or the involuntarily support to enemy units to counter the said self-bouncing. However, once you've learnt them, there's not much depth left. Chess offers more pieces with more movement variety than Diplomacy and hence offers more depth to explore. The limits of the Diplomacy units make them rather inflexible and likely to get stuck along fixed frontiers with no prospects of breaking through. A two-player game of Diplomacy between two reasonably skilled players will most likely lead to a stalemate. Although this mirrors the First World War that the game is based upon, it makes the game itself dull. But if this is the case, perhaps the strategic options arising from the multi-player Diplomacy helps us to understand more of Diplomacy's appeal.
The two Turkish units may defend against the three enemy units by ordering both armies to Constantinople and "self-bounce" (unless Austria anticipates it and supports one of them)
The strategic game
The presence of other players, in combination with the secret negotiations and simultaneous order resolution, makes the strategic game more interesting than the tactical game. An opponent move may not be what it appears to be, a shift in alliances may turn the tide of the war, even a player with a single unit left may have a role to play if it occupies a vital position. A classic example is where an Italian unit crosses the Austrian border in the first round, only to proceed to the Balkans in the second round in the Key Lepanto Opening directed against Turkey.
Italians on a temporary stop on their way to Turkey - or have they come to stay?
The strategic game and the tactical game have a curious relation in Diplomacy. Usually, tactics is a mean to accomplish a strategic goal, but in Diplomacy, tactical goals may dictate strategies. Say that you play England and have an alliance with France. The Kaiser offers a strong resistance on the Western frontier while Russia and Turkey runs a juggernaut in the East. In a strategy > tactics game, you would solve the problem by trying different tactics to break through (and probably end up with Field Marshal Haig's testimony). But in a tactics > strategy game, you would perhaps come to the conclusion that the tactical opportunities against France are better and promptly change your strategic goal (and probably end up with Brutus' testimony but hey, all's fair in love and war).
One dagger is stronger than a million men
This sounds very well but can't you play the same game in a more complex war game, or even in the simple RISK, for that matter? Before answering this, we need to examine how to play the third sub-game well, the diplomatic game.
The diplomatic game
If you thought your tactical and strategic resources are limited, your diplomatic resources are next to nothing. As discussed above, you have only your word at your disposal. However, by knowing what to say when is the key to master the diplomatic game. Basically you play different roles during different stages of Diplomacy.
In the early game you may play the deal-maker, aiming at finding mutually beneficial deals that helps both parties to expand. Are several players interested in the Balkans? Find a deal that satisfies all of them rather than fighting and benefitting only your neighbors.
In the mid-game you may play the rhetorician, pointing out which players to sacrifice so that the other players can continue to expand. Are the Balkans big enough for all of you? Find the arguments to point out which player to kick out and make sure it's not you.
In the late game, you may play the liar, stabbing your trusting ally when he or she least expects it and is hurt the most of it.
This shows that the diplomatic game does offer some challenges in spite of its limited resources. But is this enough to make the diplomatic game more interesting than other negotiation games? Why not play Avalon instead for a pure negotiation game or The Republic of Rome for a more complex negotiation game? The surprising answer to this question is found when we combine those three seemingly shallow games.
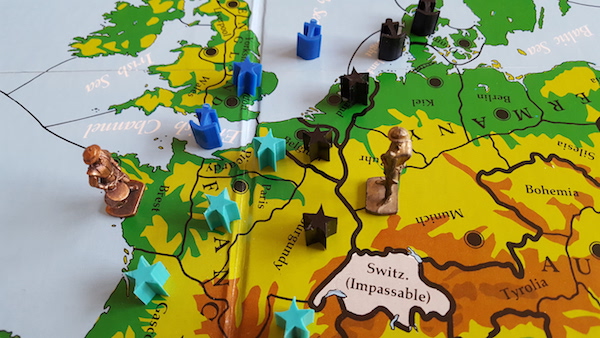
All Quiet on the Western Front
How three shallow games make one deep game
Our ambition to break down Diplomacy into its three sub-games of tactics, strategy and diplomacy hasn't managed to reveal what differentiates it. Each sub-game is simple and offers little extra compared to games like Chess, ordinary war games and pure negotiation games. However, the fact that each sub-game is simple distills the diplomacy game experience to the one and only thing that really matters: TRUST.
The tactical game prevents you from playing solitaire while the strategic game encourages you to cooperate. Since both those games are deterministic, you can predict the exact outcome of a certain set of moves. You won't be distracted by die probabilities and you can't blame bad luck. If you lose a battle, you can only blame the human factor. If you lose the war, you lose it because others were more trustworthy than you. Thus, the diplomatic game is not about conferring HOW to attack, it is about gaining and building trust so that the answer to the question of WHOM to attack will be another player.
This is further strengthened by the simultaneous order resolution. You can't wait for your partner to reveal his or her intentions first, you have to reveal them at the same time. Do you trust your partner enough to turn your back? And if you didn't, how can you regain your partner's trust? The diplomatic game in the corridors may be full of lies and deceptions but the tactical and the strategic game on the map will always tell the truth.
Or will it? The map serves as a focal point around which the diplomatic revolves. Not only do you have to win the diplomatic battles before the order resolution but also afterwards. How should a certain order be interpreted? Did Italy really stab Austria or are they preparing the previously mentioned Lepanto? Was the Kaiser lucky to find the only combination of orders that saved the Reich or is there a traitor in your alliance? You have to make sure that your interpretation becomes the accepted one. A military victory is worth nothing if it's accompanied by a loss of trust. Unless, of course, you follow the golden rule of Diplomacy to stab only when your victim can't retaliate.
So is everything great?
Certainly not! Diplomacy uses two of the most disliked mechanics in the gaming world: take that and player elimination. To single out players and eliminate them is not merely a side-effect of the game, it's the purpose of the game. Without those mechanics, the tension would be completely lost. Thus, the infamous label "Destroying Friendships since 1959" isn't just a joke, it's a most appropriate warning - Diplomacy is not for sensitive players and shouldn't be either.
Other challenges include the by modern standards clunky order resolution. Experienced players will quickly asses the board state and move the units accordingly but beginners may be intimidated by the book-keeping and the downtime. Even longer is the downtime between order resolutions, 15 minutes according to the rules (30 minutes for the first round), which of course sums up to a very long game. Again, experienced players will want to talk to everybody every round and find this time too short, but beginners with bad positions may perceive this as prolonged agony. My advice here is to keep talking to everybody because your game isn't over until your last unit has been eliminated.
Destroying friendships since 1959, courtesy of BGG user leroy43
A case study
Words alone cannot give justice to the experience of playing a game of Diplomacy but a case study may at least give a hint.
This game was my first distance game of Diplomacy, with diplomacy by phone and orders issued through a game master. This was also a time when the dominant strategy in my gaming group was for the four border powers England, France, Russian and Turkey to divide the central powers Austria, Germany and Italy. Thus, the game master almost apologized when he revealed that poor Austria had fallen to my lot.
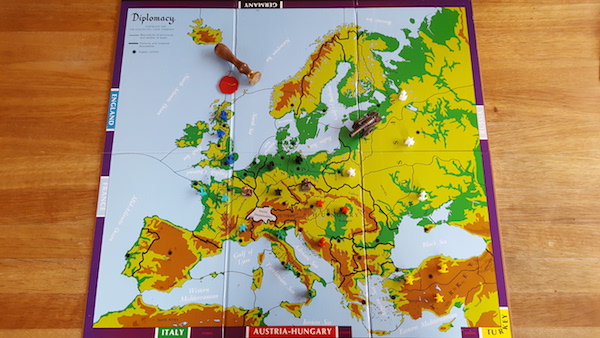
The beginning of a game - Let's all be friends
Nevertheless, I did what I could and talked to everybody. With Germany, I signed an agreement to form the permanent alliance of the Grand German Empire, signed with a formal agreement and everything. (My group was also into role-playing games at this time.) With Italy, I signed another agreement to divide the Mediterranean Sea into a Western Italian and an Eastern Austrian sphere of interest. With England and France, I formed information agreements to share information about our respective military arenas. I also hinted rumours about Russian and Turkish plans against Black Sea and warned the two Eastern powers for each other. Of course I would assist one against another in case of a conflict. With that, I had hopefully secured my Northern and Western borders and issued orders for march against the Balkans while Russia and Turkey fought each other.
Now followed a period of agony until the order deadline. The revelation was a surprising success. All the other moves went as planned and the Balkans fell into my hands while Russia and Turkey were still too entangled to make peace. As agreed with Germany, I focused on Turkey while the Kaiser (who was equally fortunate to see England and France fighting each other) focused on Russia.
However, while Turkey turned out to be a stubborn enemy, Russia fell into pieces as through a premature Russian Revolution and Germany reached Moscow while I still struggled to cross the Bosporus. Naturally, I urged England and France that they should unite against Germany (a good ally is a weaker than you ally) but to no avail and when France slipped into the Mediterranean, I got nervous that Italy may reconsider our alliance. Thus, I preceded the events and marched into Italy, claiming that Italy hadn't fulfilled her obligations. Things went very well and Italy vanished from the map in no time.
It was now time to promise England and France support against Germany (but not until I had rid myself of the dangerous Ottoman of course) and province by province I caught up with Germany. As Turkey finally fell and the Kaiser expected us to declare a shared victory, I promptly replied by crossing the border and claiming the victory myself.
The end of a game - It's not you, it's me
Conclusion
The secret behind Diplomacy's greatness is the balance between the war game in the game and the diplomacy game in the game. They both need each other to be interesting; the diplomacy game is interesting in the light of the war game but the war game is simple enough not to compete with the diplomacy game. The challenge of building, maintaining and (if necessary) regaining trust creates a game full of tension and uncertainty up to the moment of truth when the orders are resolved (but even then, players may offer different interpretations of the truth). Diplomacy is certainly not a game for everybody but it should be played by everybody at least once to experience the art of diplomacy at its worst.
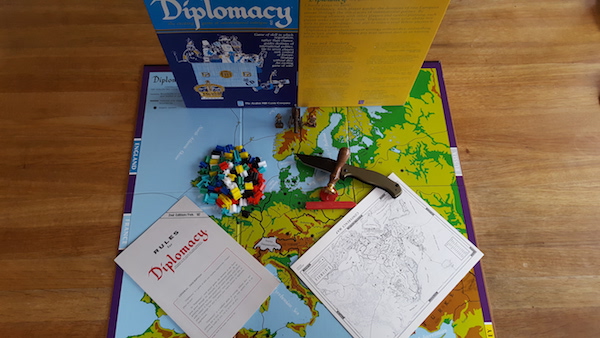
Strategi
För att vinna i Diplomacy krävs som sagt diplomati. Man måste prata med alla hela tiden för att hålla sig uppdaterad om deras strategier och snappa upp potentiella sidbyten. Se till att skaffa en eller två fasta allianspartners som du kan sätta din lit till och bygg upp förtroendet genom att se till att ni får lika andel av de frukter som alliensen skördar. Se också till att så split mellan andra liknande allianser så att konkurrenterna kan tas ut en och en. Hugg så dina allianspartners i ryggen först när du är säker på att de inte kommer att kunna slå tillbaka. Detta är dock lättare sagt än gjort.
Minnen
Mitt mest minnesvärda parti spelades i korrespondensform med ett drag i veckan. En spelledare samlade in dragen och gav ut en "tidning" där spelarna kunde publicera kommunikéer som rättfärdigade deras handlingar. Jag hade den otacksamma rollen att spela Österrike-Ungern, en central stat omgiven av fiender. Jag såg därför till att i hemlighet alliera mig med den andra centrala staten Tyskland och bilda det "Stortyska Riket" i syfte att slåss för en delad seger. Tillsammans såg vi till att sprida rykten om Ryssland och Turkiet som fick de båda att anfalla varandra. Med Italien slöt jag en allians som delade Medelhavet mellan oss så att jag kunde få fria händer på Balkan. I hemlighet medlade jag också mellan England och Frankrike så att inte mina vapenbröder skulle få det för lätt på sin front. Eftersom jag hade haft "rätt" om Rysslands avsikter hade jag vunnit Turkiets förtroende och tillsammans med Tyskland slog vi ut Ryssland. Först därefter slog jag till mot Turkiet och lade hela Balkan under Dubbelörnens fanor. Eftersom Italien hade kört fast mot Frankrike passade jag på att falla dem i ryggen också innan jag efter lite besvär avslutade Turkiet. Eftersom England och Frankrike fortfarande var kvar i spelet var Österrike-Ungern den starkare parten i Stortyska Riket. Tiden var inne för att bryta min tredje allians och kräva segern för egen räkning. De österrikiska trupperna korsade tyska gränsen och Kaisern tvingades erkänna sig besegrad. En minnesvärd seger men tyvärr också ett av få partier som jag verkligen spelat till slut.
El Grande (äger)
| Bakgrund: | Adelsmän tävlar om kungens gunst i det medeltida Spanien |  |
| Spelare: | 2-5 (bäst för 3-4) | |
| Speltid: | 90 minuter | |
| Svårighetsgrad: | 30% |
Allmänt
Ett klassiskt introduktionsspel med ett rykte jämförbart med Settlers som uppfyller alla förväntningar. Enkla och eleganta mekanismer där spelarna konkurrerar om majoritet i områden genom att flytta caballeros fram och tillbaka. Auktionen för handlingskort och dold placering i Castillon ger precis lagom oförutsägbarhet. Det finns en potentiell "kingmaker-risk" men om alla spelare konkurrerar om segern så borde inte detta bli ett problem.
Strategi
Strategi kommer när jag spelat mer.
Minnen
Minnen kommer när jag spelat mer.
Bug (spelat, äger ej)
| Bakgrund: | Abstrakt spel om att bygga mönster |  |
| Spelare: | 2 | |
| Speltid: | 15 min | |
| Svårighetsgrad: | 30% |
Allmänt
Hatten av för designern för en enastående prestation. Det här är ett spel som känns som om det bara väntade på någon som skulle upptäcka det. I en tid när många designers verkar nöjda med att kopiera gamla mekanismer gläds jag åt att det ännu finns nya spel under solen. Det kommer att bli svårt att återvända till mina egna futtiga försök. Tack för att ha delat med dig av detta spel och lycka till med Bug!
Bug - A new Game under the Sun (engelskspråkig recension för publicering på Boardgamegeek)
Introduction
"I commend the designer for a brilliant achievement. This is a game that feels like it was just waiting for someone to discover it. In a time where many designers seem content with copying old mechanics, I am so glad to see that there can be new games under the sun. It will be difficult to return to my own feeble attempts. Thank you for sharing this and good luck with Bug!"
The words are my own and originate from December 2017, when I first heard about this abstract combinatorial game. Such games have fascinated me ever since I learned how to play Chess and realized that games do not need to rely on dice or other random factors to provide an exciting experience.
Yet, new combinatorial games have often failed to surprise me in the same way as new boardgames sometimes have. While modern boardgames had to compete with trivial games like Monopoly and RISK, modern combinatorial games had to compete with games like Chess and Go, ancient games refined to perfection during centuries. Why play a game about defeating enemy pieces when you can play Chess? Why play a game about controlling territory when you can play Go? Then Bug appeared.
What makes Bug unique is that it is played with polyominoes - shapes made up of smaller components - that are created, expanded and eaten by the players until one side is unable to expand and thus has reached its full potential. For a detailed description of how the game came to be, including how it is played and won, I warmly recommend the designer's post Bug: perceptual binding, identity and meaning in a new sort of polyomino game. What this review will explore is whether this innovative gameplay translates into a fun game experience.

The end of a game on the excellent implementation at Boardgamearena.
Gameplay
Let's first briefly go through the (very few) rules and see how each rule provides interesting and challenging decisions.
A game of Bug is played with black and white stones on a board of hexagons (the size of which may vary but as we will see that even a small 19 hex board is sufficient for a large decision tree). A turn consists of the three actions Grow, Eat and Bonus Grow.
Grow
Grow is the action of placing a stone in an empty hex. Broadly speaking, this decision has two dimensions. First, you may consider which shape or "bug" your connected stones will form as this will determine your bug's chances of eating (or be eaten) in the next step. Second, you may consider which spaces you will leave for yourself and your opponent. (There is an important rule that bugs may not merge so spaces between bugs are inaccessible.) Remember that you want to exhaust your available spaces to win the game. We will return to this "shape vs space" decision later but let's first look at the next action.
Eat
Eat is the action of removing adjacent enemy stones. The condition for doing so is that they are of the same shape as your stones. A single stone eats an adjacent single stone, two connected stones eat two connected stones and so on. In the early game, shapes are small and easy to "replicate", but as the game proceeds, the shapes will be larger and the empty spaces smaller so eventually there will be bugs that cannot be eaten.
Bonus Grow
Bonus Grow adds another stone to the bug after a successful eat. This is important because Bonus Grow is the only action that lets a bug grow bigger than the currently biggest bug on the board. This rule brings the game towards the end as bugs will keep growing until they run out of space. Without it, they would just eat each other over and over. Beware, though, if you can't grow you can't eat either and may instead be eaten by your intended prey.
Game Tactics
So far the game may sound simple, even scripted. A bug of size 1 eats another bug of size 1 and grows to size 2, after which it cannot grow and inevitably will be eaten by a bug of size 2 and so on. This may also be the impression after the first few games. However, there are several tactical tricks you may utilize to get the upper hand in such an eating race. For want of better, I will use some Chess terminology.
- If two (or even three) equally sized opponent bugs are close to each other, you may utilize a "fork" to eat both of them in the same action.
- If two or more differently sized opponent bugs are close to each other, you may gain "tempi" by eating the smallest first, then grow and eat the second biggest and so on.
- If some spaces are accessible to both you and your opponent, you may set up a "zugzwang" to force your opponent to place a stone that will lose the eating race.
Continuing the chess analogy, tactical eating will help you win your first games just as tactical piece gains will help you win your first Chess games. The more stones you get to the board, the more likely it is that you will run out of actions first. However, eating is only one of several means to an end in Bug. The key to understanding Bug (well, one of the keys at least) is to understand when to eat and when not to eat. This brings us to the interesting shape vs space discussion.
A Bug Through the Looking Glass
Let's look at a study of an end game. White has no stones on the board and Black has only two available spaces left. Surely Black should run out of moves first. Or?
In fact, I believe Black is lost (but please feel free to correct me if I've missed something in my analysis). Look at the bigger of the Black bugs. Although it stretches almost across the entire board, there are two possible White shapes (partly covered by the smaller of the Black bugs) that may replicate it. If White can gain enough tempi to place the necessary five stones to do this, she will win.

It must be White's turn in this position, since Black must have eaten the last White stones, but let's for fun say that it's Black's turn and see that not even this extra move will help Black. (White in turn would simply play 4 as her first move.) Black is in zugzwang and must play 1, after which White eats it with 2a and grows with 2b. Black replicates with 3 and White coolly plays 4 at the other end of the board. Doesn't this let Black play the only remaining move 5 and eat?
Actually, Black can't grow and thus can't eat so instead White plays 6a, eats the Black stones marked "X", and grows with 6b. Compare this with the starting position. Black has exactly the same stones as she started with while White has managed to play five stones.
Black starts over again with 7 but it's too late as White gains another tempo with 8a, which eats three more Black stones.

White grows to 8b and even has time to stop Black's future counterattack 9 with 10. Now nothing can stop White's 12, which will eat the big Black bug and grow to the last remaining space for White. An astonishing comeback for the uninitiated but a natural cause of events for the one understanding the possibilities of Bug. In order to eat the size 5 bug, White had to gain tempi by first eating a size 1 bug and then the size 3 bug.
So is it a Perfect Game?
I hope I have shown that Bug is not only an elegant mechanic but also a game full of tactical tricks and strategic challenges. So what's not to like? Players may think that the opening is too opaque. In Chess and Go, you can move a piece or place a stone with a specific purpose. In Bug, you won't know whether your first stones will survive and there is nothing you can do to protect them. The end game on the other hand may feel scripted once the decisive moment has taken place. In the game example above, the concluding moves were almost forced and there was nothing Black could do to complicate matters and steer White away from her winning path.
Personally, I think it's the tension up to this decisive moment that is the exciting part of Bug. Bugs come and go on the board as the players slowly build up their presence and carefully monitor how many spaces they have left, which shapes that can be replicated and how they can take advantage of forks, zugzwangs and tempis. Whoever finds this decisive moment first will win and the loser can't blame it on coincidence.
So what's the Optimal Bug Size?
Last but certainly not least a few words about the scalability of Bug. I've mostly played on the small 3 hexside board, a size that is more than enough for a varying gameplay thanks to the way that the eating and growing changes the game state. On larger boards, the opening does take longer before things start to get interesting.
However, once the patient players have reached the middle game, they will be rewarded with entirely new challenges. Whereas the small board middle game was dominated by one big bug around which all end game strategies revolved, there will now be several bugs of different shapes and sizes that may co-exist because of the larger distances and the increasing difficulties to replicate them in the quickly shrinking non-bug spaces.
The game may end with one player having formed one "super bug" or it may end with both players having some large bugs each and racing to fill the remaining spaces to run out of actions first. Similar challenges as the ones on the small board but on a grander scale.
I've even seen discussions about a multi-player Bug and although such an idea needs extensive testing, I think the game may be stable enough to accommodate several players. Unlike Chess and Go, where a struggle between two players may weaken both in favor of a third passive player, such a player in Bug will always be a step behind thanks to the eat and grow mechanic. After the battle between the two bugs has ended there may simply not be enough space left for a third bug.
Concluding Reflections
When I first approached Bug, I felt as lost as when I first approached Go and vainly tried to apply my Chess thinking to it. Bug is a unique game that requires a unique thinking. It is neither Chess nor Go and although I have a fairly good winning rate so far (>80%) I feel there is much more to explore. All of you who are interested in abstract combinatorial games but have grown tired of the endless Chess and Go clones, there are still new games under the sun.

Finally a good use for my old Abalone board. (The yellow stones mark the borders of the smaller board.)
Strategi
Strategi kommer när jag spelat mer.
Minnen
Minnen kommer när jag spelat mer.
Dominant Species: Marine (äger)
| Bakgrund: | Kamp mellan marina arter före kometen |  |
| Spelare: | 2-4 (bäst för 4) | |
| Speltid: | 2-3 timmar | |
| Svårighetsgrad: | 50% |
Allmänt
Dominant Species grundidé att anpassa arter och miljö gjorde det till ett av mina favoritspel. Dominant Species: Marine behåller mycket av vad som gör dess företrädare så bra och introducerar några intressanta nyheter:
- Omedelbara i stället för programmerade handlingar ger lite kortare väntetid.
- Dominans genom matchande element över hela brädet i stället för enskilda brickor lägger till flera "minispel" till spelet.
- Särskilda förmågor kopplade till pjäser i stället för arter ger spelarna fler möjligheter att anpassa sina arter.
- Kortare speltid gör det förhoppningsvis enklare att få Dominant Species till spelbordet.
Min främsta invändning är att händelserna utrotning och överlevnad lägger till onödig slump, särskilt när antalet källor (och därmed överlevnadsbonusen) blir hög. Detta är dock en smärre detalj i en värdig efterträdare till Dominant Species.
Strategi
Strategi kommer när jag spelat mer.
Minnen
Minnen kommer när jag spelat mer.
Pax Pamir 2nd ed (äger)
| Bakgrund: | Välj rätt sida i rätt tid i "The Great Game" |  |
| Spelare: | 1-5 (bäst för 4) | |
| Speltid: | 2 timmar | |
| Svårighetsgrad: | 70% |
Allmänt
Spel med skiftande allianser kan vara engagerande och fängslande men också kaotiska med risk för "king-making". Pax Pamir lyckas leverera enbart de positiva delarna genom smarta men enkla mekaniker.
Jag tror att nyckeln till Pax Pamirs framgång är den starka integrationen mellan din korttablå, de andra spelarnas korttablå, kartan över Afghanistan och din trohet mot en stormakt i "Det stora spelet". Jag är normalt inte en anhängare av solitära korttablåer men Pax Pamir är allt annat än solitärt.
Att spela ett kort till en tablå kan påverka så skilda ting som inkomst (för att köpa kort längre ner i kön), enheter placerade på och flyttade till kort (för att lönnmörda enheter eller kort), enheter placerade på kartan (för att kontrollera regioner och slåss mot andra enheter), arméer och vägar placerade av stormakter samt ditt inflytande hos och trohet mot en av dessa makter. Korten är också länkade till färger och regioner, något som kan vara både positivt (om en färg är aktiv så ger korten fria handlingar) och dåliga (om du förlorar alla enheter i en region förlorar du också dess kort). När särskilda dominanskontrollkort spelas eller slängs så utdelas poäng utifrån ditt inflytande hos den starkaste stormakten men sådana kontroller tar också arméer och vägar och nollställer "Det stora spelet".
Det som gör att Pax Pamir inte blir en kaotisk dragkamp med kort som ständigt saboterar för motståndarna är en inbyggd tröghet genom begränsningar som tvingar spelarna att planera framåt och hjälper dem att förutse motståndarnas planer. Kaoset reduceras också av det faktum att ett byte av trohet kostar dig alla dina kort från din tidigare stormakt och således är något du inte kan unna dig alltför ofta.
Resultatet är ett spel där spelarna noggrant måste planera sina handlingar och bevaka motståndarna för att bestämma vem de ska svära trohet mot och vem de ska hugga i ryggen nu och i framtiden. Spelare som svurit trohet mot samma stormakt kan samarbeta för en tid men om en har starkare inflytande (vilket är lika med fler poäng) kommer det att uppstå spänningar där de andra spelarna kan välja att attackera sin allierade eller till och med överge sin stormakt.
Det kan uppstå situationer med utdragna analyser om hur man tillsammans bäst stoppar en ledare och även om de flesta korteffekterna har tydliga symboler så finns det också specialeffekter som är skrivna med liten text som gör det svårt att till fullo utvärdera en motståndares styrka. Trots det är Pax Pamir ett utmärkt spel för spelare som uppskattar spel med allianser och förräderi men vill ha mer än rena förhandlingsspel som Diplomacy.
Strategi
Strategi kommer när jag spelat mer.
Minnen
Minnen kommer när jag spelat mer.
John Company 2nd ed (äger)
| Bakgrund: | Gör karriär i det Ostindiska Kompaniet |  |
| Spelare: | 1-6 (bäst för 4-5) | |
| Speltid: | 2-4 timmar | |
| Svårighetsgrad: | 80% |
Allmänt
Jag hade svårt att ranka den första versionen av John Company. Å ena sidan fanns det ett intressant ramverk där spelarna försöker göra karriär i Ostindiska Kompaniet med det enda syftet att hitta en lönsam reträttpost. Det som var bra för företaget var vanligtvis bra för alla spelare men bara vanligtvis. Dessutom så var alla delar i den komplicerade företagshierarkin sammankopplade så du kunde inte åstadkomma något utan stöd från andra positioner, som ofta innehades av motspelare.
De här ingredienserna lade grunden till ett mycket lovande semi-kooperativ utmaning och finns även i den nya versionen.
Å andra sidan fanns det flera mekanismer som kändes underutvecklade. De flesta av dem har förfinats i den andra versionen, även om det fortfarande finns moment med många och ibland klumpiga steg jämfört med standarden i moderna brädspel, speciellt när man ska hantera händelser i Indien och "Elefantens marsch". Min främsta invändning mot den första versionen kvarstår: kritiska moment som avgör företagets framgång (=dina pengar) eller dina möjligheter att dra dig tillbaka (=dina poäng) avgörs av tärningsslag. Otur med tärningarna kan resultera i att du inte har tillräckligt mycket pengar för att betala för poäng eller att du inte har några poängmöjligheter att spendera dina pengar på. I ett spel med få poäng och rundor kan detta vara förödande för ditt spel.
Men om man inte tar sig an ett parti John Company med ambitionen att spela ett optimeringsspel utan för att navigera genom ett komplext nät av beroenden där du inte kan kontrollera eller ens förutse vad som händer utan bara förbereda dig för att kunna reagera på alla händelser så kan John Company erbjuda en unik, engagerande och rolig spelupplevelse. Är det trots allt inte det som alla spel borde sikta på?
Strategi
Frågan är om inte John Company är för kaotiskt för att man ska kunna tala om en strategi. Det finns dock ett viktigt mål som man inte får förlora ur sikte och det är prizes, för det är bland dem som den största poängkällan finns. De kräver såväl familjemedlemmar att pensionera (som fås genom familjehandlingen skrivare) som pengar (som fås på olika sätt men mest genom fälttåg med tillhörande plundringar).
Andra poängkällor är aktier och manufakturer men dessa är beroende av om företaget överlever eller inte så varje strategi måste bevaka hur det går för kompaniet och agera antingen för att påverka utgången (t ex få ut orolighetskuber på kartan och/eller negligera försvaret för att provocera fram kompaniets fall) eller att profitera på det förväntade fallet (t ex att omvandla aktier till privata företagsandelar och lägga vinsten på manufakturer). Var dock beredd på att inte ens den bästa strategin överlever ett dåligt tärningsslag.
Minnen
I mitt första parti gick allt min väg. Som premiärminister fick jag igenom alla mina lagar, som i sin tur stärkte kompaniet så att det kunde iscensätta lukrativa (åtminstone för mina befälhavare) fälttåg. Men så kom katastrofen då hela Indien gjorde uppror och kompaniet gick under. Jag hade ändå en betryggande ledning under hela poängräkningen fram till det sista momentet: parlamentet fick skulden och jag föll från första till sista plats!
Horseless Carriage (äger)
| Bakgrund: | Utveckla, bygg och sälj bilar |  |
| Spelare: | 3-5 (bäst för 3-4) | |
| Speltid: | 3-4 timmar | |
| Svårighetsgrad: | 70% |
Allmänt
Splotter har gjort det igen. Horseless Carriage må ha lånat mekaniker från andra framgångsrika Splotterspel (individuella pussel från Antiquity, försäljningsräckvidd från Food Chain Magnate, forskning från Indonesia, turordningsångest från, ja, alla spel) men de har kombinerats till en unik, interaktiv och knivskarp upplevelse - precis vad man kan förvänta sig.
Låt oss börja med pusslet. Du bygger din egen fabrik genom att placera olikformade brickor på ditt spelarbräde. Din förmåga att producera bilar beror på hur väl du kopplar din bilhandlare till din fabrik, vilken i sin tur måste kopplas till fyra grupper av forskningsbrickor (A-D) från brickans fyra olika sidor, vilka i sin tur begränsas av din forskningsnivå (1-6 i 5 olika färger). Försäljningen utförs på ett rutnät där din forskningsnivå avgör hur "långt ut på axlarna" du kan sälja och där spelardrivna mekaniker avgör vilka färger som kommer att finnas på axlarna varje ny rond.
Det finns också brickor för forskning (för att forska snabbare), marknadsföring (för att sälja till fler rutor i rutnätet) och planering (för att välja turorder) så det blir snabbt trångt i fabriken. Det finns också en unik utmaning i turordningen - först får åka snålskjuts på andra spelares forskning men säljer senare och tvärtom.
Som vanligt är detta ett spel utan slump men ett "deterministiskt kaos" som gör varje nytt parti unikt och engagerande utan att behöva falla tillbaka på variabla startpositioner eller ofokuserade poängsallader. Starkt jobbat, Splotter!
Strategi
Strategi kommer när jag spelat mer.
Minnen
Minnen kommer när jag spelat mer.
Concordia (äger)
| Bakgrund: | Handelsrutter under antiken | 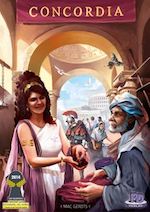 |
| Spelare: | 2-5 (bäst för 3-4) | |
| Speltid: | 2 timmar | |
| Svårighetsgrad: | 40% |
Allmänt
Concordia är ett utmärkt exempel på ett elegant spel där enkla regler ger en djup och tillfredsställande spelupplevelse. Jag gillar verkligen handlingsmekaniken, där dina handlingar representeras av kort och där du väljer ordningen du spelar dem i. Ditt mål är att expandera ditt handelsnätverk men du ställs ständigt inför utmaningar som "jag behöver en vetemarknad för att producera vete men jag behöver vete för att bygga en vetemarknad". Det finns också en bra balans mellan att utföra bra handlingar på kartan och att köpa nya handlingskort som ger dig poäng för hur bra handlingar på kartan.
Jag var till en början orolig för att spelet skulle ändras för lite mellan "kortcyklerna", eftersom handlingskorten inte ger dig nya eller bättre val utan bara mer av samma sak. Dock så ger även liten ändring, såsom en extra kritisk handling, intressanta strategiska möjligheter och du kommer ständigt sträva efter att göra nästa handling lite effektivare. Den slutliga poängräkningen kan kännas lite tradig men den bidrar till att dölja ställningen så att spänningen bibehålls ända till slutet.
Den nya Venus-versionen med nya kort som ger mer varierade strategier samt lagspel som öppnar för sex spelare gjorde ett redan bra spel ännu bättre och kvalificerade Concordia för min samling.
Strategi
Concordia är ett klassiskt eurospel där du först behöver bygga en "motor" och först använda den till att få resurser för att sedan växla över till poäng. Motorn i det här fallet utgörs av hus på kartan som ger produkter som i sin tur kan användas för att skaffa kolonister (för att bygga hus lättare) och kort (för att utföra bättre handlingar). Poängen beror sedan på kombinationen av dessa så till vida att kort kan ge poäng per hus, produkttyp, kolonist etc. Du behöver alltså se till att de kort du köper ger poäng för de bästa delarna i din motor och/eller att de delar du bygger i din motor matchar de kort du har. Detta är förstås lättare sagt än gjort men här är några tips på hur du bäst använder de olika handlingarna:
- Architect: Sprid dig snabbt och bygg hus som producerar olika resurser. Ju färre motståndare i en stad, desto billigare blir husbygget. Försök också se till att ha resurser som räcker till minst två husbyggen.
- Prefect: Producera produkter i de provinser där du har fler och/eller dyrare produkter än motståndarna och försök att åka snålskjuts på motståndarnas prefekter i de provinser där de är starkast.
- Mercator: Sälj dyra produkter och köp billiga produkter för att få pengar till husbyggen och produkter du saknar. Undvik att sälja din sista produkt av en viss typ utan en plan för hur du ska fylla på den igen (om du inte är säker på att du klarar dig utan den vill säga).
- Senator: Köp i första hand kort som matchar din motor för att få poäng och i andra hand billiga kort. Försök att spela Senator varje kortcykel eftersom korten är din främsta poängkälla.
- Diplomat: Bedöm vilken handling du behöver utföra flera gånger under kortcykeln och använd Diplomat för denna. Det är oftast bra att kopiera Architect i början av spelet och Senator i slutet av spelet.
- Tribune: Försök att spela alla andra kort före Tribune. Dels ger det mer pengar och dels är det en svag handling som du vill utföra så få gånger som möjligt i partiet. Försök också ha en iron och en grain till hands så att du kan bygga en kolonist.
Ett sista tips är att när slutet närmar sig försöka omvandla alla produkter till det som ger mest poäng och helst själv avsluta spelet, antingen genom att spara "husresurser" till sist eller genom att spara de resurser som krävs för det sista kortet till sist. Det sistnämnda kräver att du noga följer vilka resurser motståndarna sparar så att de inte köper de kort du hoppats köpa och lämnar kvar kort du inte kan köpa.
Minnen
Concordia är ett spel som är lätt att ta till sig och det har till exempel gjort succé bland mina kollegor på en spelkväll. Jag har också alfatestat en online-version på Boardgamearena och bland annat upptäckt en bugg som gjorde att tiebreak-regeln bara användes för innehavaren av Praefectus Magnus-kortet, inte för följande spelare i tur.
Listan fortsätter här.